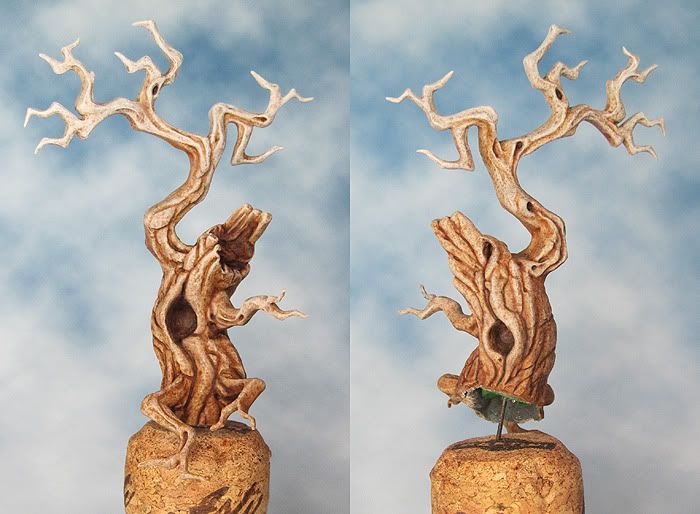
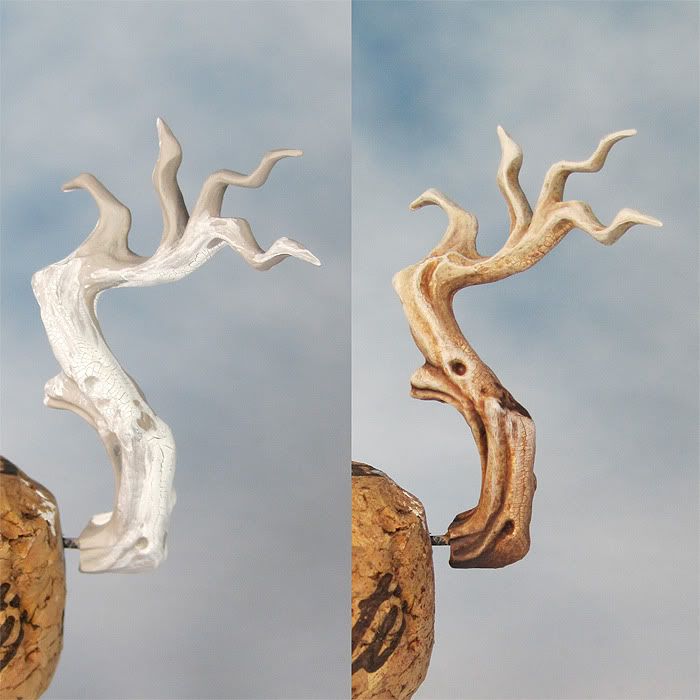
I’d initially
settled for a design with a smaller tree stump and spent a fair bit of time
putting it all together. To be honest I pretty much hated it on sight as I was
making all the same mistakes over again. I needed to have the courage of my
convictions and push the Dark Eldar element to the max. The tree had to go … I
needed more monoliths!
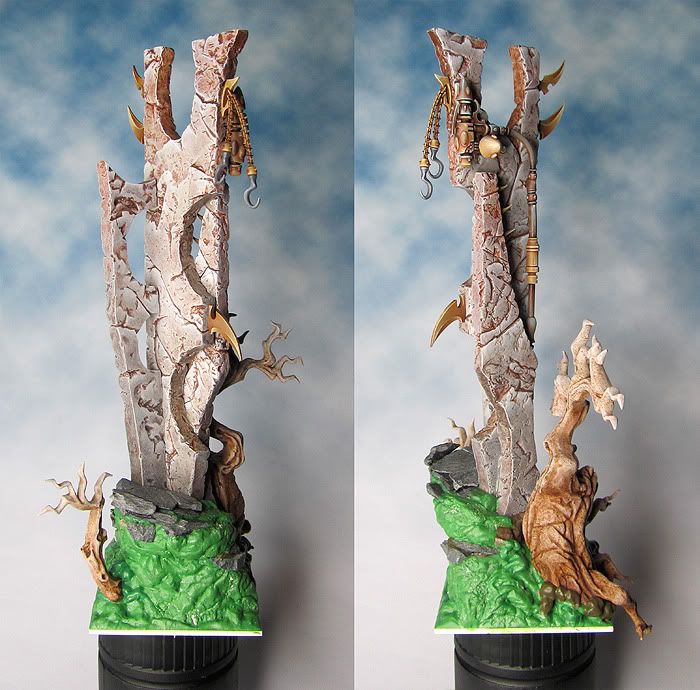
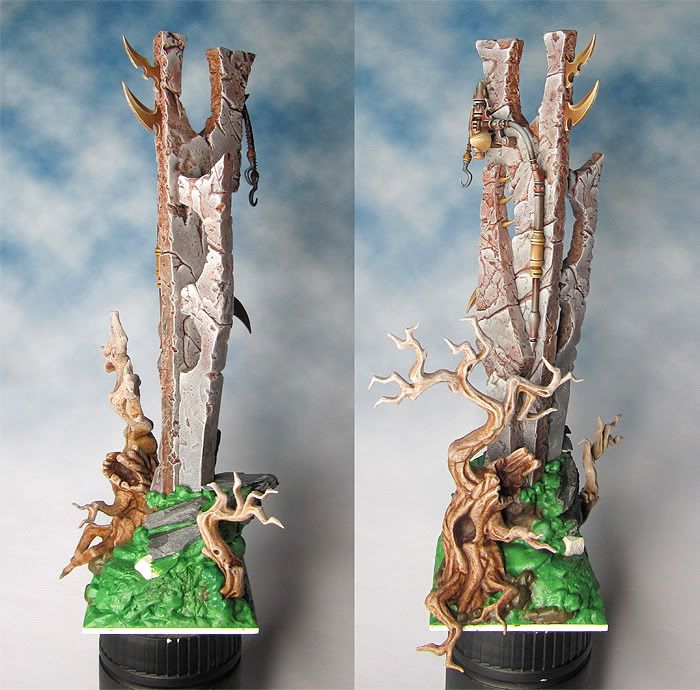
As I’d decided that the diorama needed
another monolith I was able to take some pics of the progress so here is a Step
by Step to painting the Dark Eldar Monoliths/Spires.
A general mish
mash of techniques is probably the best description. The effect is built up in
layers using mostly dry brushing and washes.
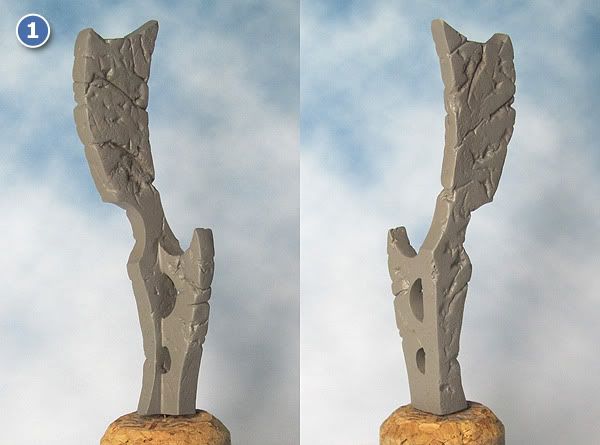
Base coat
Citadel
Foundation Paints
- Mix Calthan Brown + Astronomican Grey. Any mid warm grey will do.
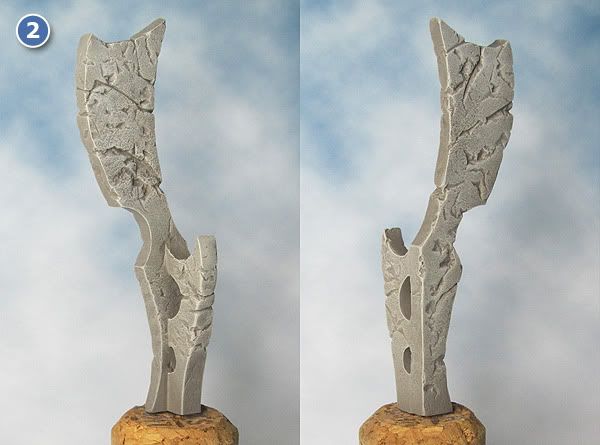
Dry Brush
- Mix Base coat + Vallejo Grey Primer.
An overall dry brushing
with a lighter and slightly cooler version of the base colour. The aim is to
bring out all the texture.
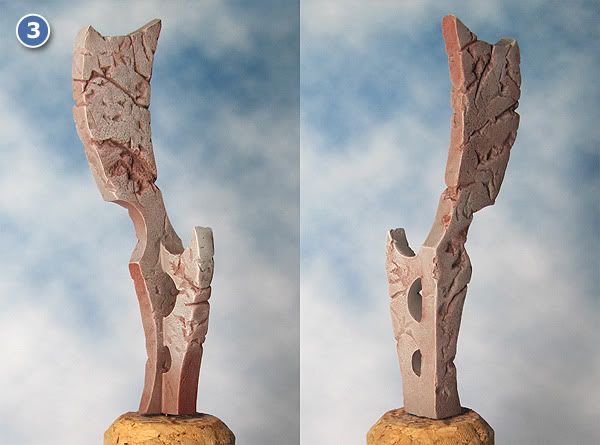
Wash
Citadel Colour
Paints
- Blazing Orange
- Mix Blazing Orange + Scorched Brown
- Scorched Brown
I like to build
up my washes with lots of layers so I dilute the colour right down and apply it
in relatively thin coats. As I build up the intensity of colour I progressively
darken the mix. I find this give me a fair amount of control on the overall
finish.
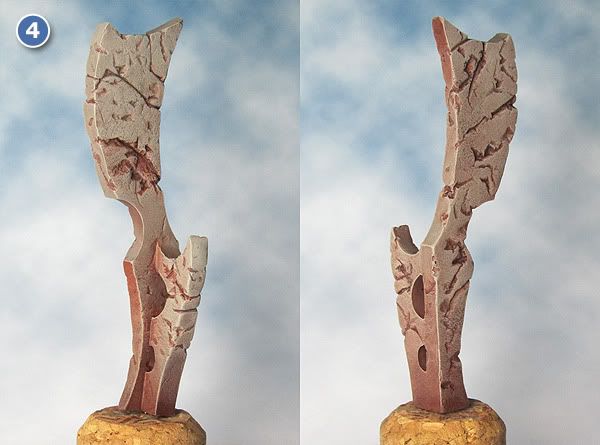
Dry Brush
- Mix Base coat + Vallejo Grey Primer
A selective dry
brushing to begin to emphasize the raised areas.

Highlight
- Vallejo Grey Primer
I used grey
primer because it was to hand & I’m lazy that way! Any light cool grey
would do the job. The highlights are building up with thin applications of
diluted colour until the desired intensity is reached. I also went in with some
ink and refined the shadows/recesses.