Sunday, 7 September 2014
Painting Uncle John – Part 5
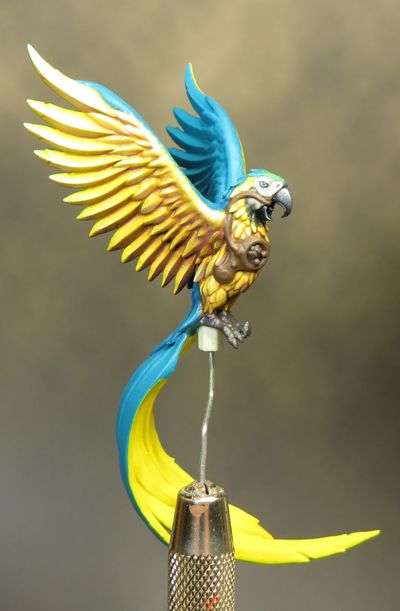
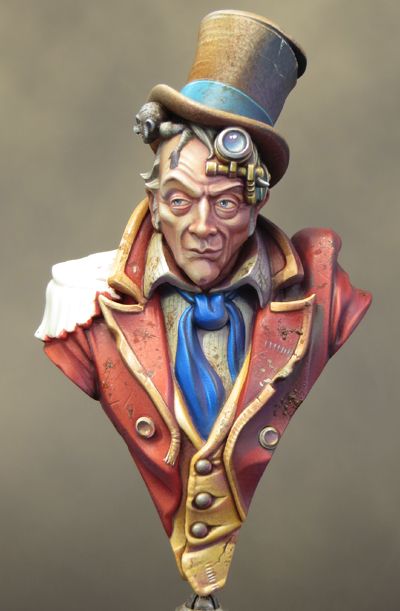
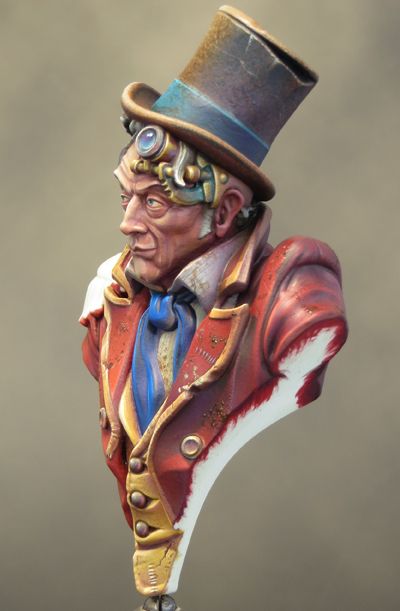
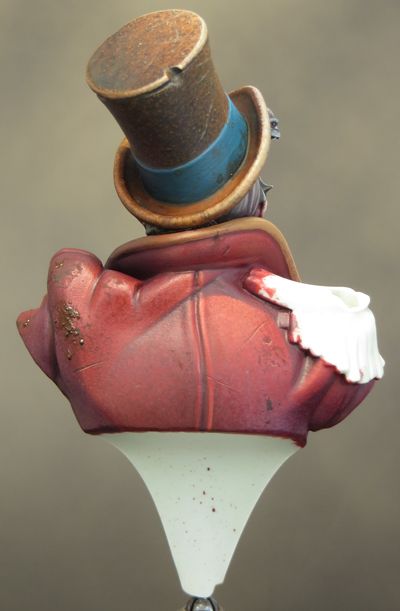
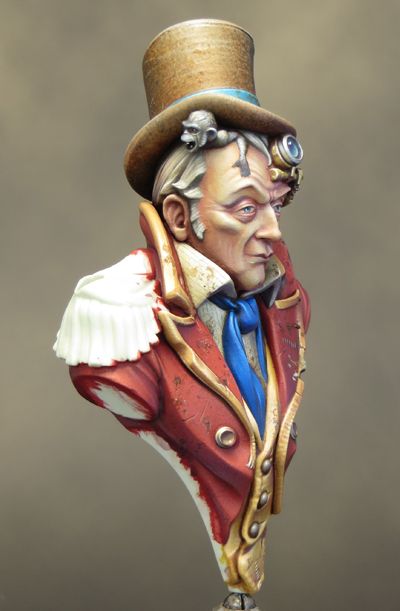
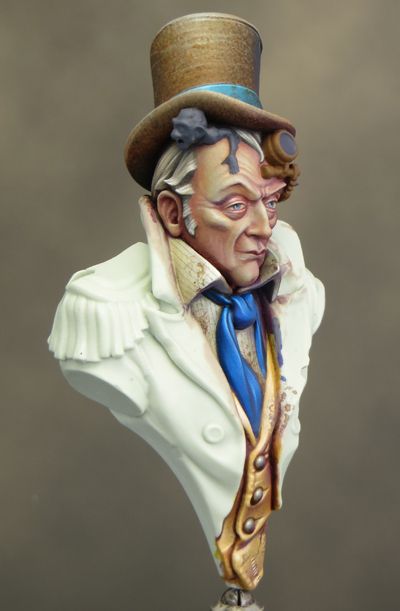
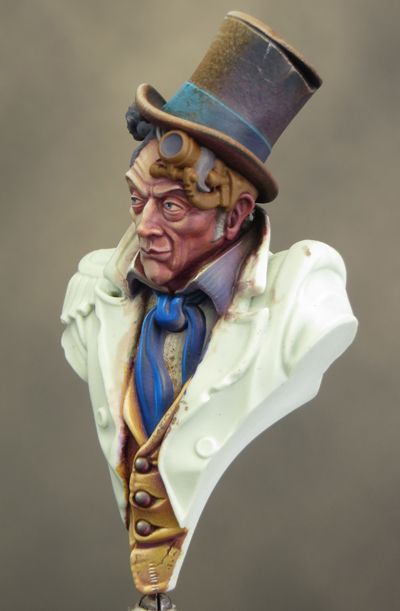
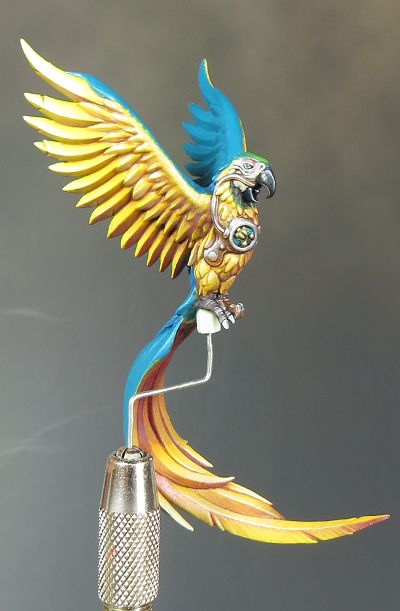
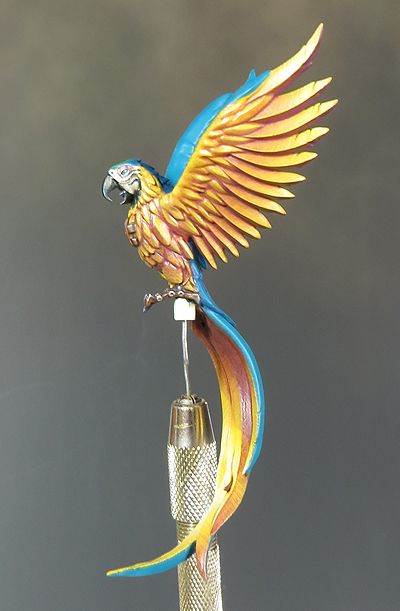
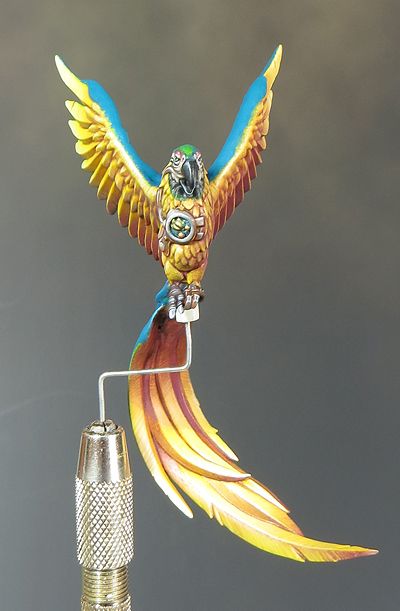
My photos are a bit quick and dirty this time but they show how things are going.
On the whole I'm now feeling more confident about bringing together the elements of this project and finish them off to a satisfactory standard in time for Euro Militaire. I've had a full weekend of parrot painting and that means I've made some good progress. With the exception of a little tidying up here and there only the blue areas remain to be painted. After that there is a lot of shine from the vallejo paints that needs to be fixed but that isn't a great problem and can be sorted out with a little matt medium.
Tuesday, 2 September 2014
Painting Uncle John – Part 4
I’ve started to paint the
parrot that sits on Uncle John’s shoulder and although I’ve made progress it’s
been a bit of a struggle!
I’ve very limited time at the
moment and haven’t been able to put in enough hours to make dramatic progress.
But the biggest frustration I’ve had has been getting the colour right. Yellow
has never been a colour I‘ve liked to paint and I’ve
probably allowed that to spook me. Put simply I went in with too bright a base
colour. As a result I’ve had to work hard to tone down the brightness and get
the parrot looking like it belongs with Uncle John.
On the positive side I’ve stuck at it and I’m beginning to get closer to the colour I want.
Time is rapidly
counting down to Euro Militaire and I need to crack on and resolve this
piece. I’m so close to getting this done but those last steps can make or break
a project!
Monday, 18 August 2014
Painting Uncle John – Part 3
It’s been an odd few weeks featuring a period of ultra intense painting followed by a total break and then a gradual return to my usual routine. I had a tricky couple of days where I struggled to regain the buzz I’d felt previously. But perseverance has paid off and I’m back to loving every moment spent on this model.
Now that I’m back to work my painting schedule has returned to the usual stolen hours in the evenings and at weekends, so the pace has slowed a little. However, before my holiday, I had already established my colour palette and achieved some significant progress that has laid down the foundation for the rest of the job.
Recently I have been painting the mechanical lens and monkey under Uncle John’s hat. I’d intended to use true metallics but my gut instinct has been to paint NMM instead. Somehow it feels more in keeping with how the rest of the model is turning out. Both of these areas are relatively detailed compared to the rest of the bust and I struggled to get the definition I wanted in my paint job. After two days I broke out a new paintbrush and had an instant solution to my problems!
With the lens and monkey painted, I could finally turn my attention to the jacket. This is a key element of the bust, as its red colour will provide one of the strongest visual elements. Several areas had been left unresolved, as I needed to see them against the red to finalise their appearance, so I was keen to get started.
I was feeling a little cautious as red can be a notoriously difficult colour to work with. I mixed up a pot of a deep red for my base colour and base coated the jacket with it. The next stage was to block in the shadows using a red/purple/brown mix. With this groundwork established I could work on the mid tones and highlights. After a little trial & error I figured out those colours that seemed to work best and carefully built up the highlights. Broadly speaking I used a red/orange to orange/yellow mix, as I wanted to avoid taking the highlight into pink tones. With this done I went back in to enrich the mid-tones with red /purple glazes and stippling.
I was pleased with the colour I’d achieved but the jacket was looking a bit bland. It wasn’t until I began to paint the gold braiding onto the jacket that the red colour seemed to come alive! At this stage I was able to have a little fun and mess things up. I’ve always wanted to paint Uncle John as dirty and decrepit with all sorts of (literally) crap over his clothing. After all the man has a monkey living under his hat – you probably don’t want to get downwind of him!
The dirt has been built up with a combination of stippling, sponging and pigments. I’ve also used a variety of finishes from matt to gloss to convey a feeling that some stains are ‘fresher’ than others.
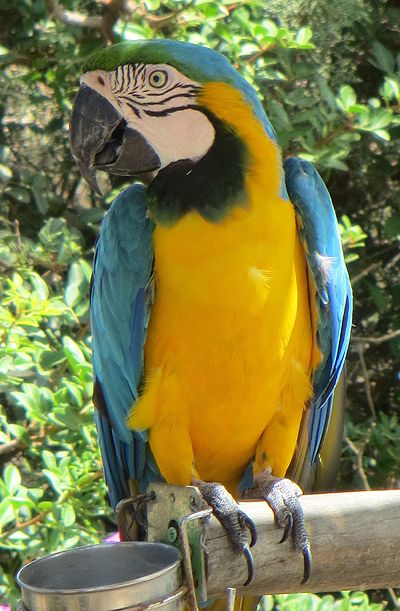
There is still a fair bit of work to do and a lot of little tweaks and adjustments as the overall scheme comes together but it feels like I’m on the home stretch. There is only one major element left to tackle but I’m well prepared. While I was on my holiday I went to Paphos Zoo and couldn’t believe my luck when my feathered friend below ‘posed’ (he really did) for photos. Needless to say I’ll be making full use them.
Now that I’m back to work my painting schedule has returned to the usual stolen hours in the evenings and at weekends, so the pace has slowed a little. However, before my holiday, I had already established my colour palette and achieved some significant progress that has laid down the foundation for the rest of the job.
Recently I have been painting the mechanical lens and monkey under Uncle John’s hat. I’d intended to use true metallics but my gut instinct has been to paint NMM instead. Somehow it feels more in keeping with how the rest of the model is turning out. Both of these areas are relatively detailed compared to the rest of the bust and I struggled to get the definition I wanted in my paint job. After two days I broke out a new paintbrush and had an instant solution to my problems!
With the lens and monkey painted, I could finally turn my attention to the jacket. This is a key element of the bust, as its red colour will provide one of the strongest visual elements. Several areas had been left unresolved, as I needed to see them against the red to finalise their appearance, so I was keen to get started.
I was feeling a little cautious as red can be a notoriously difficult colour to work with. I mixed up a pot of a deep red for my base colour and base coated the jacket with it. The next stage was to block in the shadows using a red/purple/brown mix. With this groundwork established I could work on the mid tones and highlights. After a little trial & error I figured out those colours that seemed to work best and carefully built up the highlights. Broadly speaking I used a red/orange to orange/yellow mix, as I wanted to avoid taking the highlight into pink tones. With this done I went back in to enrich the mid-tones with red /purple glazes and stippling.
I was pleased with the colour I’d achieved but the jacket was looking a bit bland. It wasn’t until I began to paint the gold braiding onto the jacket that the red colour seemed to come alive! At this stage I was able to have a little fun and mess things up. I’ve always wanted to paint Uncle John as dirty and decrepit with all sorts of (literally) crap over his clothing. After all the man has a monkey living under his hat – you probably don’t want to get downwind of him!
The dirt has been built up with a combination of stippling, sponging and pigments. I’ve also used a variety of finishes from matt to gloss to convey a feeling that some stains are ‘fresher’ than others.
There is still a fair bit of work to do and a lot of little tweaks and adjustments as the overall scheme comes together but it feels like I’m on the home stretch. There is only one major element left to tackle but I’m well prepared. While I was on my holiday I went to Paphos Zoo and couldn’t believe my luck when my feathered friend below ‘posed’ (he really did) for photos. Needless to say I’ll be making full use them.
Thursday, 7 August 2014
Review - Boiler Alt Edition from Guild Ball
I came back to the office after my holiday to find Boiler, one of the new Guild Ball minis, waiting for me on my desk. Having had a peep at the artwork, I was keen to see what the actual miniature was like.
My very first impression was that he was a bit small, but I think that had to do with my being in a bit of a grump due to the end of my holiday! As soon as I took a closer look I realised that there was a lot more going on with this mini than I’d first realised. Although Boiler is a small character his mini comes as a five part kit that, once assembled, makes up a dynamic and characterful mini of a good size to paint.
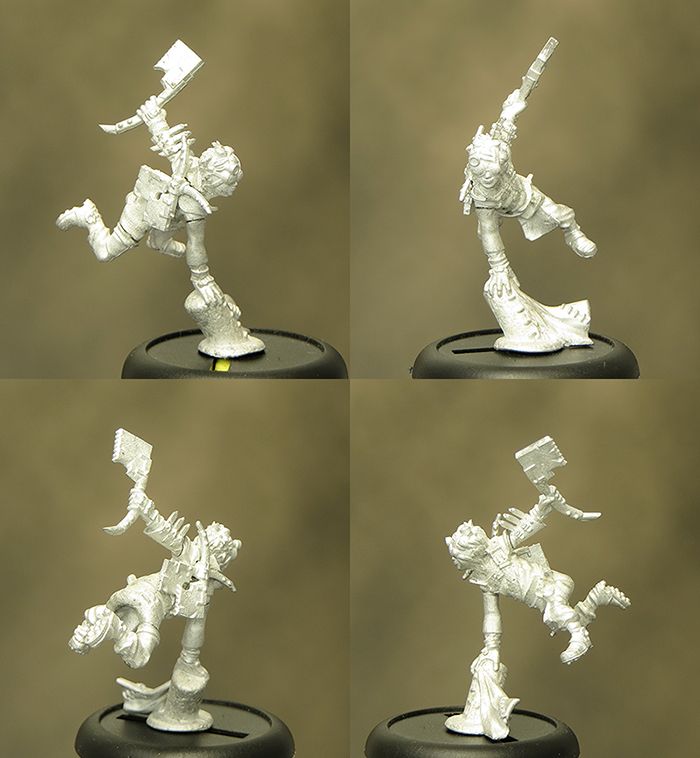
The quality of the casting is excellent and I was able to put him together for an initial test fit (see below) with no problems. There was very little flash on the mini and the mould lines pose no special problems. All the parts fitted well with out any extra filling or trimming and no need for any major gap filling once properly assembled. All in all this was a better than usual assembly experience for me.
The assembly may only be an initial test prior to giving him a proper clean up but it’s clear that this is a very nice mini indeed. There is a lot of great detail but also areas that are plain enough to give a painter the opportunity to have a little fun with adding some extra patterns, texture or insignia should they be so inclined.
The thing that really clinches the deal for me is the pose. Boiler has been sculpted in the act of leaping and is captured in a dynamic mid-air pose that is supported on just one arm. For a mini of this size it is an extremely successful use of multiple parts to achieve great movement and dimensionality. Something I’d normally associate with a resin or plastic kit rather than metal.
You can see a fully assembled & beautifully painted version of Boiler by John Keys aka megazord_man Here
The only problem is that he is such a good mini I want to paint him straight away and I’ll have to exert great self control to restrain myself. Euro Militaire is fast approaching and I’ve a painting schedule to keep to if I want to get Uncle John finished in time.
It’s tough when you’ve more enthusiasm than time but that’s preferable to things being the other way around!
My very first impression was that he was a bit small, but I think that had to do with my being in a bit of a grump due to the end of my holiday! As soon as I took a closer look I realised that there was a lot more going on with this mini than I’d first realised. Although Boiler is a small character his mini comes as a five part kit that, once assembled, makes up a dynamic and characterful mini of a good size to paint.
The quality of the casting is excellent and I was able to put him together for an initial test fit (see below) with no problems. There was very little flash on the mini and the mould lines pose no special problems. All the parts fitted well with out any extra filling or trimming and no need for any major gap filling once properly assembled. All in all this was a better than usual assembly experience for me.
The assembly may only be an initial test prior to giving him a proper clean up but it’s clear that this is a very nice mini indeed. There is a lot of great detail but also areas that are plain enough to give a painter the opportunity to have a little fun with adding some extra patterns, texture or insignia should they be so inclined.
The thing that really clinches the deal for me is the pose. Boiler has been sculpted in the act of leaping and is captured in a dynamic mid-air pose that is supported on just one arm. For a mini of this size it is an extremely successful use of multiple parts to achieve great movement and dimensionality. Something I’d normally associate with a resin or plastic kit rather than metal.
You can see a fully assembled & beautifully painted version of Boiler by John Keys aka megazord_man Here
The only problem is that he is such a good mini I want to paint him straight away and I’ll have to exert great self control to restrain myself. Euro Militaire is fast approaching and I’ve a painting schedule to keep to if I want to get Uncle John finished in time.
It’s tough when you’ve more enthusiasm than time but that’s preferable to things being the other way around!
Thursday, 31 July 2014
Uncle John - part 2
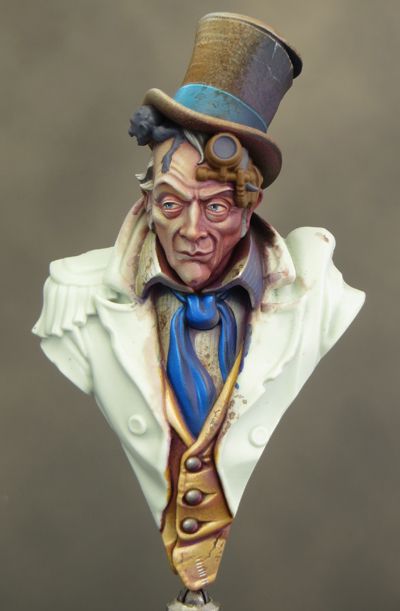
I've had a lot of fun with my Uncle John bust painting the clothing, texturing and dirtying it up; I've done a bit of subtle tweaking on the flesh tones. I think there will be a lot more tweaking as the mini develops and the overall colour palette comes together. The purple shadows are 'interesting' to work with but I need to get the red jacket painted in order to resolve a few of the shadow areas.
I’ve just enjoyed an utterly self-indulgent and thoroughly productive week ‘home alone’ with my minis. Being able to become totally absorbed in my hobby has been a joy, and something I’ve not really been able to do since the long summer holidays of my teens. I think the results speak for themselves.
But now it’s back to real life and, in all likelihood, I’m not going to get much, if any, painting done over the next couple of weeks. That may turn out to be a good thing, It gives me the chance to think through and plan my progress on Uncle John. I’ve made a good start and got lots done, but I want to build on what I’ve achieved and see if I can take it up another level. And let’s not forget there’s a cyborg parrot to be painted – feathers and all.
I’ve just enjoyed an utterly self-indulgent and thoroughly productive week ‘home alone’ with my minis. Being able to become totally absorbed in my hobby has been a joy, and something I’ve not really been able to do since the long summer holidays of my teens. I think the results speak for themselves.
But now it’s back to real life and, in all likelihood, I’m not going to get much, if any, painting done over the next couple of weeks. That may turn out to be a good thing, It gives me the chance to think through and plan my progress on Uncle John. I’ve made a good start and got lots done, but I want to build on what I’ve achieved and see if I can take it up another level. And let’s not forget there’s a cyborg parrot to be painted – feathers and all.
Subscribe to:
Posts (Atom)