
I'm being asked if I'm going to enter Golden Demon this year. So I suppose it's time to go public and say yes ... hopefully!
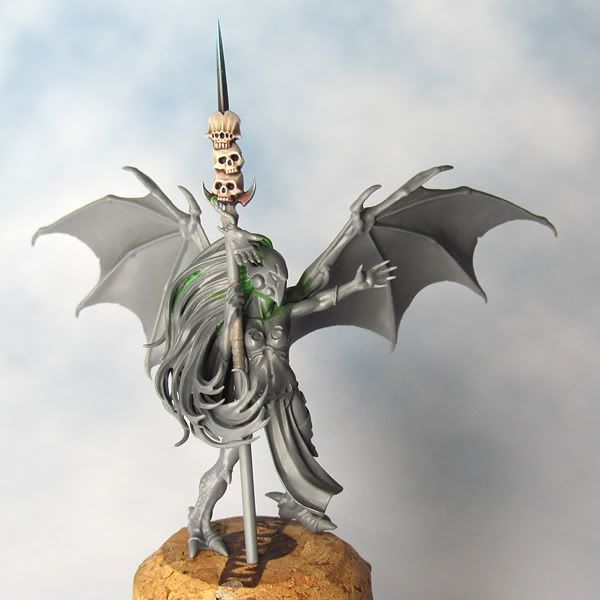
It's important to stress the hopefully bit as I'm nothing if not a slow painter. If the Dark Elf Diorama is ready in time it shall be going to the Demons. But this diorama is turning out to be something of a long game and I'm determined not to rush (as if) to try and meet the deadline. So I might be looking at 2013.
One of the big things I needed to re-learn when I came out of painting 'retirement' was to take the time I need to do the job properly. I can paint quite quickly if I want to but I don't enjoy the process as much and it never results in my best work and my best work is demanded for the Demons. Also my job as a Graphic Designer/Illustrator is very deadline driven and it's good not to have any such pressures involved in my hobby.
On a personal level entering the Demons again is quite a big deal. I last entered in 1990 and at the time I felt that I'd achieved as much as I could. The best I would ever be able to do would be to equal past triumphs. I just wanted to take time enjoying mini painting for it's own sake. To be honest that's still my primary motivation - if it ain't fun I ain't doing it!
Mini painting is more fun than ever and as for the Demons, well I'm up for the challenge. It would be rather fine to prove that there's still some life in the old dog nearly twenty two years after I last won a Demon!
Aw man, this is soooo awesome, I cannot keep my eyes off of it...and it's not even painted yet! I would LOVE to paint it so much, that I almost would copy the idea. Make it a good one mate!
ReplyDeleteI've really being enjoying your blog David and it's always great to see people come back to the hobby.
ReplyDeleteJust goes to show that talent is permanent.
yeah.. looking grat!! btw nnice blog man!!
ReplyDeleteLooks brilliant mate! How do you get the GS to blend into the plastic so seamlessly?
ReplyDeleteLoving the blog, keep up the great work!
Very creative conversion. I am simply dying to see how you paint her!
ReplyDeleteI blend the green stuff with a clay shaper and then, when it has cured, wet sand it. I use the finest grade of wet & dry sandpaper I can get. Wet sanding helps to stop the green stuff tearing up but it takes a light touch. I find a circular sanding action work well - keep checking and rinsing away the residue.
ReplyDeleteCan't wait to see this painted David, great conversion!
ReplyDelete