I wondered if I’d ever get to this stage but, at long last, I’m painting my Demon Tank! However, before the ‘fun’ could start, there was one last little bit of preparation to be done. I had to wash the model prior to priming it. This was to remove any grease and dust that had built up during the construction of the model. It’s essential to have a clean surface before you apply any paint. I first masked off the belly-mouth and then set to with an electric toothbrush and dish soap. Once I’d given the model a careful scrub, I gently rinsed it off under cool running water. This was a terrifying process as it had the potential to do quite a bit of damage but everything went very well.
The size of this model presented a challenge to me in that I would have to handle it quite a bit during painting. That, combined with the large surface area, meant that priming the model would be essential! I first gave the underside and deeper recesses a coat of black and then sprayed the whole model with several light coats of Tamiya Fine Surface Primer. This is another potentially tricky job but the primer gave me an excellent result!


And so to painting!
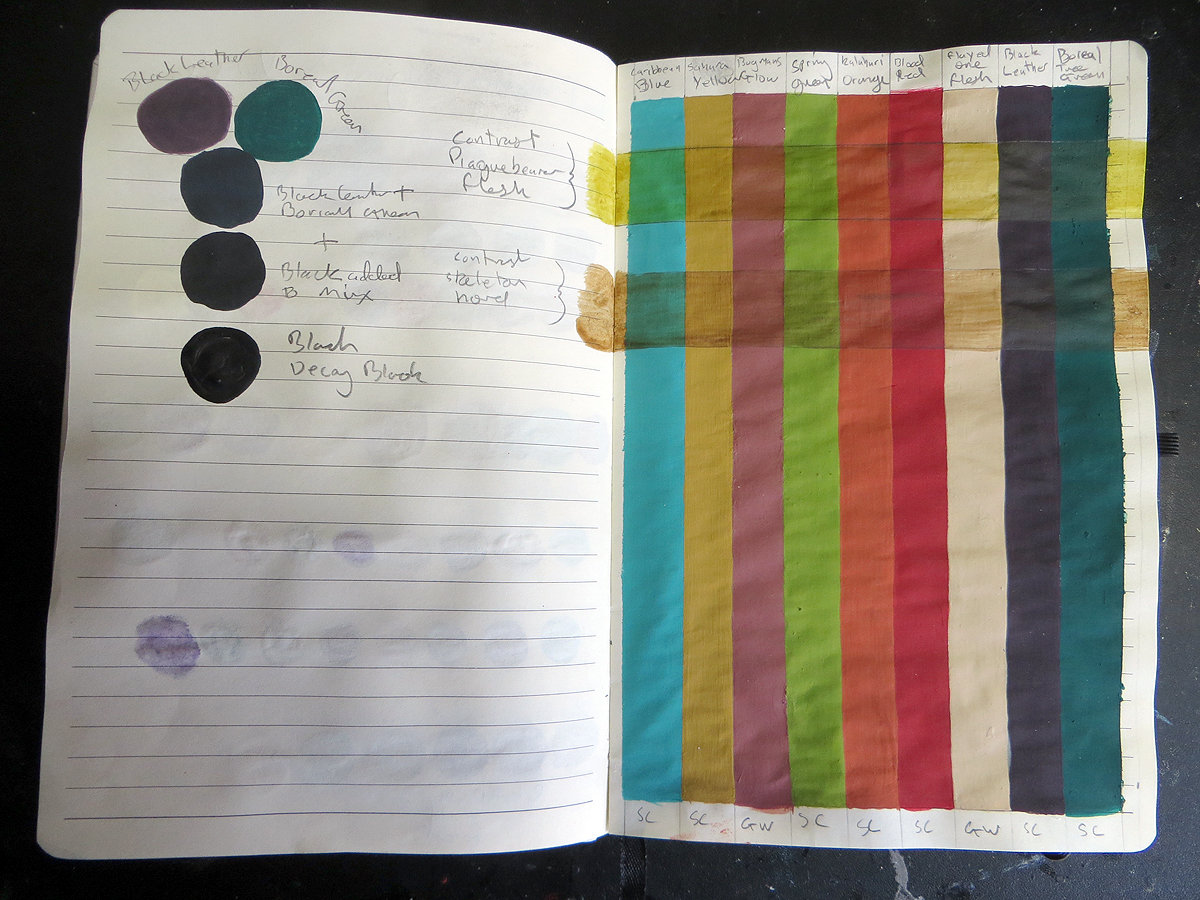
Painting this model feels like going on a bit of an adventure. The physical challenges presented by the size of the model are something totally new to me. Add to that the nostalgia, and expectations involved in revisiting my first great success, and the result is a project unlike any I’ve taken on before! That’s the main reason why my colour palette uses a lot of tried and tested favourites. I do believe that stepping out of your comfort zone provides a positive challenge, but I like to pick my challenges carefully. The size and scope of the model is a major challenge in itself. By using a tried and tested palette of colours I’ll be able to draw on my experience with them to resolve the overall paint scheme. After all the entire point of this project is that it’s a coming together of old and new.
As I’ve said I’d expected the size of the model to be something of a challenge and I wasn’t wrong! I started off by attaching a painting handle to the model but took that off straight away. It shifted the centre of balance and made the model too big and awkward to hold during painting. So I am carefully holding the model in my gloved hand while I paint it. The tank weighs very little, which is a great help, but I’ve had to adapt my painting technique and posture to its size.
I’m used to working up close to the surface I’m painting. I usually brace my hand by holding the model on my desk and my brush hand is usually also braced on the desk, or sometimes against the hand holding the model. It’s a very stable set up and allows me a lot of control over my brush. However, in my usual painting position, there isn’t now enough space for the model and my hands between my eyes and the desk! I’ve had to get myself a taller stool so that I can sit a little higher. I also have to adapt to bracing my brush hand against the model rather than my desk.
This new set up is taking quite a bit of getting used to as it’s far more difficult to keep my hands stable during painting. There are some tricky angles involved in getting my brush into contact with the model’s surface and I have to handle the model while I paint it. Challenging as this may all be, I’d anticipated these issues as a part of the project and, so far, there has been nothing that a little patience and perseverance can’t overcome. In fact, I’m enjoying this project because of the challenges not in spite of them!
As usual I decided to start off by painting the face. This is going to set the tone and character of the model. It’s also a relatively small area that contains a lot of contrasting surfaces. So it will give me the opportunity to decide how I am going to resolve many of the material contrasts at an early stage. My usual habit is to work on a fairly small area at a time but, on a model of this size, I think that would be a mistake. Therefore, I decided to work over a larger area, which included the face and chest, by starting out fairly roughly and then gradually refining the painted surfaces as the project evolves.


After painting a base of Rakarth Flesh, my first layers of paint were applied with a size 4 brush, roughing out the areas of light and shade. I then began to lay down a series of glazes to add and adjust the colour nuances. My next move was to focus on smaller areas to begin refining my work. However, I made sure to keep moving around the overall area I was painting, and not to linger on one spot for too long. This enabled me to balance things out over a larger area than I might normally do and resolve the overall skin tones.
By starting out big and bold I’ve been able to avoid getting stuck on one small area. My overall approach is one of going back and forth between different areas and different tones. This is a very different way of working from a structured step by step approach but it feels appropriate for this model.
I’m very glad that I’d taken the decision to think through my colour palette in advance because it saved me a lot of time and helped me to work swiftly at the early stages. However, as expected, once I started to work with my chosen palette I felt the need to adapt it. I had some definite ideas about the direction I was going to take but, as my work progressed, so did my ideas. As I’ve said before, the good thing about starting out with a plan is that it gives you a structure to work within but it also enables you to vary from that structure in an organised way.
I’d planned to use a cooler blue/green hue on much of the model but, as I progressed, that felt wrong. So I’ve used more of the yellow/green hues from my palette in the flesh tones. I turned to my old favourite of Bering Blue to bring some subtle blue tones to the flesh. I think is a more successful choice than my original option of turquoise. However, I think the blue/green hues will come into play as the project progresses.


I’d thought that the overall look and feel of my colour palette would be very different to anything I’d done before but, in reality, it’s turning out to have a familiar feel to it. As has already been pointed out on Instagram, my flesh tones have much in common with both my Plaguebearers and my Troggoth. Although it’s not what I’d intended to do, I’m actually very happy with this. It feels like a more natural progression from my earlier work and a truer reflection of my style and instincts.
This project has been in planning for many years so it’s been on my mind as I’ve worked on many other models. Consequently many of my models contain things that I was trying out in preparation for the Demon Tank. My Death Guard, Horticulus Slimux, Kastelan Robot and Sloppity Bile Piper may all have an influence before I’m finished. I don’t want this project to nothing more than a ‘Sproket’s greatest hits’ but it is intended to look back over my past work while, hopefully, continuing my journey to be a better painter.

I think I’m off to a good start but there is a long way to go yet!