Showing posts with label Diorama. Show all posts
Wednesday, 22 January 2014
WAMP Awards 2013
Well this is a very nice surprise!
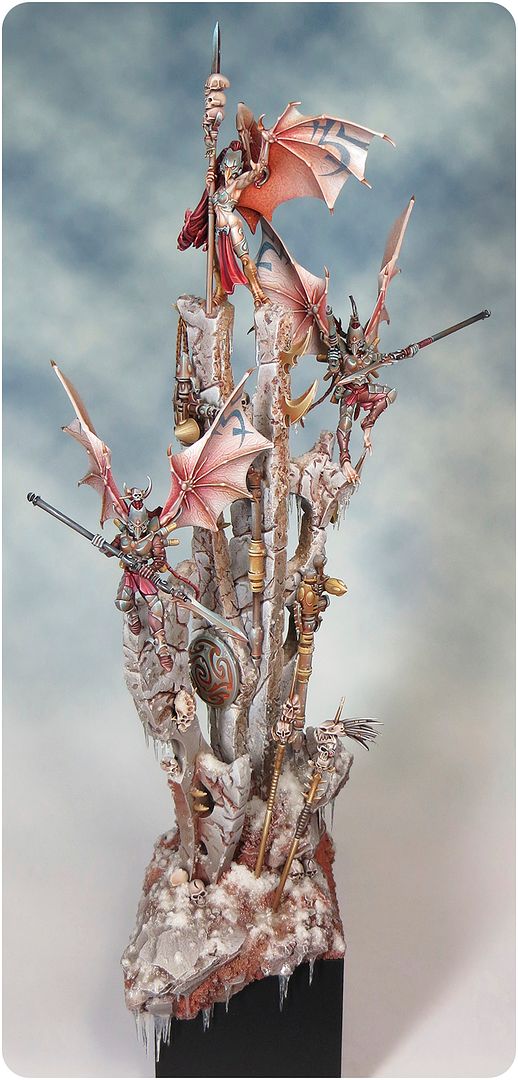
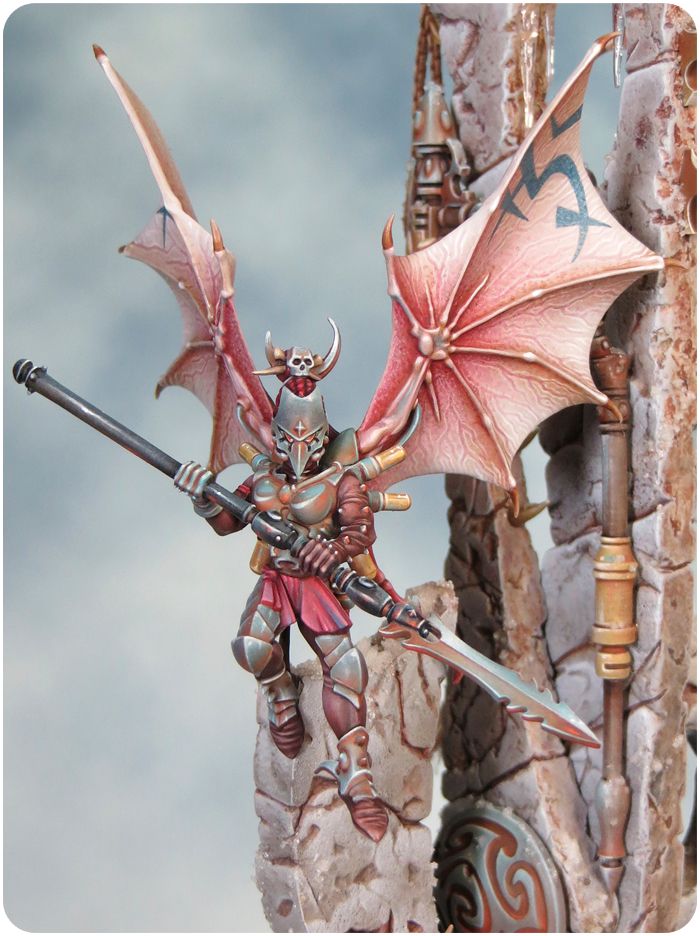
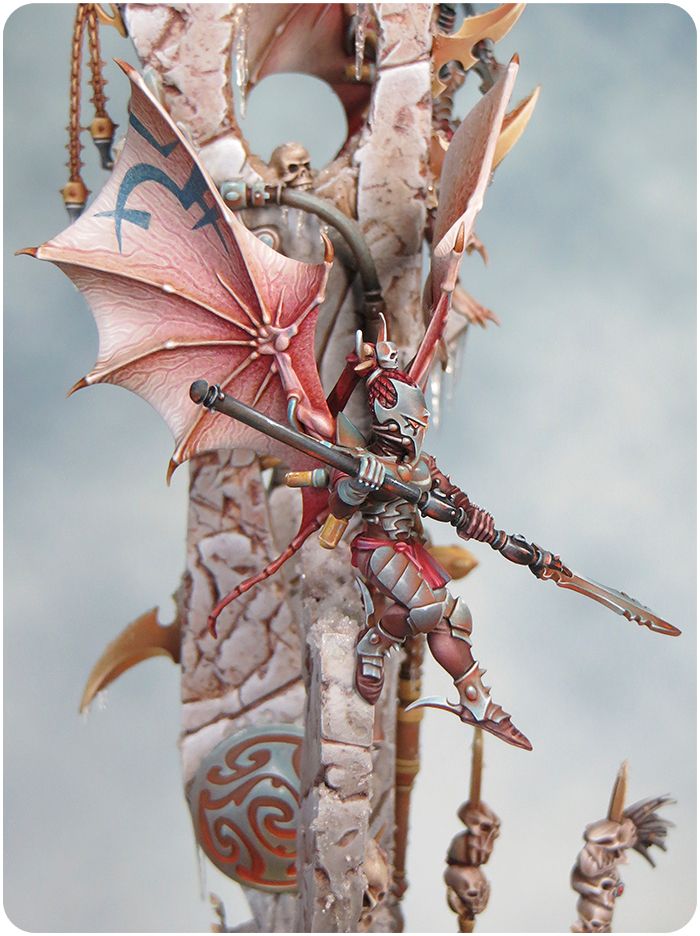
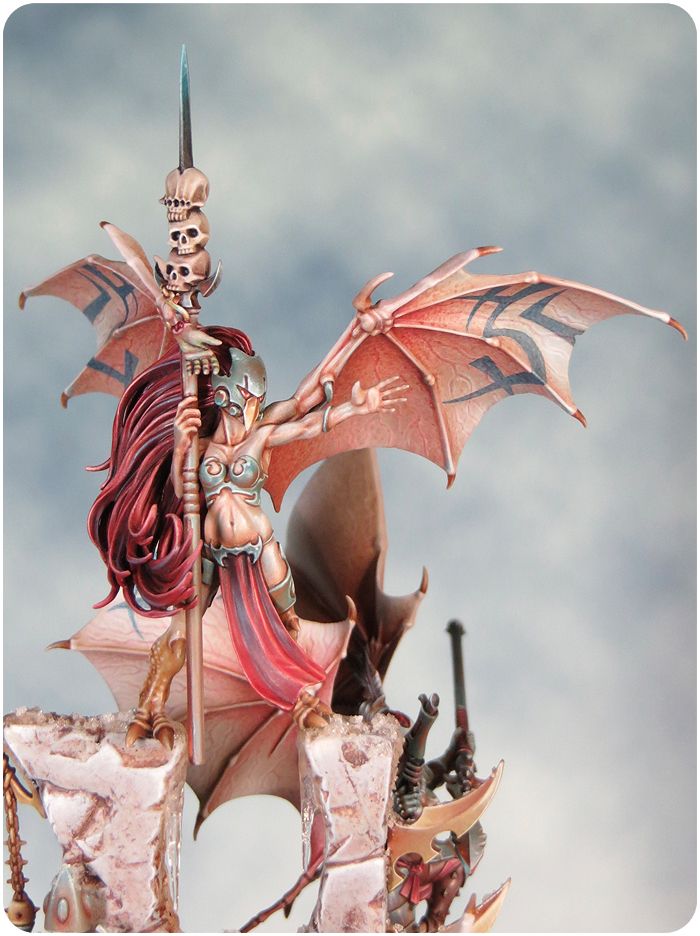
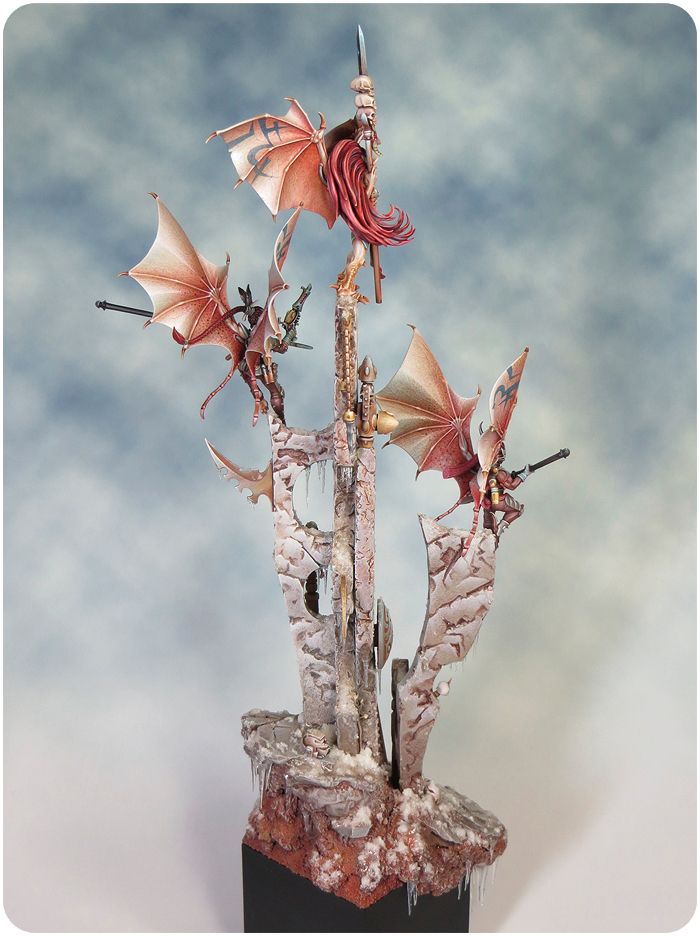
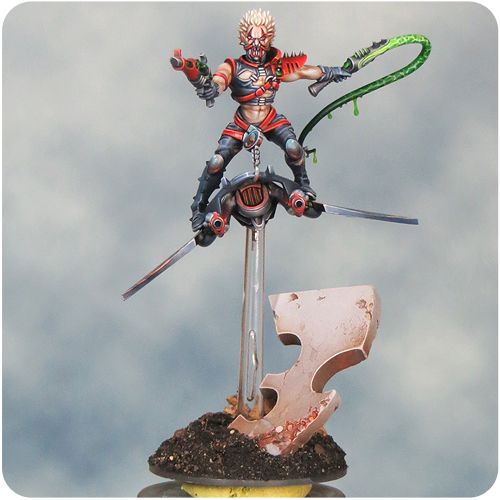
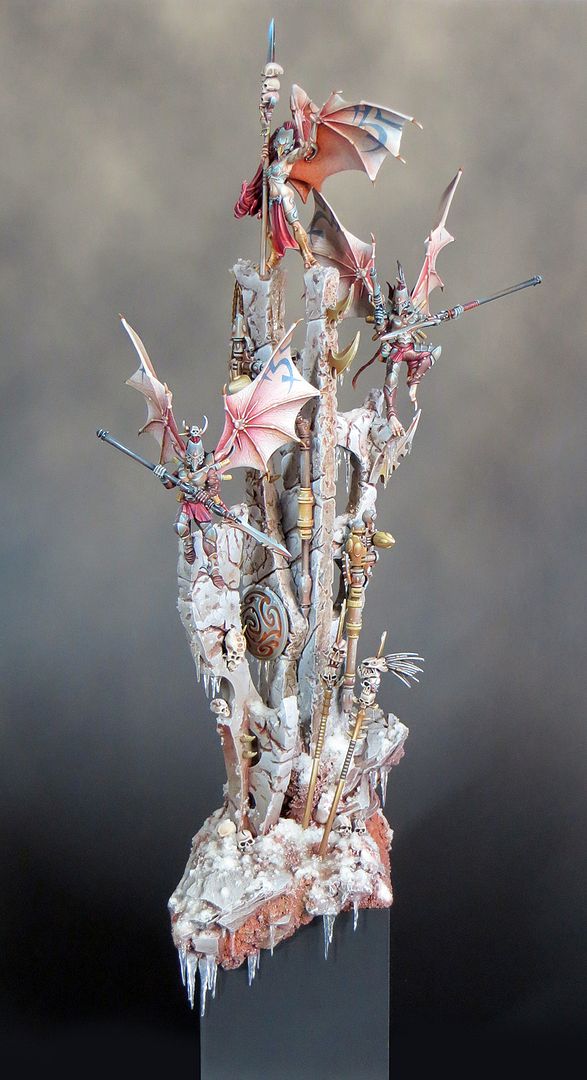
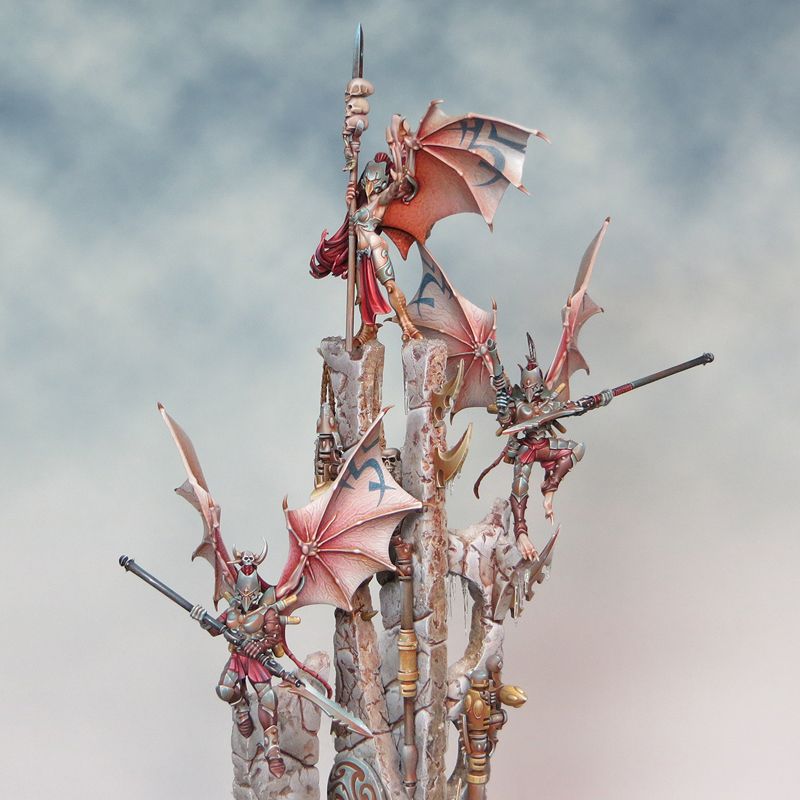
My Dark Eldar came second in the Painted Sci-Fi category of the Wamp Awards 2013. To be honest I hadn't realised that I was a finalist untill quite late in the day and when I saw the other finalists in the painted Sci-Fi category I really didn't fancy my chances at all!
Congratulations to all the winners.
Check out all the results of the WAMP Awards 2013, here.
Thursday, 26 December 2013
Chee-Chee Part 7 - Sculpting a base from Polymer clay.
Seasons Greetings!
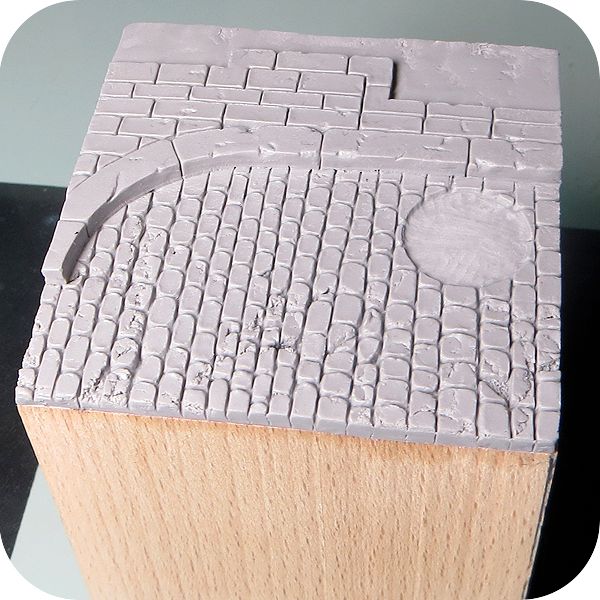
Having figured out what I'm doing for Chee-Chee's base it's time to start putting it all together. I've decided to sculpt the road and pavement/kerb out of polymer clay. I'd considered using plaster but that can be a messy business and although epoxy clay would also have been a good option I'm allergic to it. I avoid using it too often especially as I will need to use milliput later in the project.
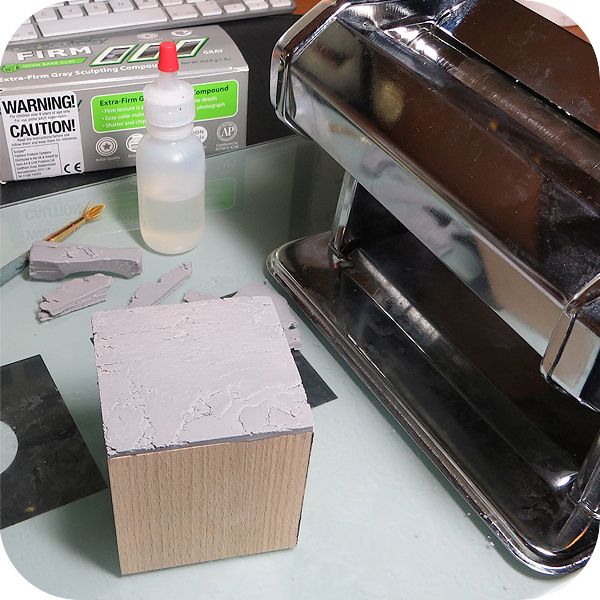
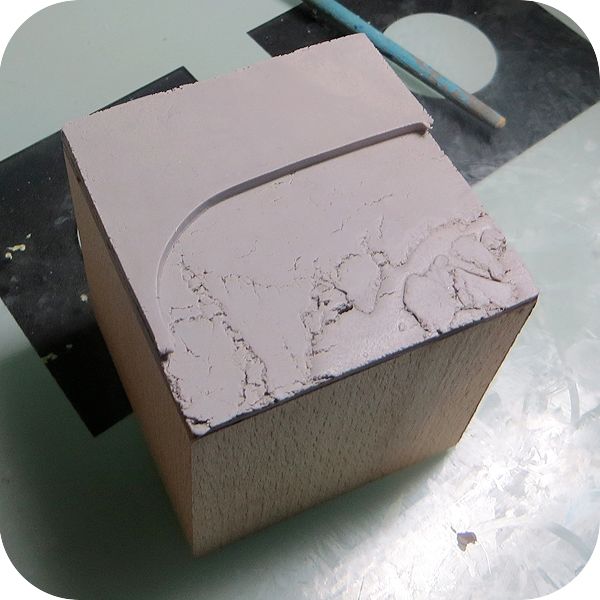
The next issue was the condition of the polymer clay. My super sculpey firm is stored in an airtight container in a cool place but after a couple of years neglect it was woefully dried out and crumbly! A few drops of sculpey softener and a lot of passes through a pasta machine (only ever used for polymer clay of course!) returned the clay to a workable condition but the crumbly clay gave me an idea. I kept back a small quantity of this to use as the top surface of the road. The cracked & crumbly surface helps to give some interest and texture. I then rolled out another, smoother, layer of smoother clay and cut it to shape for the pavement.
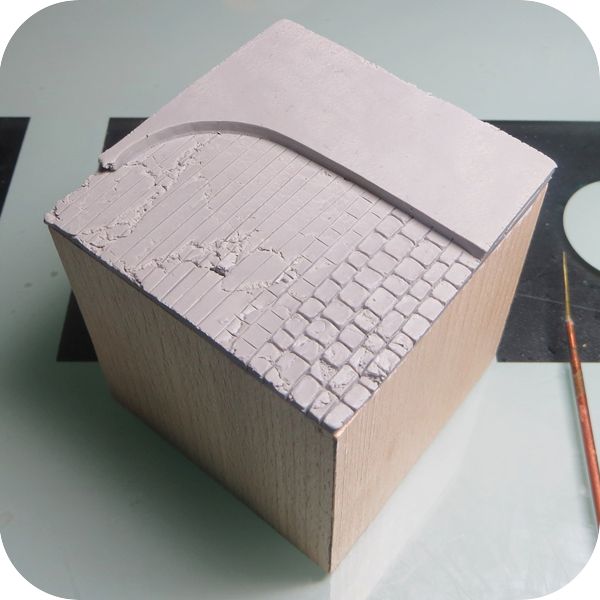
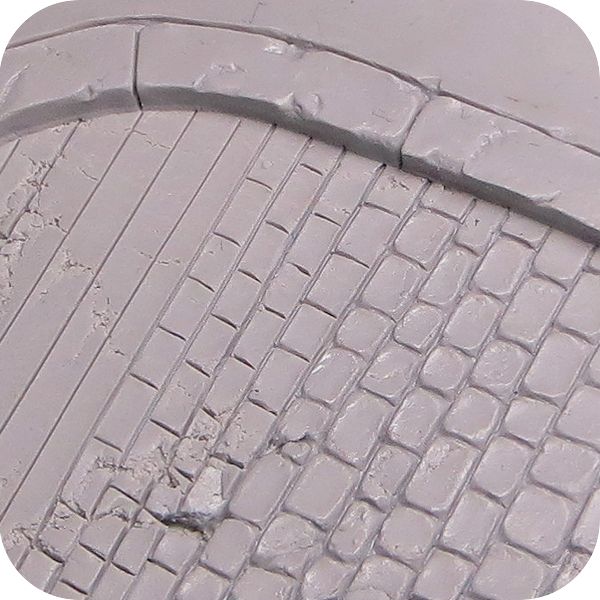
To create a cobble stone texture I first cut a series of lines with a scapel and then set about adding some character and deffenition with a fine point sculpting tool. After that I rounded off the hard edges by working over the sculpted surface with a paintbrush dipped in a little isoproplyl alchohol.
With the sculpting done I cut away the clay where the wall will go so that it won't simply sit flush on the ground surface. I also carved out an indentation ready for an eched brass drain cover. With an oven nicely preheated from roasting the Christmas ham (I kid you not) I then baked the clay to set it hard.
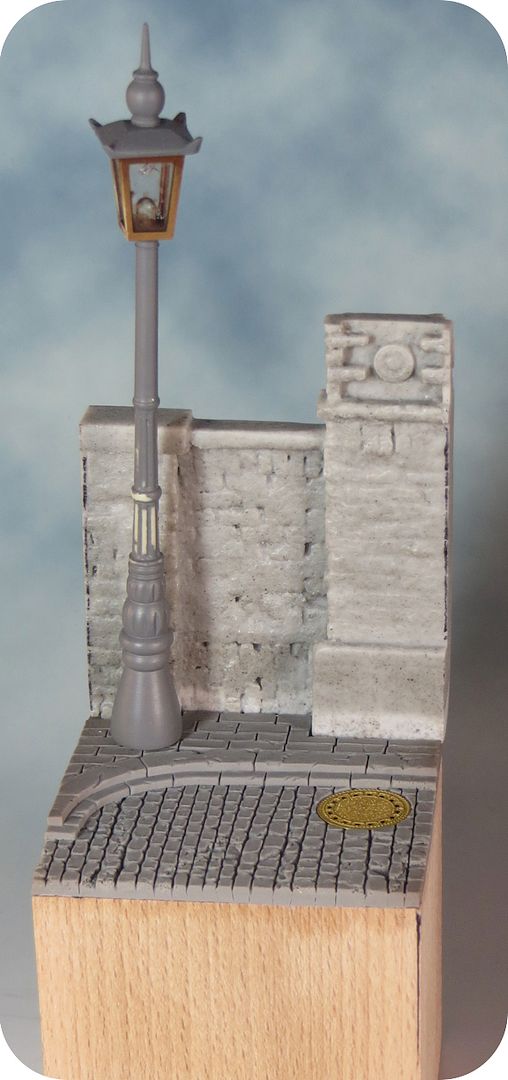
Next I will have to attach the wall and set about ensuring a seamless transition between all the base elements but for the time being I've photographed the first test fitting of the wall and lamp to the new base.
Having figured out what I'm doing for Chee-Chee's base it's time to start putting it all together. I've decided to sculpt the road and pavement/kerb out of polymer clay. I'd considered using plaster but that can be a messy business and although epoxy clay would also have been a good option I'm allergic to it. I avoid using it too often especially as I will need to use milliput later in the project.
The next issue was the condition of the polymer clay. My super sculpey firm is stored in an airtight container in a cool place but after a couple of years neglect it was woefully dried out and crumbly! A few drops of sculpey softener and a lot of passes through a pasta machine (only ever used for polymer clay of course!) returned the clay to a workable condition but the crumbly clay gave me an idea. I kept back a small quantity of this to use as the top surface of the road. The cracked & crumbly surface helps to give some interest and texture. I then rolled out another, smoother, layer of smoother clay and cut it to shape for the pavement.
To create a cobble stone texture I first cut a series of lines with a scapel and then set about adding some character and deffenition with a fine point sculpting tool. After that I rounded off the hard edges by working over the sculpted surface with a paintbrush dipped in a little isoproplyl alchohol.
With the sculpting done I cut away the clay where the wall will go so that it won't simply sit flush on the ground surface. I also carved out an indentation ready for an eched brass drain cover. With an oven nicely preheated from roasting the Christmas ham (I kid you not) I then baked the clay to set it hard.
Next I will have to attach the wall and set about ensuring a seamless transition between all the base elements but for the time being I've photographed the first test fitting of the wall and lamp to the new base.
Tuesday, 10 December 2013
Painting Chee-Chee Part 6
Well November has come and gone and I've managed to get far less painting done than I'd hoped but it's been a busy month so I've had to go with the flow. I'm hoping to get a lot of work done over the Christmas holiday (it's approaching at an alarming speed) and I'll steal whatever painting time I can in the meantime.
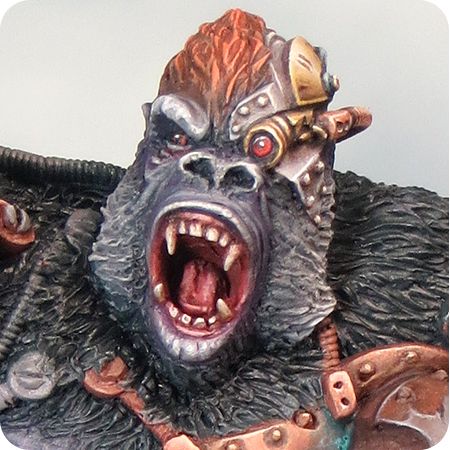
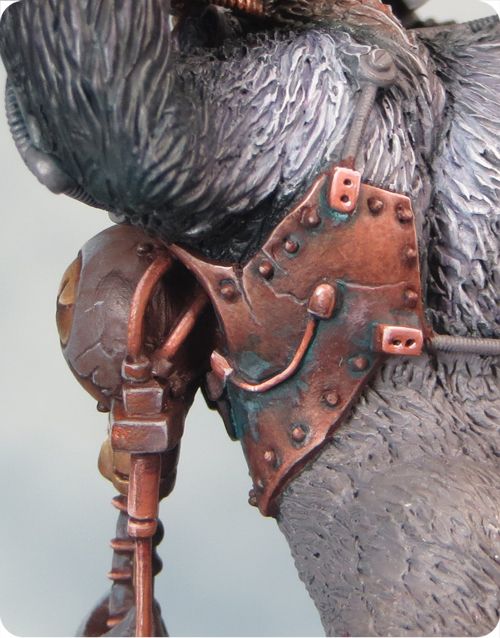
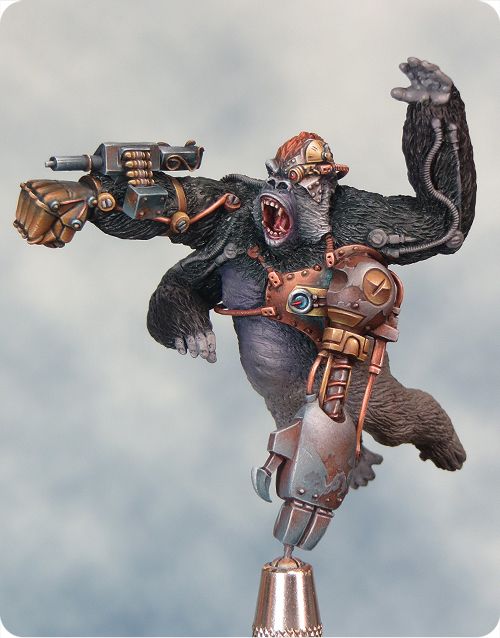
I have managed to get some painting done and I've finished Chee-Chee's big mecha arm. So with the exception of a few rods & cables I've mostly only got fur left to paint. Mind you that's quite a lot of only!
I've begun to resolve those areas of fur by working on the back & arms. These areas cover the extremes of the colour range in Chee-Chee's fur with the arms being almost pure black and the back being silver-grey. Both areas need a bit more work but the overall effect is becoming apparent and I'm very pleased with how it's looking.
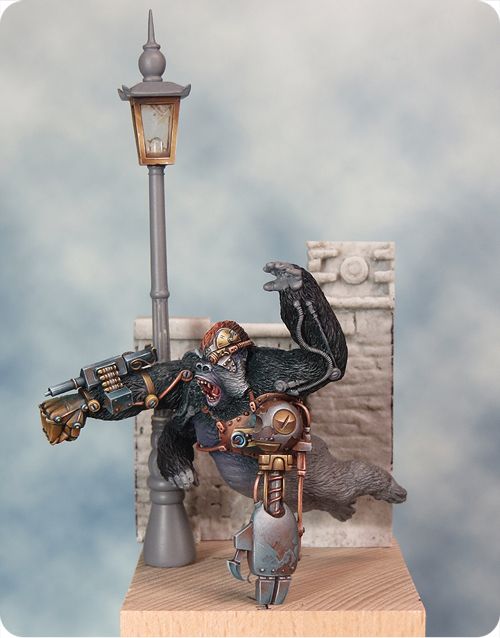
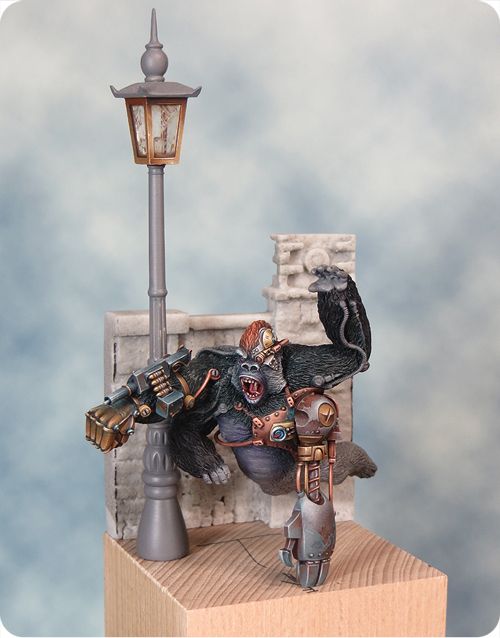
I've also been spending a bit of time working out my designs for Chee-Chee's base. My earlier plans were for something far bigger but as time has gone on I've decided to literally scale it back. I'm still having a cobbled street, lamp post & the zoo walls but the whole thing will be a smaller & tighter composition. I think this will show off Chee-Chee to far better advantage. He will now be the dominant element of the composition as only seems right. The pics below are of a very rough test fit but they give the general idea.
Thursday, 3 October 2013
The Finished Dark Eldar Diorama
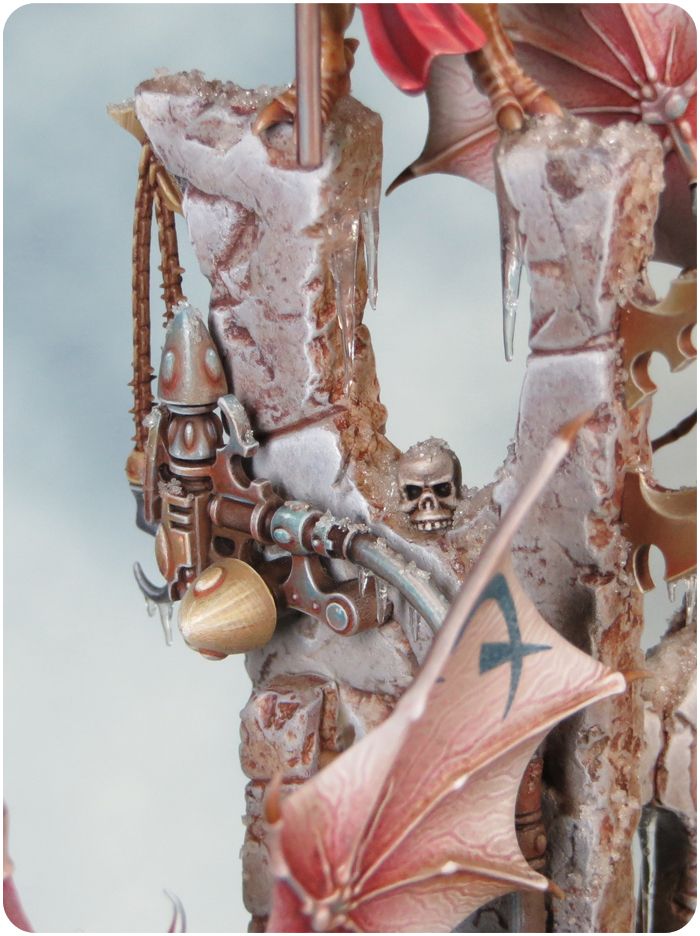
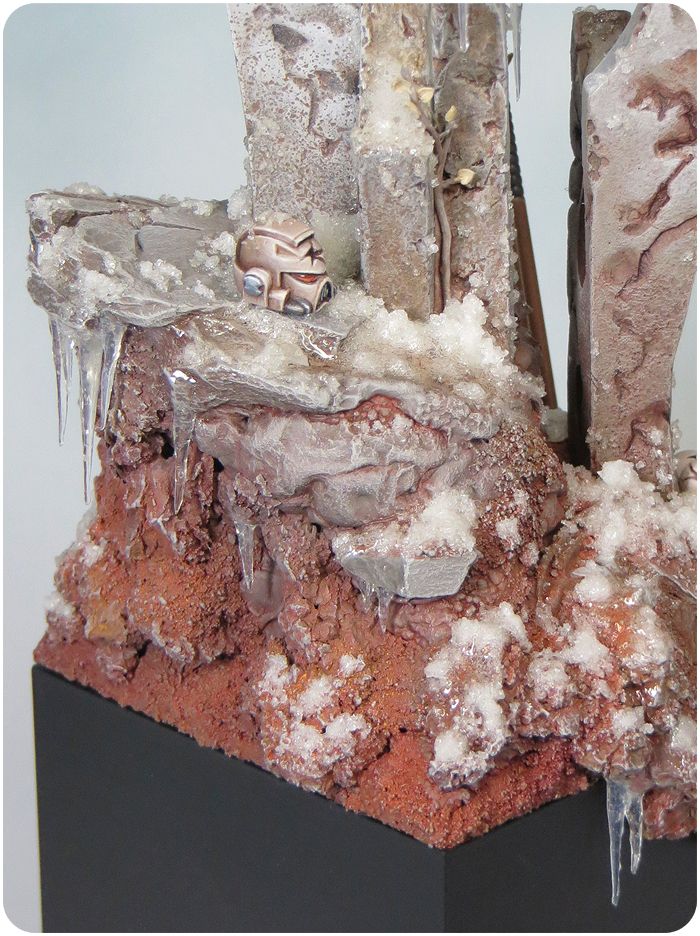
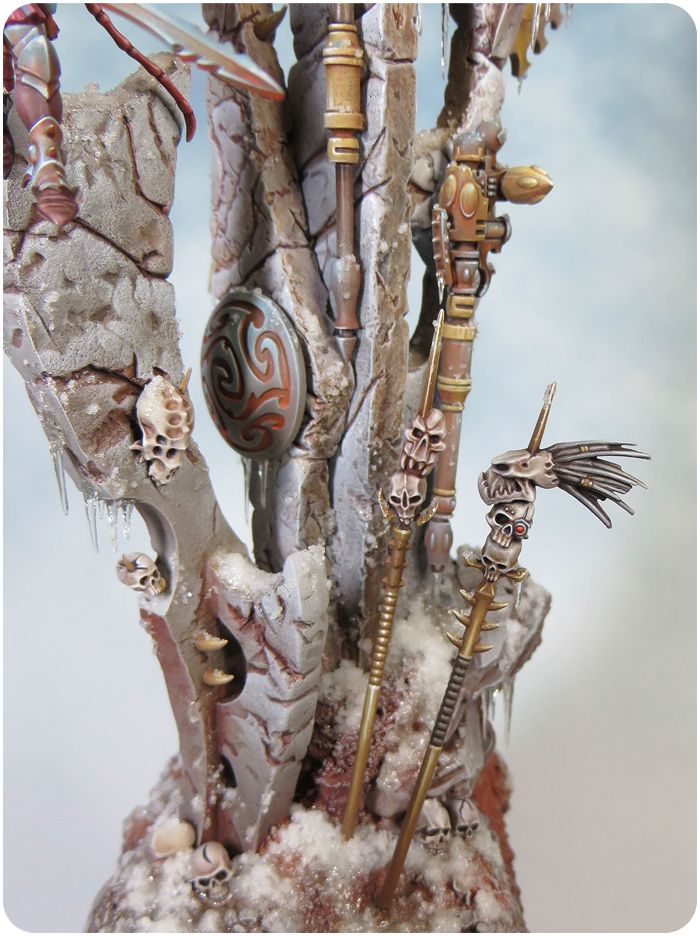
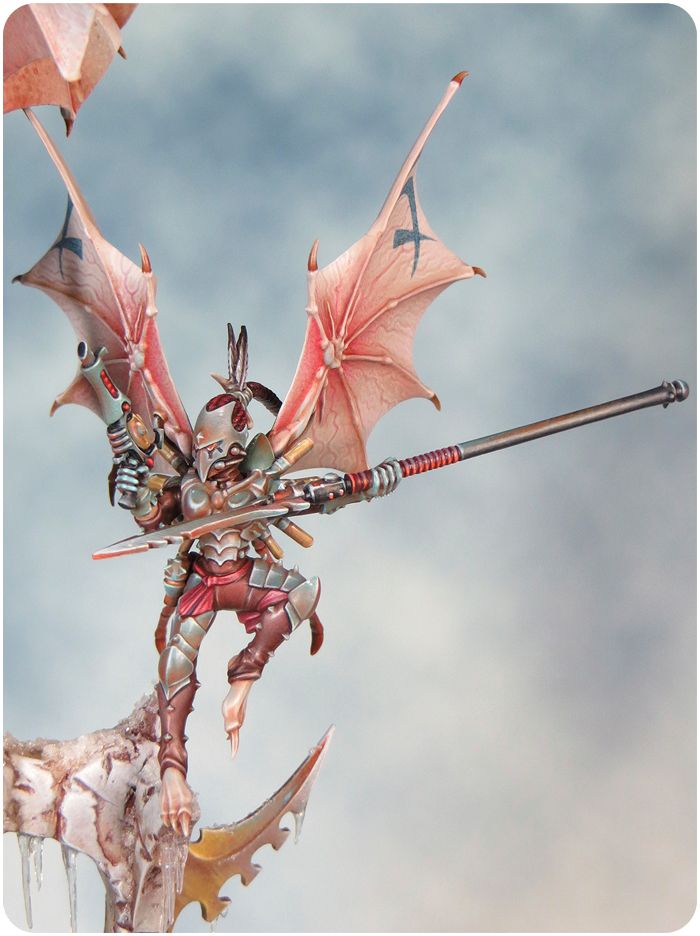
Here are the pics of my finished Dark Eldar diorama.
Winner of the Gold Award in the Diorama category and the Slayer Sword at GDUK 2013.
You can find the Diorama on cool mini here: http://www.coolminiornot.com/342470?browseid=6858398
Tuesday, 24 September 2013
Preparing for GDUK
The last week has been intense with mini painting pretty much taking over my life in the run up to GDUK but all the extra effort seems to be paying off.
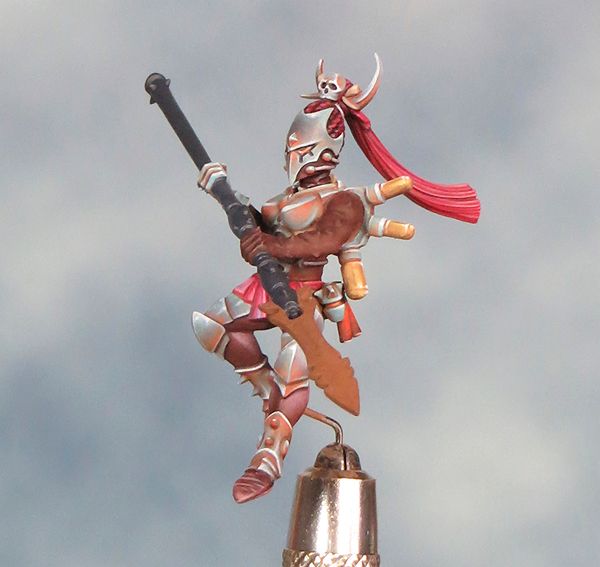
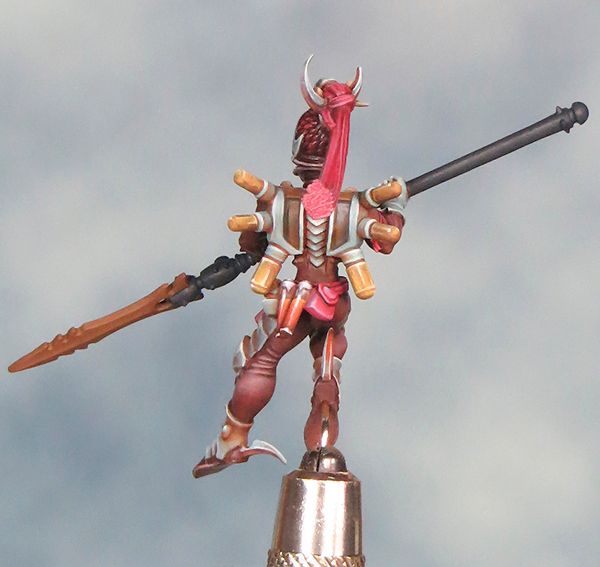
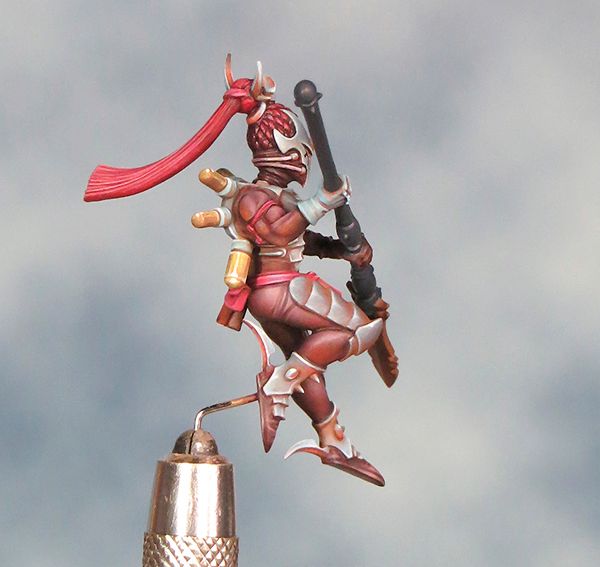
So, my Skink is almost finished and my plans are coming together when from the back of the figure cabinet something catches my eye. Those of you with good memories may recall that my Dark Eldar diorama started out as a totally different concept from the finished piece. The very first thing I painted for it was a Hellion and it has been sat in the cabinet ever since.
Because I was keeping my options open for the diorama I never based up the hellion and pretty much forgot about him when the concept moved on. But as the DE dio is finished it seems a shame not to make something out of the hellion. So with just a few days to go project Hellion is underway here at Sproket Towers. I'm keeping things simple not the least due to time but also because it would be easy to go OTT on a base in a fit of Golden Demon frenzy.
Just as the Skink stopped me overworking the diorama this will stop me overworking the Skink. Not that I don't already have enough on my hands with all the finishing touches I've planned!
I doubt I'll get round to posting anymore before GDUK (It's this Sunday - there's so little time!!!) so I'm planning a catch up & report after the event. In the mean time here are a few teaser pics some of which may or may not feature things in my GD entries.
So, my Skink is almost finished and my plans are coming together when from the back of the figure cabinet something catches my eye. Those of you with good memories may recall that my Dark Eldar diorama started out as a totally different concept from the finished piece. The very first thing I painted for it was a Hellion and it has been sat in the cabinet ever since.
Because I was keeping my options open for the diorama I never based up the hellion and pretty much forgot about him when the concept moved on. But as the DE dio is finished it seems a shame not to make something out of the hellion. So with just a few days to go project Hellion is underway here at Sproket Towers. I'm keeping things simple not the least due to time but also because it would be easy to go OTT on a base in a fit of Golden Demon frenzy.
Just as the Skink stopped me overworking the diorama this will stop me overworking the Skink. Not that I don't already have enough on my hands with all the finishing touches I've planned!
I doubt I'll get round to posting anymore before GDUK (It's this Sunday - there's so little time!!!) so I'm planning a catch up & report after the event. In the mean time here are a few teaser pics some of which may or may not feature things in my GD entries.
Thursday, 1 August 2013
Dark Eldar Diorama - Finished!
One of the early lessons I learned at art college was that it can be surprisingly difficult to get a new project started. A blank sheet (real or metaphorical) is a daunting thing. It takes discipline, and a deep breath, to make those first marks and get things started. Much the same applies to ending a creative project.
Having worked on my diorama for so long it's been been a bit of a wrench to put down the paint brushes. I've been fine tuning the details and there always seems to be one more thing to do before it's all done. The obvious danger is that rather than improving things I'll overdo or even ruin them so, with a cry of 'enough', I am declaring this project finished.
A big part of the problem is that at the moment I'm just too close to the project. All I can see are the faults and I can see lots of them! This isn't because I'm unhappy with the piece but rather it's on account of it not being perfect. I'm well aware that absolute perfection is quite impossible to achieve but that doesn't stop me trying because trying for and falling short of perfection how I improve as a painter.
This is something I go through with almost every mini I paint and It's not a problem. I just need to put my Dark Eldar diorama in the mini cabinet and ignore it for a while. Then I can move on to the next project (Chi Chi) and start trying for perfection (whatever that may be) all over again. In a while I'll be able to look at my diorama with a fresh perspective and judge more truly if any details need adjustment.
Perfect or not I'm very happy with my Dark Eldar diorama and I suspect that I'll leave well alone as it's time to move on and apply the lessons learned to something new.
Having worked on my diorama for so long it's been been a bit of a wrench to put down the paint brushes. I've been fine tuning the details and there always seems to be one more thing to do before it's all done. The obvious danger is that rather than improving things I'll overdo or even ruin them so, with a cry of 'enough', I am declaring this project finished.
A big part of the problem is that at the moment I'm just too close to the project. All I can see are the faults and I can see lots of them! This isn't because I'm unhappy with the piece but rather it's on account of it not being perfect. I'm well aware that absolute perfection is quite impossible to achieve but that doesn't stop me trying because trying for and falling short of perfection how I improve as a painter.
This is something I go through with almost every mini I paint and It's not a problem. I just need to put my Dark Eldar diorama in the mini cabinet and ignore it for a while. Then I can move on to the next project (Chi Chi) and start trying for perfection (whatever that may be) all over again. In a while I'll be able to look at my diorama with a fresh perspective and judge more truly if any details need adjustment.
Perfect or not I'm very happy with my Dark Eldar diorama and I suspect that I'll leave well alone as it's time to move on and apply the lessons learned to something new.
Tuesday, 23 July 2013
Dark Eldar Diorama - Work in progress
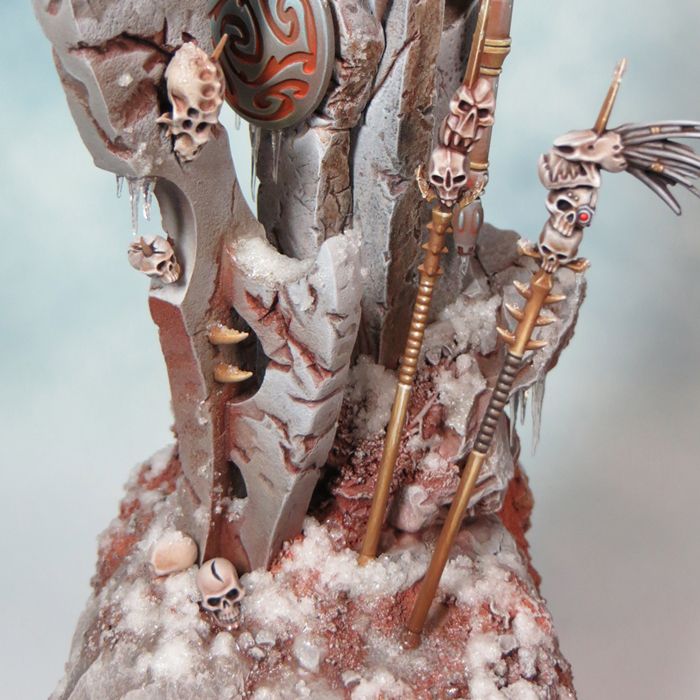
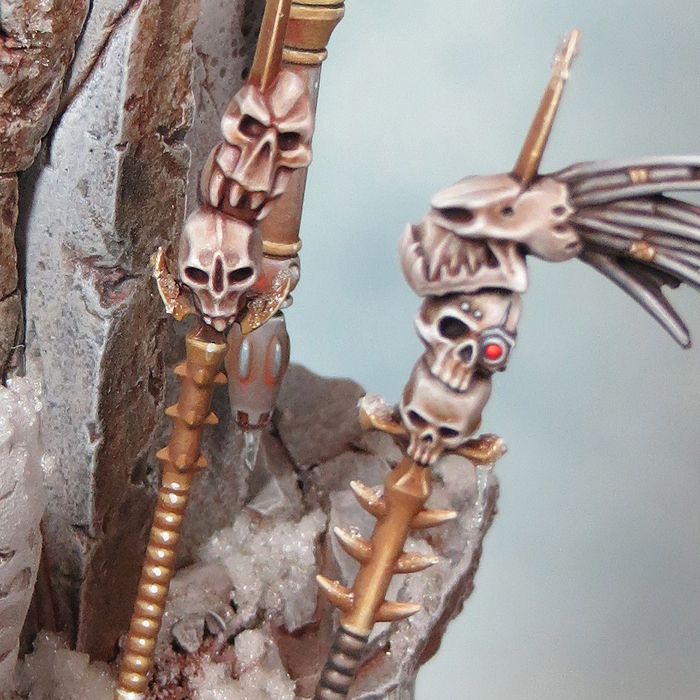
With the bulk of the ice & snow done I've taken the plunge and fixed the Scourge minis onto the spires. I'd planed this well ahead and knew exactly how and where the minis were going but I always find this step a nerve-wracking one. With the Scourge minis in place the overall composition is really coming together and I can now work on the finishing touches.
Thursday, 18 July 2013
It's Summertime - lets make some snow!
It's typical, just when I think I'm nearing the end of a big project everything grinds to a crushing halt! First I went and caught a cold in the height of summer and then I developed a chest infection followed by sinusitis. Painting has been the last thing on my mind although recent events could provide inspiration for a Nurgle themed piece (there really has been too much mucus in my life recently!).
On a happier note I'm now well on the road to recovery and so the Dark Eldar Diorama is back on my work bench.
I can't think of a less appropriate time but as the temperature soars and Summer has finally arrived I need to turn my attention to ice and snow effects. I've been planning this step for ages but it's only now that I can implement my ideas as I finally bring the overall composition together. My initial tests with snow and ice effects can be seen below:
Know your Snow!
Ice magic - making icicles
On a happier note I'm now well on the road to recovery and so the Dark Eldar Diorama is back on my work bench.
I can't think of a less appropriate time but as the temperature soars and Summer has finally arrived I need to turn my attention to ice and snow effects. I've been planning this step for ages but it's only now that I can implement my ideas as I finally bring the overall composition together. My initial tests with snow and ice effects can be seen below:
Know your Snow!
Ice magic - making icicles
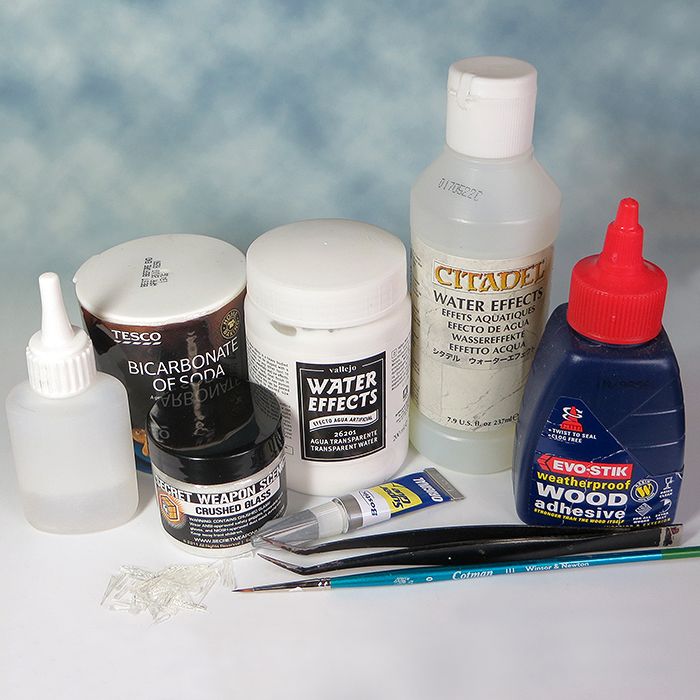
Before starting I gathered together all the materials I thought I might need so everything was to hand.
PVA Wood glue
Superglue - regular
Superglue - thick
GW water effects
Vallejo water effects
Crushed glass
Bicarbonate of soda
Tweezers
Icicles (made in advance)
Paintbrush (size 0)
The first step is to fix the icicles onto the base. I only applied a few icicles at a time carefully viewing the piece from all angles as I progressed to make sure I was happy with the composition. I tended to fix the bigger icicles on first and then work down in size to glue the small ones on last.
I applied dot of super glue thick to the base of each icicles and then positioned them using a pair of tweezers. I always made a test fit before applying the glue. Allow the glue to become completley dry before attempting the next step.
next paint on a little water effects to blend the icicle onto the base (and hide any visible super glue). I used a mix of GW and Vallejo water effects for this. I find that this gives me the best combination of flow (GW) and bulk (valejo). As with all water effects this is best built up in careful stages and allowed to dry between each stage as the water effects shrink a little as they dry.
Remember it's easier to add than to take away so it's really very important so take time building up the icicles and blending them onto the base in gradual stages.
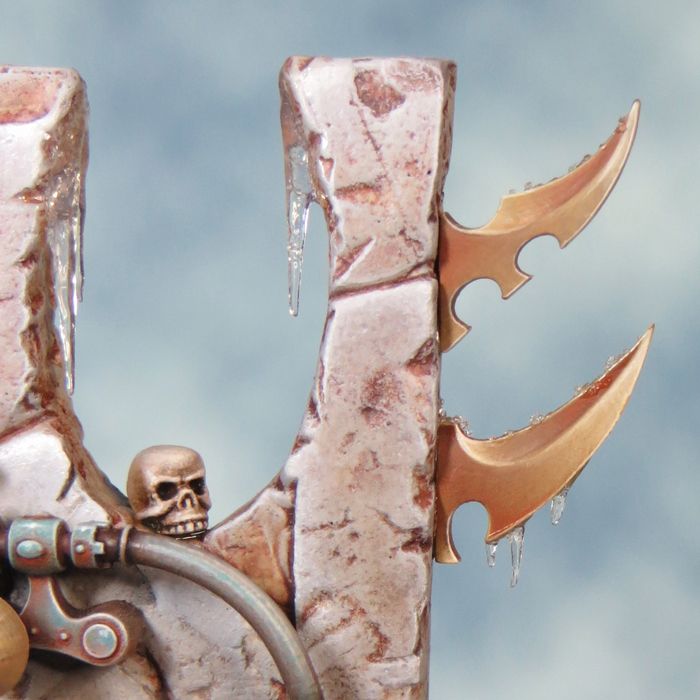
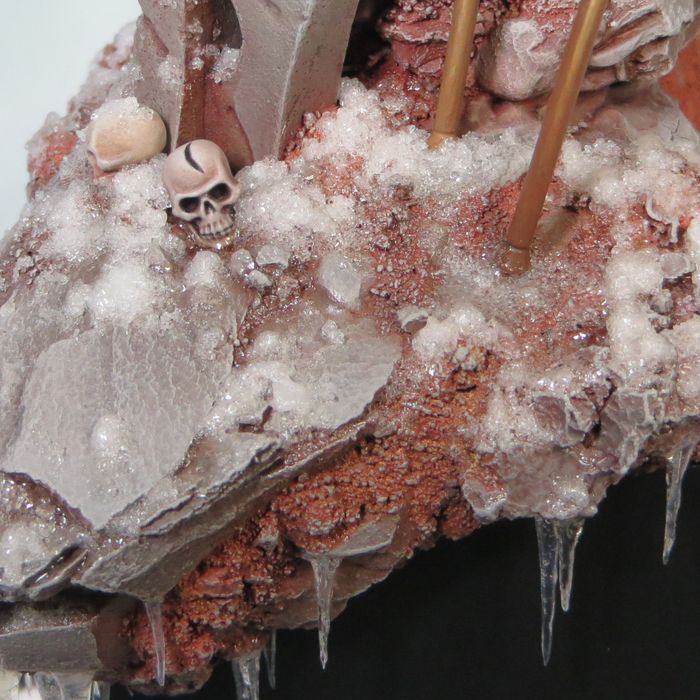
With the icicles sorted it's time to work on the snow. The important thing to remember here is that I'm going for a cold/wet/slushy look to my snow and ice. I had to constantly remind myself of this as I worked. Based on my earlier tests I decided to use a mix of GW water effects and crushed glass. The crushed glass came from Secret Weapon and needs to be used with due regard to health & safety. On no account should you (as I've seen it suggested elsewhere online) attempt to make your own!
I spooned a small amount of the crushed glass into a palette and mixed this with the water effects using a cocktail stick. I used the same cocktail stick to apply the snow mix a little at a time. Once again I'd recommend working in stages and letting each stage dry before you apply the next. This helps to gauge and control the finish as the snow's appearance will change quite a bit (generally becoming whiter and more defined) as the water effects dries.
It can help make the snow look more realistic to vary the mix a little so that some of the snow mix is whetter in places. Applying a little extra water effects so that it forms a few pools & puddles will also add realism & variety. Finally I add tiny amounts of snow to any edges that I want to have a light frosting effect on. This was done with a brush and at times I quite literalt positioned one crystal at a time. It's a fiddly job but worth the effort.
With the icicles sorted it's time to work on the snow. The important thing to remember here is that I'm going for a cold/wet/slushy look to my snow and ice. I had to constantly remind myself of this as I worked. Based on my earlier tests I decided to use a mix of GW water effects and crushed glass. The crushed glass came from Secret Weapon and needs to be used with due regard to health & safety. On no account should you (as I've seen it suggested elsewhere online) attempt to make your own!
I spooned a small amount of the crushed glass into a palette and mixed this with the water effects using a cocktail stick. I used the same cocktail stick to apply the snow mix a little at a time. Once again I'd recommend working in stages and letting each stage dry before you apply the next. This helps to gauge and control the finish as the snow's appearance will change quite a bit (generally becoming whiter and more defined) as the water effects dries.
Friday, 17 May 2013
Chee-Chee part 2
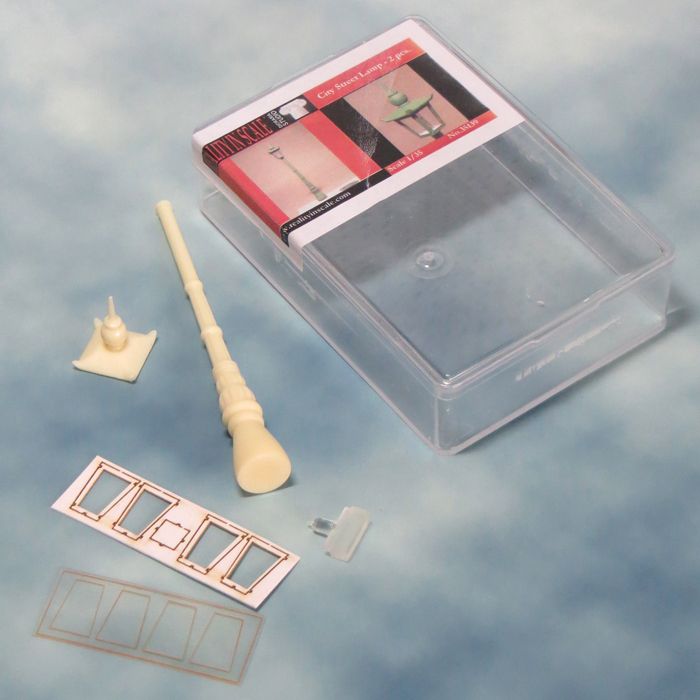
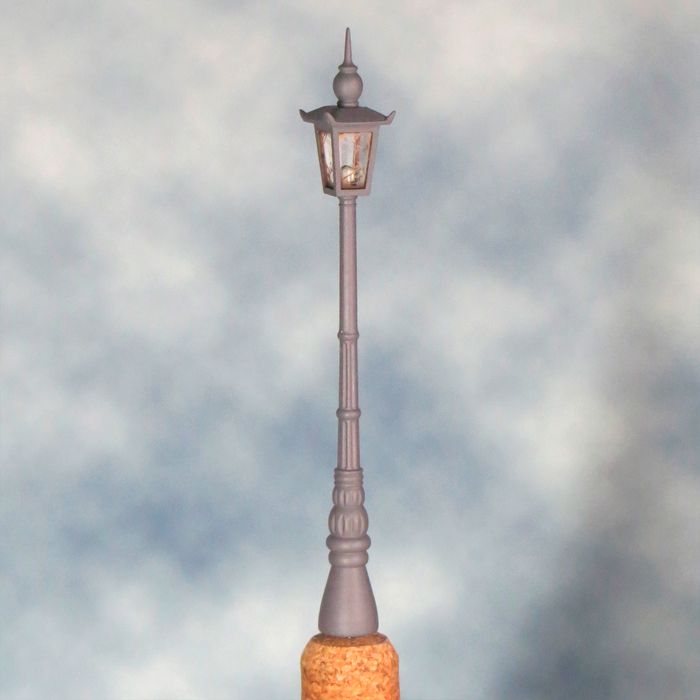
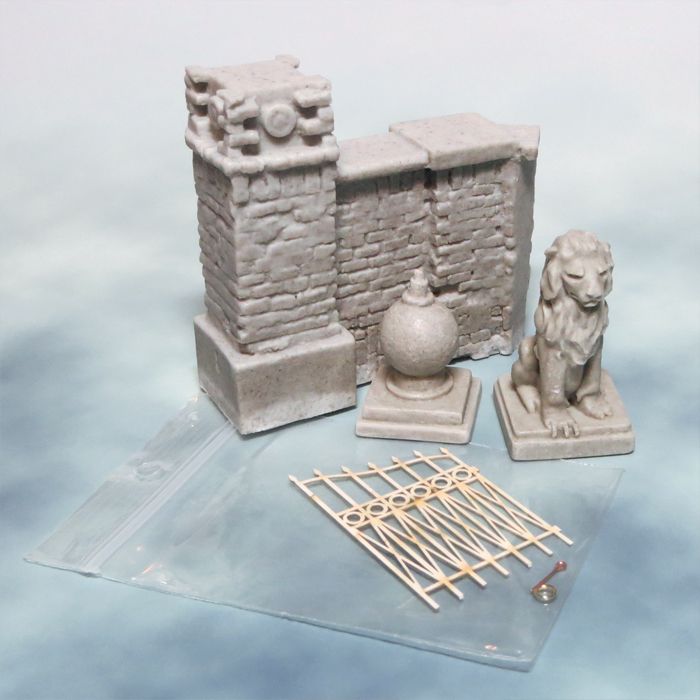
At the same time as I'm painting up my Scourge I'm making some preparations for Chee-Chee. The resin 'bits and bobs' I mentioned in my earlier post have arrived and I've begun some of the necessary work on them. I intend to create a scenic base for Chee-Chee and my idea is to have him bursting out from the gates of London Zoo and onto the streets . After a bit of searching Reality in Scale provided two of the elements I was looking for so I've now got my Zoo gates (well half of then any way!) and a victorian style lampost.
I'm very pleased with my purchases! The kits consist of a mix of materials including resin, lazer cut card and printed acetate. The lamp post come as a set of two so I've a spare if I ever want to do a Narnia diorama! The gateway is a pretty flexible kit and also comes with options for a wooden (resin) and wrought iron (lazer cut card) gate.
Assembly on the lamp post was straight forward although a bit fiddly. Not the least because I needed to paint the inside of the lamp before assembly. I may need to do a little work to customise these pieces and the overall composition will take a some careful planning but It's a good start.
I'm very pleased with my purchases! The kits consist of a mix of materials including resin, lazer cut card and printed acetate. The lamp post come as a set of two so I've a spare if I ever want to do a Narnia diorama! The gateway is a pretty flexible kit and also comes with options for a wooden (resin) and wrought iron (lazer cut card) gate.
Assembly on the lamp post was straight forward although a bit fiddly. Not the least because I needed to paint the inside of the lamp before assembly. I may need to do a little work to customise these pieces and the overall composition will take a some careful planning but It's a good start.

Tuesday, 9 April 2013
Painting the Third Scourge Part 5
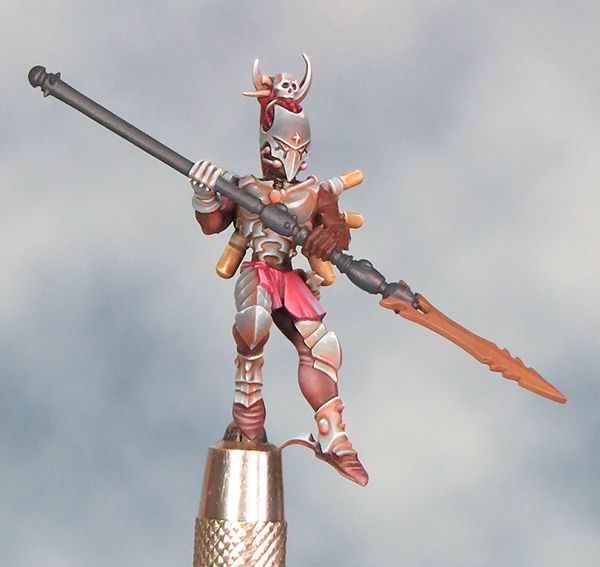
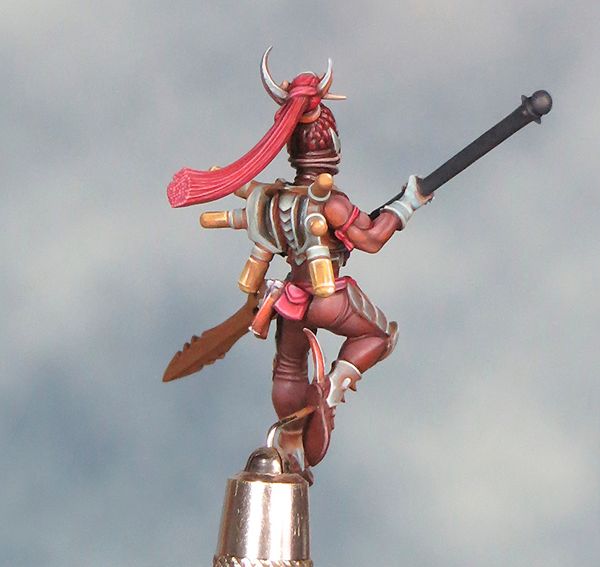
The Easter break was a busy one for me with a lot of travelling up and down the country to visit friends. In spite of this I've managed to have some quality painting time and as a result it really feels like I've made some progress on my Scourge mini.
The back pack, utility belt and one of the arms are now all but complete and with so much of the base colour covered up the mini looks a lot closer to being finished. I't been the usual mix of easy and hard with the belt being a joy to paint and the arm a total pain! I'll be very glad when I've painted the last bit of dark brown on the remaining arm as the colour has been a pig to get right.
A major improvement to the ease of the task came with the delivery of some new paint brushes. I'm still sold on sable but they don't seem to last me any longer than my old brushes. This may say more about me than it does about the brushes though! This time around I've gone for a slightly larger brush size using a 1 instead of my usual 00. I've been able to do this because the sable brushes hold such a good point and a larger brush brings the benefit of having a larger reservoir of paint behind the tip. I found that a 00 sable had an incredible fine tip for precise work but really held very little paint.
The back pack, utility belt and one of the arms are now all but complete and with so much of the base colour covered up the mini looks a lot closer to being finished. I't been the usual mix of easy and hard with the belt being a joy to paint and the arm a total pain! I'll be very glad when I've painted the last bit of dark brown on the remaining arm as the colour has been a pig to get right.
A major improvement to the ease of the task came with the delivery of some new paint brushes. I'm still sold on sable but they don't seem to last me any longer than my old brushes. This may say more about me than it does about the brushes though! This time around I've gone for a slightly larger brush size using a 1 instead of my usual 00. I've been able to do this because the sable brushes hold such a good point and a larger brush brings the benefit of having a larger reservoir of paint behind the tip. I found that a 00 sable had an incredible fine tip for precise work but really held very little paint.
Subscribe to:
Posts (Atom)