Showing posts with label Finished Work. Show all posts

Thursday, 29 September 2022

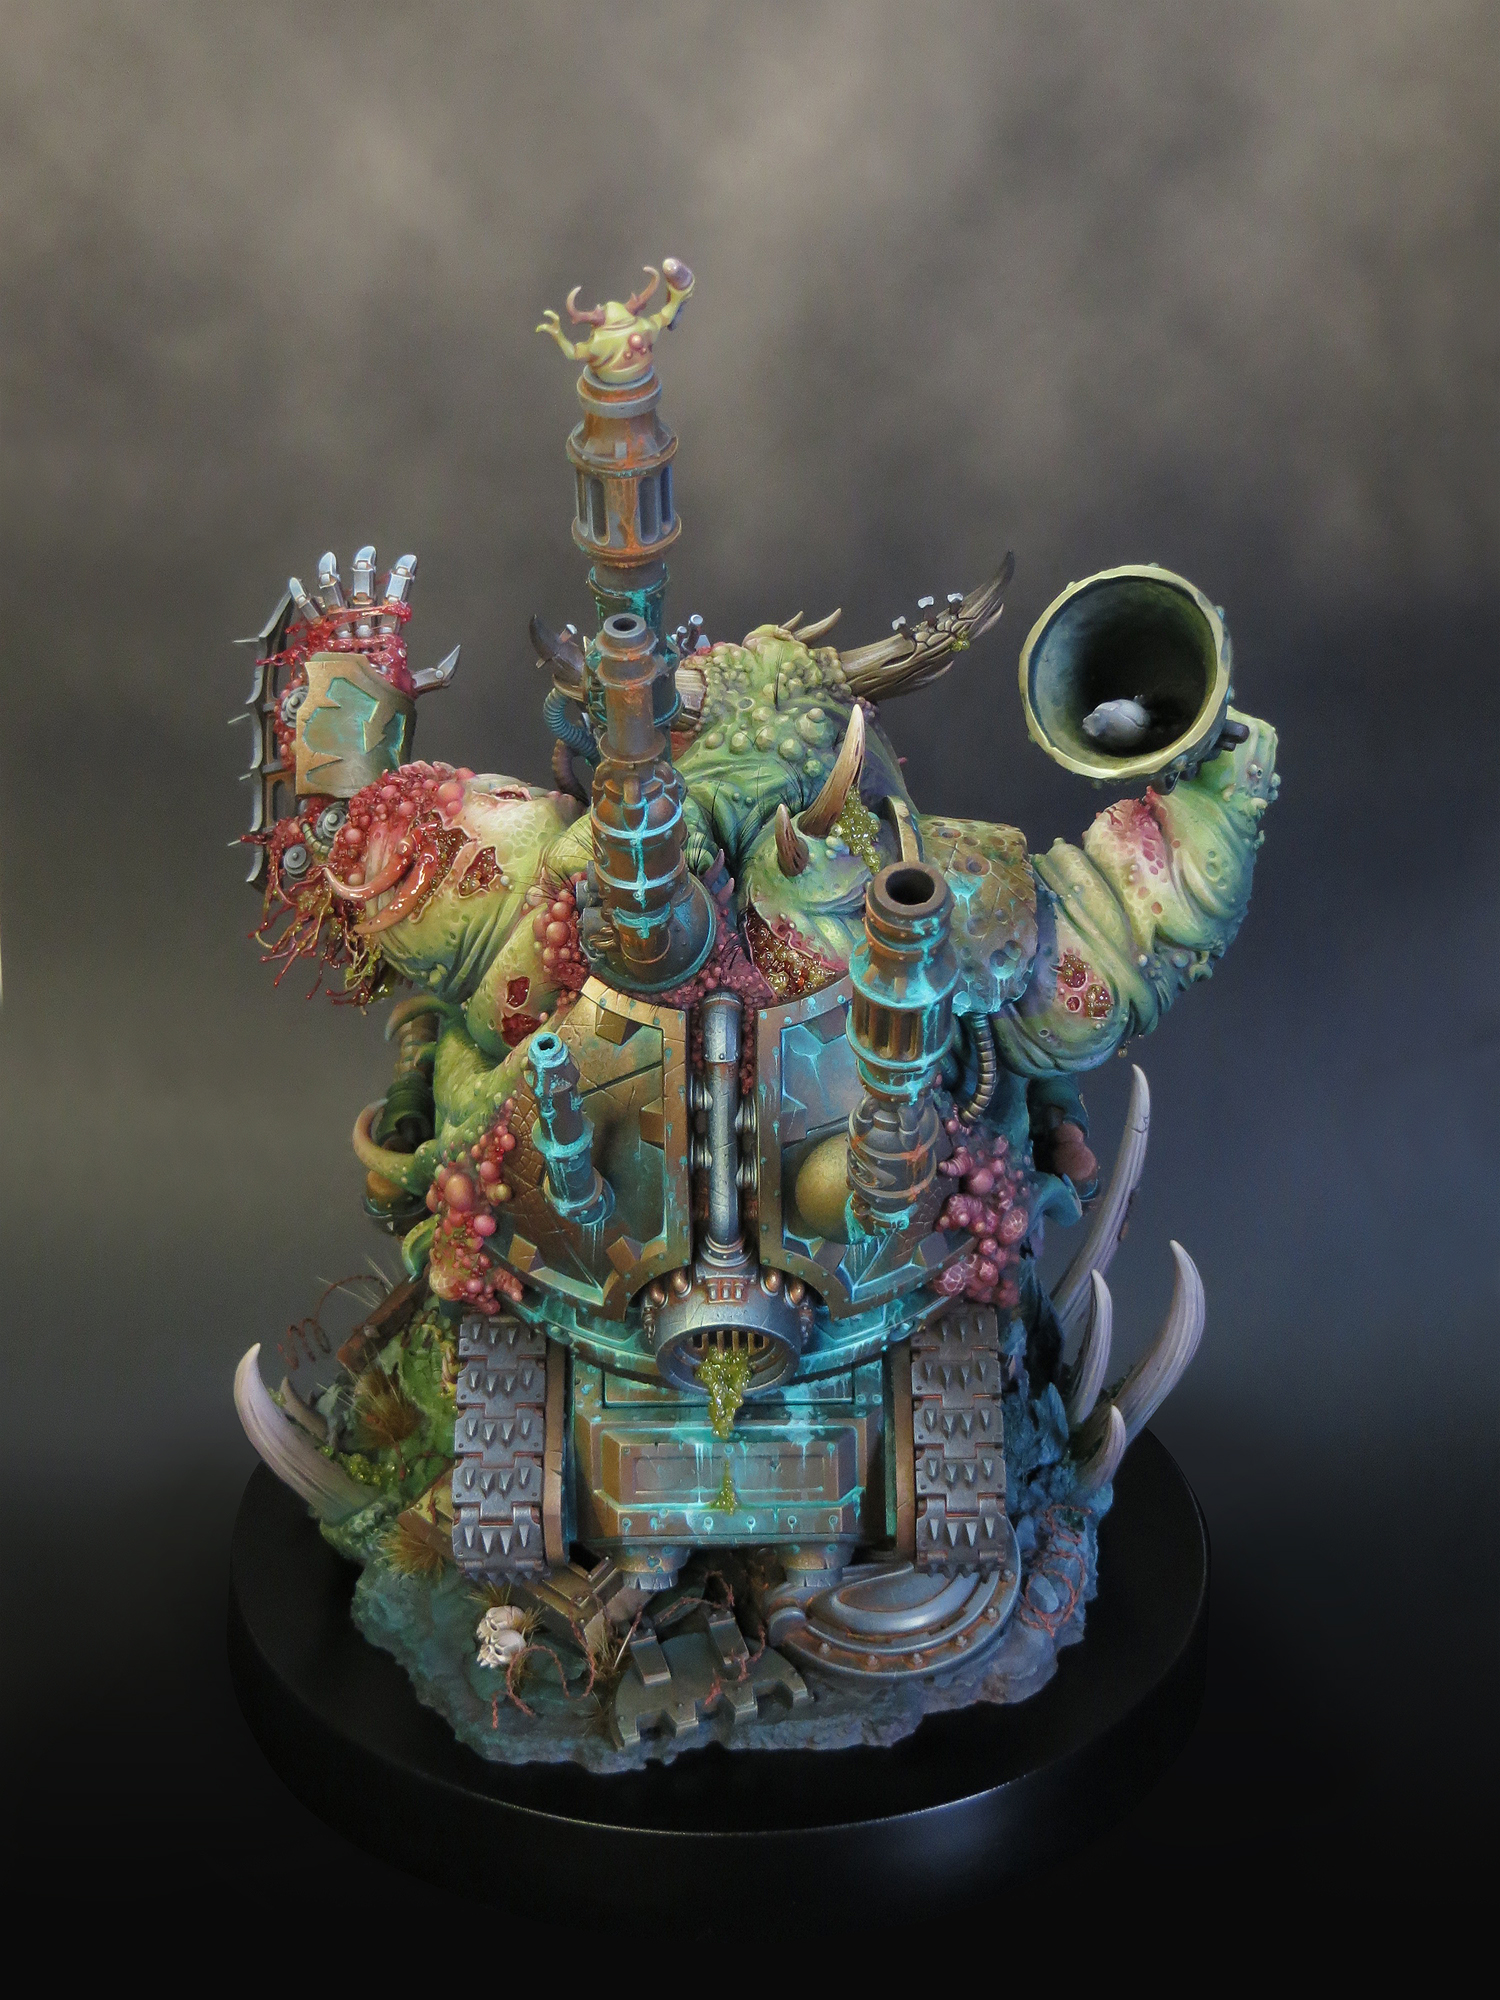
Project P30 - Part 15.

It's done!!!

It’s been an intense few months of preparation and painting but I’ve finished my Daemon Engine in time for Golden Demon UK 2022, which is now upon us! I’m very proud of how this project has turned out because I’ve done the very best I can. It has been a brilliant experience but it’s now out of my hands and into the GD cabinet for judging. Fingers crossed!

So it’s time to reveal the finished Tank in its entirety. 

My planned pre-GD blog updates fell by the wayside. Once I’m back home and the GD dust has settled, I will upload a series of posts detailing the stages of this project to its completion.

Monday, 21 September 2020

Basing the Kastelan Robot… oops I did it again!


The Kastelan Robot was painted as a demonstration model for my new weathering workshop. As such I hadn’t planned on basing the model. However, as the project progressed the model was turning out very nicely and it seemed like a wasted opportunity not to put it onto a base. So I began to consider my options and in the end I came down to just two:

  1. Fix the model onto a plain plastic gaming base, possibly with some minimal terrain detail. This basic option would serve the models function as a demonstration piece; or,
  2. Build up a more elaborate base to create an environment and narrative for the model. This would have the added advantage of turning the model into a potential competition piece.

Let’s be honest option two was always going to win out as that’s what I always end up doing. But I did seriously consider option one.

I think it’s best practice to consider your basing options right at the start of a project. That way your ideas for the environment and narrative can play a part in the development of the overall scheme. However, though not perfect, it is possible to paint a model and then think up a base for it.

The model had been painted to demonstrate weathering so I wanted to continue with this approach and feature some heavily weathered architectural elements on the base. I decided to build the majority of my base using Games Workshop’s Sector Imperialis Administratum kit.

My starting point was one of the broken columns and I built out from this using a selection of other ruinous elements. I wanted to have the Kastelan Robot framed by a combination of broken arches and windows. By using one of GW’s own kits I would also be setting my Robot in an apropriate environment.

Instead of using a plain gaming base I chose one of the Sector Mechanicus bases and then built a raised floor above this to give the base some extra depth. The entire base was then finished off with some dirt and rubble.

I was quite pleased with the resulting base. But please take note of my use of the word ‘quite’. I had a few doubts about the overall proportions and composition of my base. This is in no small part down to the base being something of an afterthought to the painted model. However, I went ahead and began painting.

As usual I painted my base using the same palette of colours as the model but switched around the proportions of those colours. For example, I used a base/shade colour of Rhinox Hide but switched around the green and off white so that, on the base, the green was a dominant colour while the off white would only feature on the scattered skulls.

Painting was off to an OK start but my nagging doubts were now in full flow! Something about the base just felt wrong to me. It was time to stop work and think very carefully. If you are a long time follower of this blog you’ve probably guessed exactly where this is all going because we now get to the ‘oops I did it again’ bit.

The overall composition was too busy, obscured the Robot from several angles and was in danger of overpowering the model. In addition the design looked slightly clumsy and inelegant. I also felt that my decision to use pre-made building elements was a bit lazy and had influenced my design choices too much.

My solution was to start over again. This time I would construct a far simpler base that was less reliant on the Sector Imperialis Administratum kit. Construction began in the same way as the first base with a column. But the new base would not feature any of the wall or window elements. Instead I used plaster and Milliput to build a surface of broken slabs and rubble. I used a few bits of window frame from the building as further wreckage that, along with the column, would frame the Robot.

Straight away I was much happier with this more streamlined approach and, once I began painting, I found a whole new energy and enthusiasm for the project.

After painting the base, I pinned my Kastelan onto it and began work on the finishing touches. These consisted of the inevitable skulls and grass tufts but also some barbed wire to help give the base the feel of a warzone. The very last thing was the addition of some fine dirt and rubble around the feet and some subtle brown washes on the green slabs.

So once again I went over the top with my basing plans and then had to rein my ideas in. This doesn’t bother me too much because I think it’s preferable to tone down an OTT design than it is to have to go the other way.

The finished base feels like the same sort of environment that I tried to create with my first attempt; but it’s now done more simply and I think it’s more effective for it!

At the start of this post I mentioned my new weathering workshop. Sadly the current situation with Covid-19 means that I’ve had to cancel all of my workshop dates this year. I thought very hard about this but with the best will in the world, and as I have asthma, there is no way I could deliver a workshop to the standard I expect while keeping socially distanced.

Hopefully we can all get back to meeting at workshops and competitions some time next year but, in the meantime, let’s keep safe and keep painting!


Sunday, 1 March 2020

Rockgut Troggoth Part 9. “Lob it, don’t drop it!”

Rather than writing a great long post I’m going to keep things fairly brief and make this a photo-focused piece.

It’s been a whole year since I actually finished a project! Not that I haven’t been busy since but a combination of workshops, long term projects and life in general has kept me on the go without actually getting to the end of a project. Until now that is because my Troggoth/Goblin project, now titled “Lob it, don’t drop it!” is finished!


If your not already sick to death of seeing my Troggoth here are a few close-up pics showing the detais (and brush marks).


I’m going to talk about how I brought the all elements together and finished the project in my next posting.

But in the mean time I have cause for celebration. I’d been looking forward to the Iron Skull painting competition for some time but, until the end of last week, it was looking like I wouldn’t have anything to bring along. With everything that happened at the start of the year my thoughts were not on painting or competitions.

Then when my Troggoth project came together, in what I can only describe as a super productive painting frenzy (again more on that next time), I suddenly found myself with an entry. Not that that prevented my usual pre-show nerves and jitters but they were rewarded with a major success!

The Iron Skull Trophy for 'Best in Show'
Gold Trophy for Scene/Duel/Diorama

I’m so very pleased and proud that my Troggoth won gold in it’s category Scene/Duel/Diorama. Then, to make an already great day even better, it went on to win Best in Show!

Friday, 10 May 2019

Turning the Tide(caster)


I finished painting my Tidecaster back in July just as Mark began to feel unwell. I didn’t know it at the time but this was the start of the infection that would land him in hospital for a month. Naturally enough I put the Tidecaster away and got on with life. But she has always felt like a little bit of unfinished business. I never had the opportunity to give the mini that final finesse that can often make all the difference. I definitely had the feeling that something was missing from the overall paint scheme but I didn’t have the time to give it my full attention. When Mark came home and I returned to painting I wanted a fresh new project, so I broke out the Sloppity Bilepiper.

But now I have the time, and a very good reason, to take another look at my Tidecaster. When I started painting her it was simply because I liked the mini and that’s always the best reason to paint. But, in the time since I started, the Tidecaster was announced as the chosen miniature for the ‘Eavy Metal Paint Masters category in the 2019 Golden Demon. At that time I didn’t expect to be going to Golden Demon so I was a little disgruntled. However due to Mark’s improving health I am now able to attend and my Tidecaster will be coming with me!

I certainly wasn’t unhappy with what I’d achieved but I had that all too familiar nagging feeling that I could do a bit more. After careful consideration, and the advice of a few fellow painters, I decided to do the following:
  • Rework the Tidecaster’s face;
  • Add texture to the coral;
  • Tweak some of the highlights;
  • Add water effects to the fish.

The face


This was the single biggest issue and the trickiest change to make. I painted the face first and, as the overall scheme and contrast developed, it became clear that the face was too dark. It just didn’t stand out enough. In addition I felt my painting could be softer and smoother. My initial painting of the face felt a little harsh and I wanted something that would look both more passive and feminine. The Tidecaster is notable for having a very calm face counterpointing an active stance. She even has her eyes closed. I felt that her face should, quite literally be the calm focus at the center of the storm.

I had to go in with some very subtle glazes and soften out the transitions on her face. This was especially fiddly because I was also lightening her face to the point of having almost pure white highlights. In addition I worked a little blue into her jaw line and the space above her eyes. I had to take a couple of passes at all of this but I’m glad I stuck it out. I’m now much happier with my Tidecaster’s face and feel it’s appropriate to the nature of the character, as I perceive it.


The coral


This had the opposite problem to the face. My initial painting of the coral was too smooth to the point that it looked bland and unfinished. The solution was to add some texture. Rather than just stippling the coral I decided to paint some striated bands. This had the double benefit of adding a texture and increasing contrast. The final effect is quite subtle but I think it somehow brings the coral to life.

The highlights


This was the subtlest of the changes I made and although it probably makes no great difference I at least know that I’ve refined everything to the best of my ability. I smoothed out some of the highlights on her cloak and sharpened some of the highlights on her armour. Never forget to adjust your painting to reflect the type of material you are trying to represent. Material contrasts are just as important as hue, tone, and saturation! I also added a touch more saturation to the highlights in the gold trim on her cloak.


The fish


This was definitely the least subtle of the changes I made! I based the paint scheme for the fish on a striped marlin and, although I liked the colour and pattern, I felt it looked somehow a bit unfinished. Even worse, to my eye, the fish didn’t quite belong with the rest of the mini. The solution I came up with was to make my fish look wet. I’ve had issues with painting aquatic and semi-aquatic animals before and I wasn’t going to be called out for having a dry fish!

Three coats of high gloss varnish have transformed my fish to something that now looks wet and sleek as it glides through the air. I’ve enhanced this with the addition of a few droplets and streamers of water trailing from the tail and fins. These emphasize the movement in the fish but also add a visual link to the base and tie the fish into the same environment as the Tidecaster.


Overall none of the changes I’ve made to my Tidecaster are that major but they do all make a difference. I now feel I’ve done the best job I can on this mini and she’s as ready as she can be for the Golden Demons!

Monday, 4 February 2019

Sloppity Bilepiper Part 4

Apologies for the lack of regular post on this blog but with all my old routines gone my painting and posting is more than a little erratic. In truth I’ve decided to focus my hobby time on painting with social media and blogging taking a back seat for the time being. This is working out very nicely for me as I’m getting a little more painting time and, most importantly, I’m enjoying myself.

In my last post I had just about finished the Sloppity Bilepiper but I'd yet to paint his base. With the luxury of a little more time I’ve now done that and it feels so good to have completed a project. The process has been fairly intense as there was a lot of going back and forth to tweak some of the details.


As the Bilepipe, his nurgling companion and the base came together many of the tones, hues, textures and finishes were adjusted to balance out the overall composition. It was all a bit fiddly and in some places very subtle but it’s really helped to tie the elements together. It’s been a satisfying experience to finesse a project without any deadline pressure.


The base incorporates my first use of resin water effects for creating the puddle the Bilepiper is stepping in. Admittedly it’s a cautious use of resin but I wanted to start off with something straightforward before getting more adventurous. I can see myself doing more water bases in my future.


I’d initially intended to keep the slime and drips to a minimum but as the project developed I realised this was not the right mini for that approach. He is after all called a SLOPPITY Bilepiper and that suggests more than a little sloppyness. So out came the microbeads, UHU glue and plenty of gloss varnish. My Bilepiper is now appropriately sloppy and is pipes are oozing bile!


In contrast to the slime I wanted to add some rough textures for the mould and corrosion. In the past I would have used my old friend baking powder but I’ve finally found what seems to be a perfect replacement. Chinchilla bathing powder, a mixture of mineral sand and calcium powder, has the right texture and best of all takes and holds colour very well! Fingers crossed it will, unlike baking powder, be stable over the long term.


So there we have it, the finished Sloppity Bilepiper. I started this as a ‘quickie’ after Mark came home from hospital but, as usually happens, the project drew me in and I’ve invested a lot of time into it. But I think it’s been time well spent because I’m very happy with the finished result and painting the Bilepiper has helped me get into the swing of a new painting routine!

Monday, 27 August 2018

The finished Isharann Tidecaster

Apologies for my absence! If you’ve been following me on Facebook you may have read that my partner Mark has been very unwell and in hospital for the past month. Obviously Mark is my top priority and I was effectively ‘offline’ for the duration.

Thankfully Mark is now much recovered and back home where he belongs. My hobby time is still limited but it’s time to start the ball rolling again. So without further ado here is my long delayed, but finally finished, Isharann Tidecaster!