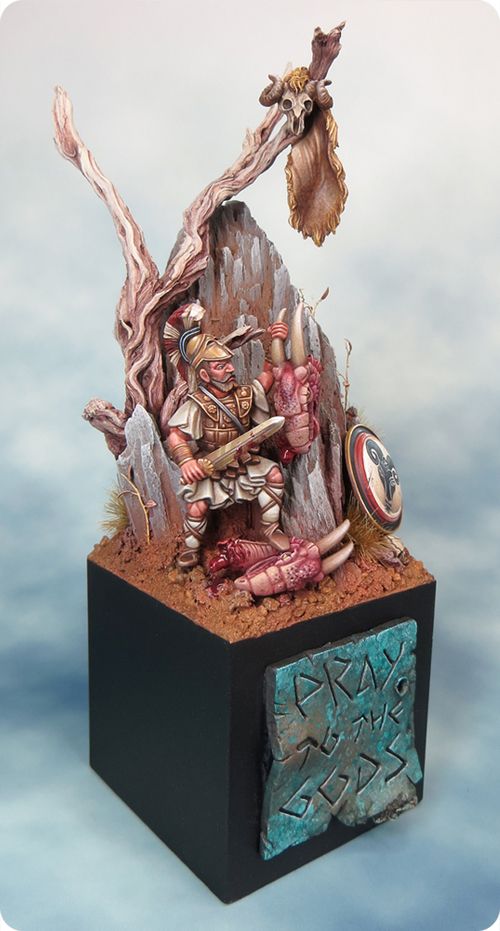
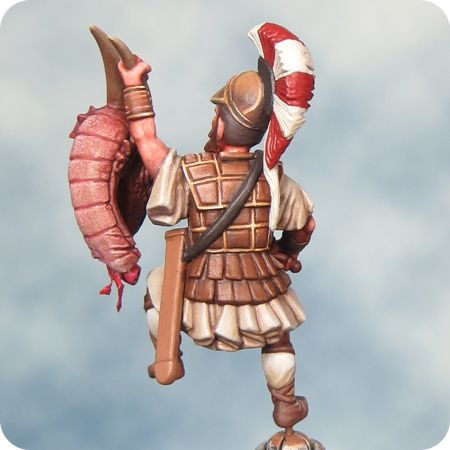
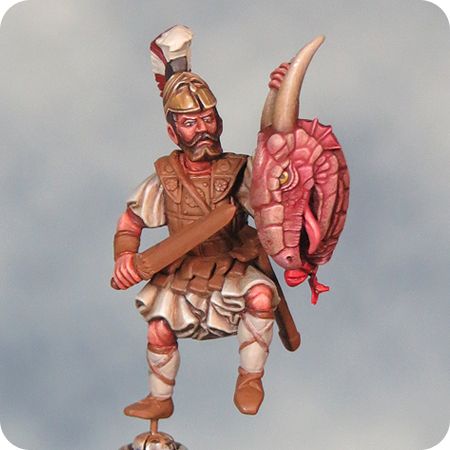
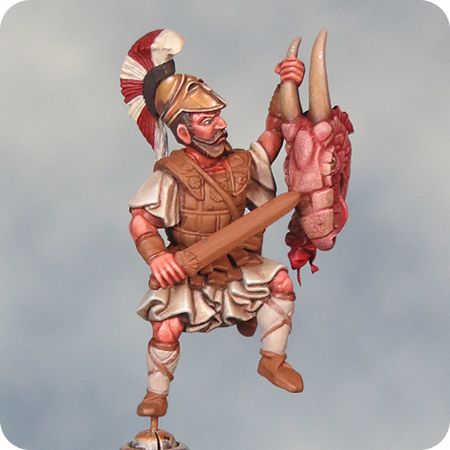
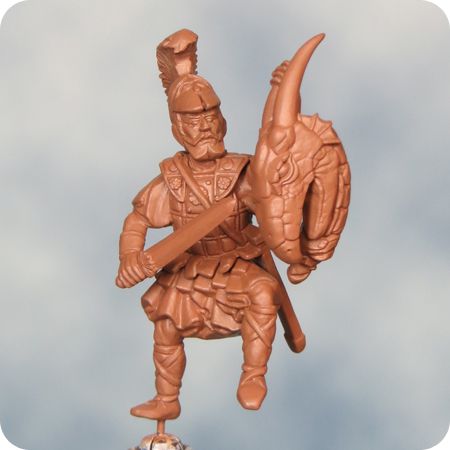
Here's my long promised report on painting Jason for Salute. The intention is to fill in a few of the gaps from my earlier posts. They were a bit short on detail due to the pressures of ill health and a looming deadline!
The miniature
Jason is not an especially dynamic miniature and some areas are a bit chunky but what, in my opinion, saves the mini are the ‘extras’ that come with him.
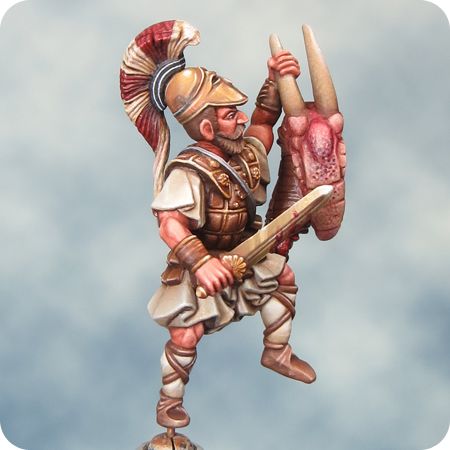
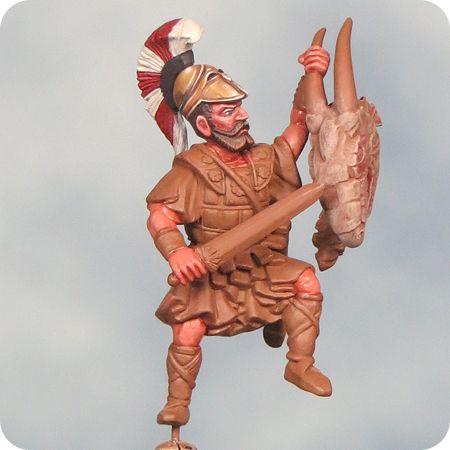
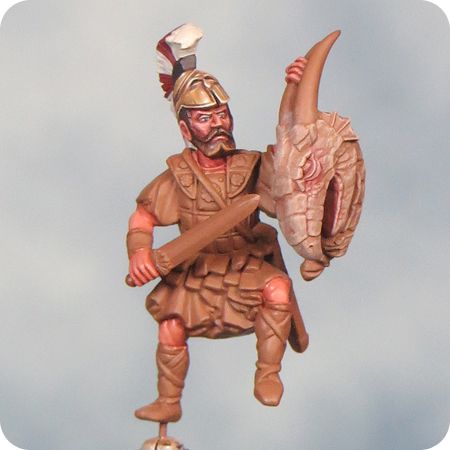
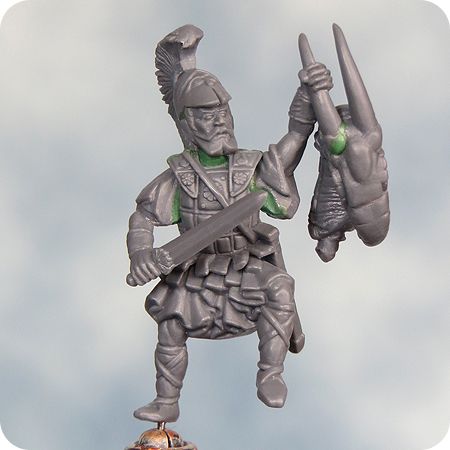
Jason comes with the options of an arm holding up either a severed hydra’s head or a shield. There is also a fallen statue as a part of the base. While Jason himself is a little bit bland, the extras are the best and most detailed parts of the kit. Straightaway I decided to use as many of these parts as possible and particularly to make a feature of the hydra’s head.
When I first took a quick look at the mini I assumed that the statue’s head was a spare helmet-less head for Jason. This planted the seed of an idea. A little bit of chop and swap surgery was performed and my Jason had a new head. Similarly some careful cutting, drilling and pinning enabled me to re-position the hand holding the hydra’s head to better advantage.
The colour scheme
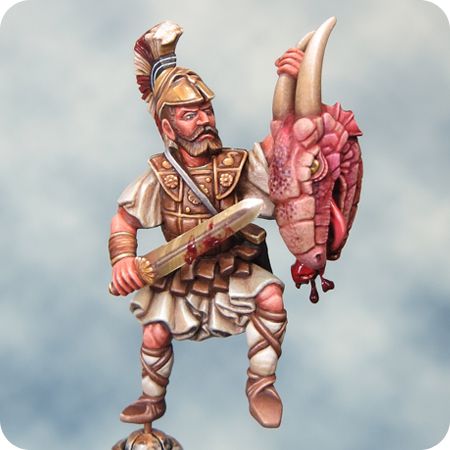
To be honest I didn’t think things through in advance this time. Instead I figured out the colour scheme as I went along. I knew that gold/bronze tones would feature and that Jason’s tunic would be white, but I was initially undecided on what colour to paint Jason’s leather armour . The mini is based on the film ‘Jason and the Argonauts’ so black would seem the logical choice, but as the paint job progressed I became less sure.
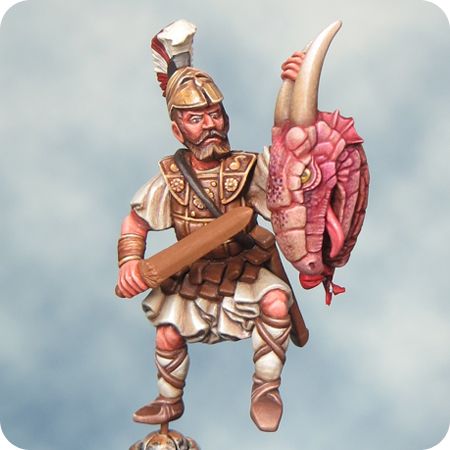
It was with the hydra’s head that I fixed the colour scheme. My initial idea was that it would be a greenish grey with red accents. As soon as I started painting the head I decided that red was the way to go and ended up using colours very similar to those on my Scourge wings. It’s often the way that regardless of how much I think things through I’ll end up following a gut feeling about my colour choices and adapt my ideas as I go along.
With the introduction of a significant amount of red into the colour scheme I decided to stay with an exclusively warm palette and paint the leather armour brown and gold.
The base
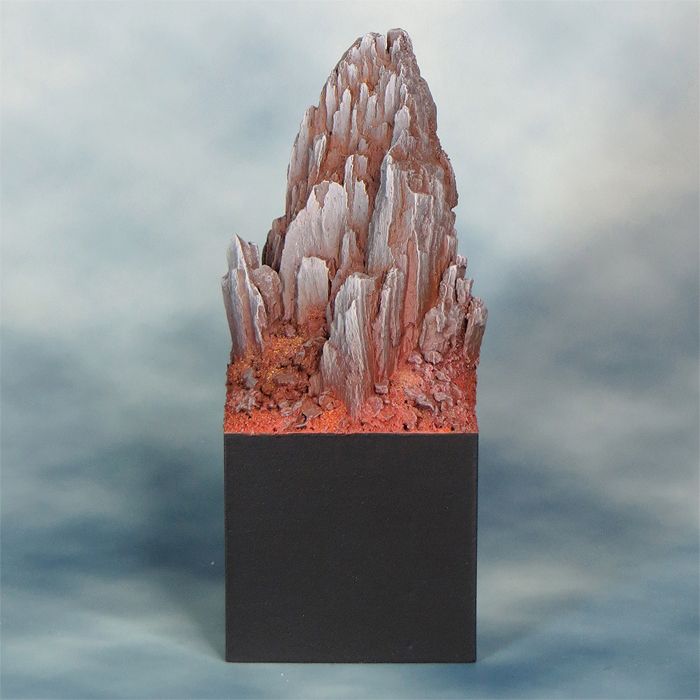
Jason’s base was made and painted a year ago in preparation for Salute 2013. I had intended to use it for my Dark Eldar Hellion but decided (wisely I think) against it at the last minute.
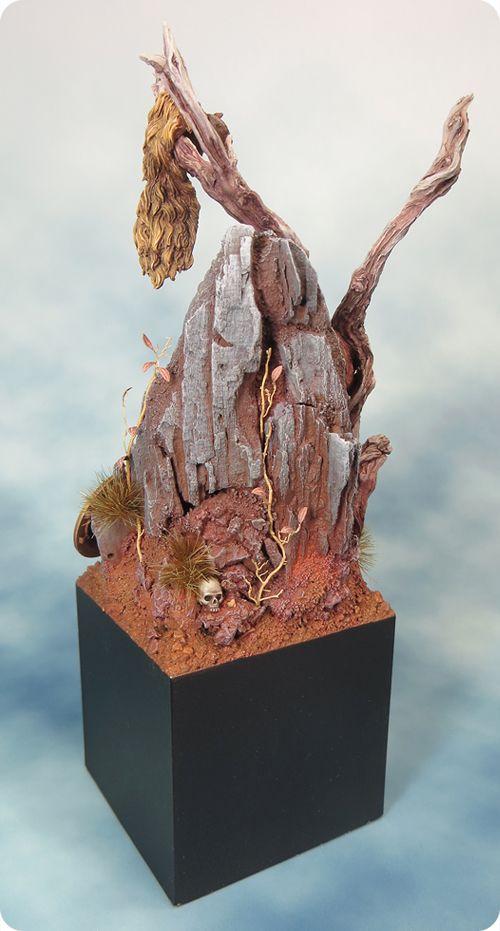
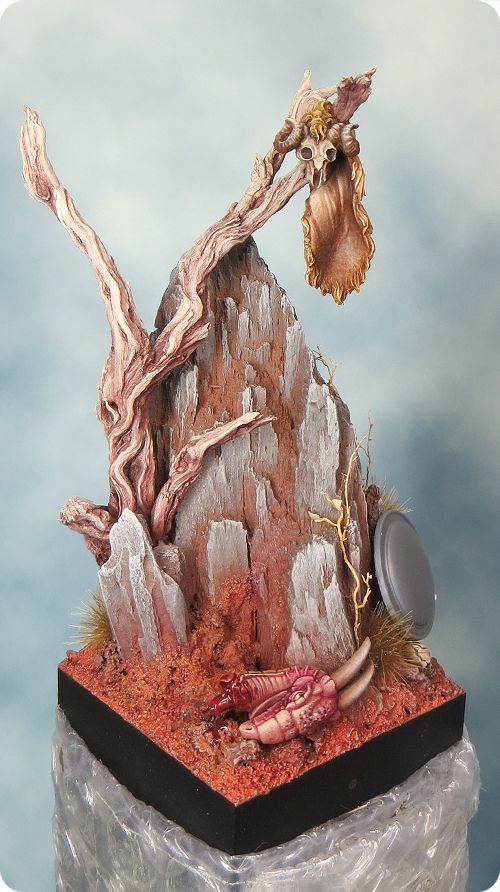
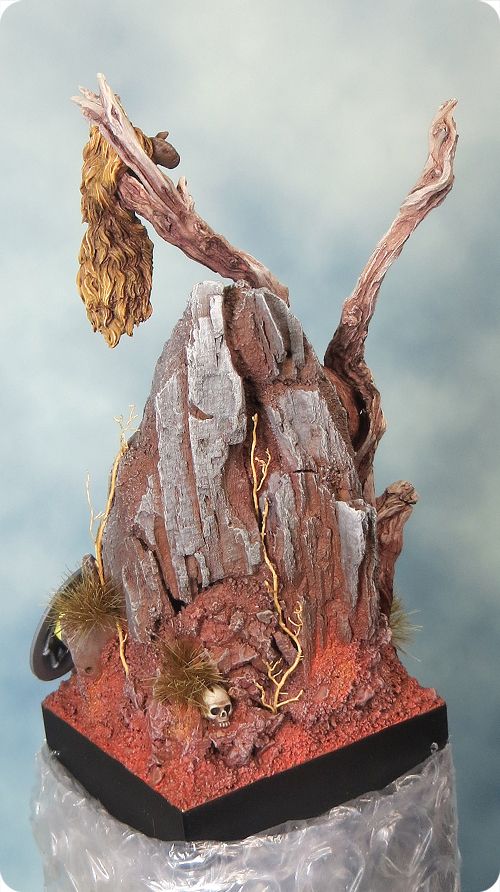
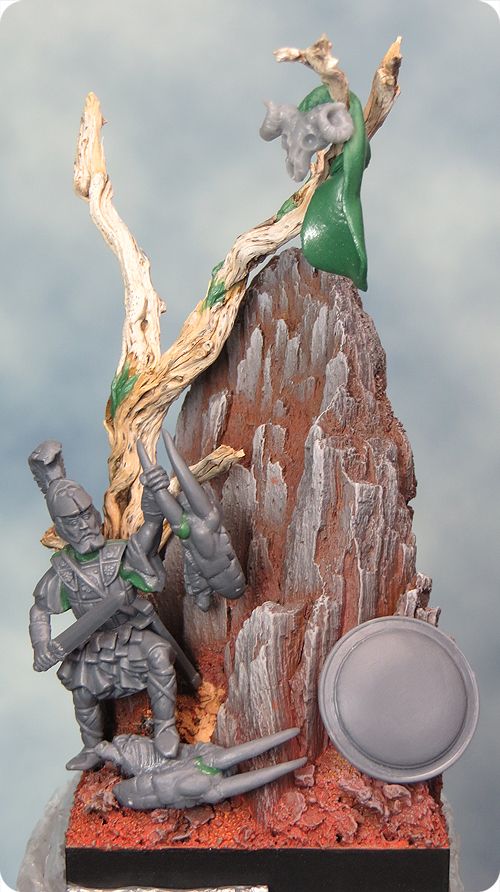
The shape of the rock suggested an off-centre positioning for Jason. As this could result in an interesting composition, I went with the idea and assembled the elements of the scene accordingly. Although the base was ‘finished’ it required quite a bit of reworking to adapt it to the golden fleece scenario. The addition of the tree (made from pieces of root) went surprisingly smoothly and it integrated into a split in the rocks as though I’d always intended it. The integration of Jason into the scene was a little trickier and I had to carve out a lot of material to make it work. Fortunately I’d built a lot of the groundwork with cork and it was possible for me to dig out and rebuild the area for Jason to stand on. I used cork in the same way on my Scourge base and I find it to be a really useful and flexible basing material.
I also needed to repaint the ground. Partly to cover up and incorporate the changes but also because the orange colour I had used was far too strong for the base’s new purpose. I didn’t want to cover up all of the orange so I decided on using a sucession of washes and glazes. I mixed up some golden brown tones and built up layers of colour until I was happy with the result. As the rock element were heavily dry-brushed I decided against using any dry brushing on the other groundwork . I like the look that dry brushing can give but it needs to be combined and contrasted with other textures. It is very easy to have too much dry brushing on a model!
The Shield
I decided to use Jason’s sheild as a decorative element and as a way of incorporating some freehand decoration in the overall composition. The idea to feature a ram’s head design was inspired by the design on the sail of the Argo in the film. The actual design used in the film looked to me to be more 1960’s than Bronze Age so I came up with one of my own that I felt was more in keeping with the period.
Painting freehand designs can be a daunting prospect. It helps a great deal to mark in an outline or guide marks prior to painting. As the design was to be painted onto a smooth shield there was an even better option available that I learnt about back in the 1990s. I drew the design onto a piece of lightweight (layout) paper and then glued that onto the surface of the shield. This is an especially helpful technique as I wanted to get my ram’s head design as perfectly symmetrical as possible. To that end, I decided to go one further and construct the design in Adobe Illustrator, a programme I use on a daily basis in my role as a designer/illustrator. With the illustration constructed I was able to reduce it down to the correct size and print it out ready for pasting onto the shield.
It would be nice to think that having gone to all the effort of creating the image in Illustrator I could just glue it in place and be done with the job. Not so. Although the print out was a huge help as a guide to painting, the image, even when printed at the best possible quality, wasn’t crisp or clear enough to use on its own. I also think that even the best printed image stuck onto a mini will look exactly like what it is – a printed image stuck onto a mini.
Regardless of whether you are printing out your design or hand-drawing it you will need to fix it onto the shield seamlessly. First cut the design out to the size and shape of the shield. Next you will need to sand down the edges of the paper from the back and it is as fiddly as it sounds. The idea here is to create as thin and tapered an edge as possible. If you get this right, the paper will stick onto the shield with a seamless edge. To fix the paper onto the shield I used slightly diluted Vallejo matt varnish. I soaked the paper in the varnish solution for a couple of minutes to soften it. Then, using a clean paintbrush, positioned it onto the shield smoothing out any air bubbles or wrinkles. Once dry an extra coat of matt varnish will help to fix the design and seal the paper ready for over painting.
Showing posts with label Jason. Show all posts
Tuesday, 6 May 2014
Tuesday, 15 April 2014
SALUTE 2014 - a brief report.
Salute felt like a much bigger event in every way this year (not that it wasn’t big last year!). I thought the painting comp was tougher with more entries in general and more entrants coming over from other countries. The judges really had their hands full with what looked like a huge number of finalist to sort in a relatively short time.
Just like last year the day seemed to go in a flash! There was loads to see
and a ton of cool people to meet and chat about minis with. Getting to meet up with fellow enthusiasts at these events is one of
the best things about them! Despite all of the opportunities I resisted the
inevitable urge to spend too much money but I found it pretty frustrating. I saw so many beautiful minis that I would love to paint but I’ve got to be
realistic. There’s no point buying a load of stuff I’ll never get round to
painting. Having said that I did get my hands on a couple of very nice pieces
from Infamy and Twisted that I'm quite excited about painting so expect more steam punk from me in the future.
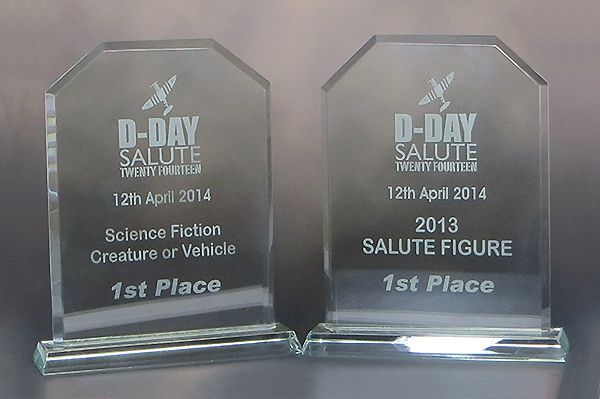
To cap off what was already a very good day both Jason and
Chee-Chee got first in their respective categories.
My promised write-up on
Jason has been a bit delayed by preparations for Salute but now that’s all over I‘ll be posting it as soon as I can.
Monday, 31 March 2014
Jason - Finished
Monday, 24 March 2014
Jason - Part 6
This week my attention has been on Jason's base, but before I could get any painting done I had to finish sculpting the golden fleece. This was a fiddly job but I find it helps if I break sculpting down into stages. It takes longer to do this way but by allowing each stage to set before I start the next it's easier to build up the volumes and textures.
With the fleece sculpted could turn my attention to painting the tree. I used layers and glazing for this and I think it gives a more interesting finish compared to the tree I painted for my Tomb King with dry brushing.
The base is still very much a work in progress but the pics below show how things are progressing.
With the fleece sculpted could turn my attention to painting the tree. I used layers and glazing for this and I think it gives a more interesting finish compared to the tree I painted for my Tomb King with dry brushing.
The base is still very much a work in progress but the pics below show how things are progressing.
Tuesday, 18 March 2014
Jason - Part 5
A chest infection has put a major crimp in my painting plans and the weekend didn't see very much time painting. On the good side antibiotics (shake me & I'll rattle I'm so full of pills!) have come to the rescue and I'm on the mend.
I did manage to get a little quality painting time last week, before Nurgle stuck, and I've just about finished painting Jason.
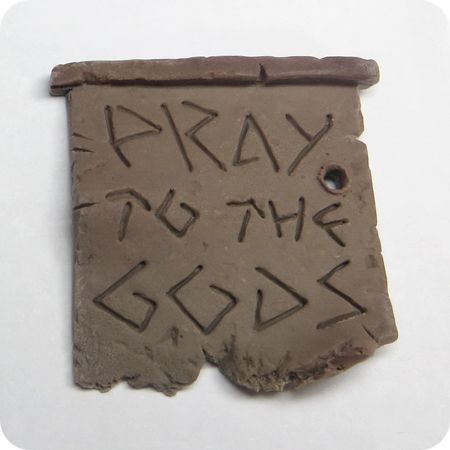
I'm now focusing my energies on the base with the second Hydra's head and the Golden Fleece to paint as well as a number of tweaks and adjustments to the terrain. I've also started work on a label for the plinth. I'm looking to pull all the elements together so that I can get a feeling for the overall piece and make sure it works as a whole. I'm very aware that April 12 is getting a lot closer!
I did manage to get a little quality painting time last week, before Nurgle stuck, and I've just about finished painting Jason.
I'm now focusing my energies on the base with the second Hydra's head and the Golden Fleece to paint as well as a number of tweaks and adjustments to the terrain. I've also started work on a label for the plinth. I'm looking to pull all the elements together so that I can get a feeling for the overall piece and make sure it works as a whole. I'm very aware that April 12 is getting a lot closer!
Tuesday, 11 March 2014
Jason - Part 4
I’ve been putting some extra hours into painting Jason and it feels like I’m making progress! The mini has proven to be deceptively tricky to paint. It always seems to need that little bit of extra attention to make the details pop but I think the effort is finally proving worthwhile.
I’ve gone back over the Hydra’s head (again) with a little purple glazing to enrich the colour and shadows. I’ve also added some stronger stippling to the forehead area to create a skin pattern of sorts and I think it adds a lot more interest to an otherwise bland area.
Jason’s costume and armour are now beginning to come together and it’s been fiddly work but I’m finally getting a feel for the finished look of the mini. Once Jason is done I’ll turn my attention to his shield and what will be my first proper bit of freehand for many years – no pressure there then!
I’m also starting to do a little prep on the base ready for when the mini is finished. There are a lot of little touches that the piece will need to bring everything together and finish it all off. That’s not something I want to get caught out with by leaving it to the last minute.
I’ve gone back over the Hydra’s head (again) with a little purple glazing to enrich the colour and shadows. I’ve also added some stronger stippling to the forehead area to create a skin pattern of sorts and I think it adds a lot more interest to an otherwise bland area.
Jason’s costume and armour are now beginning to come together and it’s been fiddly work but I’m finally getting a feel for the finished look of the mini. Once Jason is done I’ll turn my attention to his shield and what will be my first proper bit of freehand for many years – no pressure there then!
I’m also starting to do a little prep on the base ready for when the mini is finished. There are a lot of little touches that the piece will need to bring everything together and finish it all off. That’s not something I want to get caught out with by leaving it to the last minute.
Monday, 3 March 2014
Jason - Part 3
I've been able to put in quite a few hours painting time this week as a result Jason has progressed fairly well. I've been concentrating on painting the hydra's head and I'm very pleased with how it's coming together.
I thought that I'd be painting it in a blue/green/grey colour scheme but as you can see it didn't work out that way! As the overall colour scheme has resolved itself it became very clear to me that red was the colour to use. I started off by applying a wash of baal red over the dry brushed under painting and then worked up successive washes and highlights. The final stage of highlights were built up using a fine stipple texture.
I've also painted up Jason's tunic and although it's OK for the moment I'll need to go back over it and refine the finish as the rest of the mini comes together.
I thought that I'd be painting it in a blue/green/grey colour scheme but as you can see it didn't work out that way! As the overall colour scheme has resolved itself it became very clear to me that red was the colour to use. I started off by applying a wash of baal red over the dry brushed under painting and then worked up successive washes and highlights. The final stage of highlights were built up using a fine stipple texture.
I've also painted up Jason's tunic and although it's OK for the moment I'll need to go back over it and refine the finish as the rest of the mini comes together.
Monday, 24 February 2014
Jason - Part 2
After a busy week I finally got to put some paint onto Jason over the weekend but first I made one more tweak to the mini. I've twisted the hydra's head around so its face is now more clearly visible in the final composition.
Having considered the colour palette using I've opted for a brown undercoat - so no surprises there.
The first task was to get Jason's face painted. Like many other painters I tackle the face as soon as possible as it sets the character of the mini and if you can't get the face right nothing will save the mini from disaster! To be honest I dread painting human faces as they can turn into an epic struggle to get things looking right. I was also a bit shocked to realise that it has been a few years (at least three) since I painted a humanoid mini with the face showing.
Overall things went surprisingly well. I picked a pinker base colour than I might normally use as I wanted a fairly ruddy complexion and then I went in with some washes to create some definition. After that I painted in the eyes and then I painted in the eyes again several times over. Once I'd managed something that wasn't too ugly or comical I moved onto building up some highlights. For me the process of painting a face is one of constant adjustment and refinement. I constantly moved back and forwards between the shade and highlights to develop the face slowly resolving the features and definition of the face.
Coming back to the mini the next day I repainted the eyes again. I've been using a sable brush and although it gives a beautiful crisp stroke it was too soft to get a good dot for the pupil. I switched back to one of my older cottman water colour brushes and the slightly stiffer bristles and blunter point made the task a lot easier. That's something I will need to remember next time as it could save me a lot of time.
For the time being I'm happy with the face although I may need to adjust it as the mini develops.
Having considered the colour palette using I've opted for a brown undercoat - so no surprises there.
The first task was to get Jason's face painted. Like many other painters I tackle the face as soon as possible as it sets the character of the mini and if you can't get the face right nothing will save the mini from disaster! To be honest I dread painting human faces as they can turn into an epic struggle to get things looking right. I was also a bit shocked to realise that it has been a few years (at least three) since I painted a humanoid mini with the face showing.
Overall things went surprisingly well. I picked a pinker base colour than I might normally use as I wanted a fairly ruddy complexion and then I went in with some washes to create some definition. After that I painted in the eyes and then I painted in the eyes again several times over. Once I'd managed something that wasn't too ugly or comical I moved onto building up some highlights. For me the process of painting a face is one of constant adjustment and refinement. I constantly moved back and forwards between the shade and highlights to develop the face slowly resolving the features and definition of the face.
Coming back to the mini the next day I repainted the eyes again. I've been using a sable brush and although it gives a beautiful crisp stroke it was too soft to get a good dot for the pupil. I switched back to one of my older cottman water colour brushes and the slightly stiffer bristles and blunter point made the task a lot easier. That's something I will need to remember next time as it could save me a lot of time.
For the time being I'm happy with the face although I may need to adjust it as the mini develops.
Monday, 17 February 2014
Jason - Part 1
Deadline April 12 2014!
With Chee-Chee finished and roughly a month and a half before Salute 2014 there's time for me to see if I can get another mini ready for the painting competition. To be honest I've always intended to get Jason (the Salute 2013 mini) painted but I finished Chee-Chee a little later than intended so my plans are a bit skewed. But what the hell I'm going for it any way!
I spent the best part of last week's hobby time prepping the mini and quickly decided that I needed to do something to make a bit more out of him. The original face was a bit bland for my taste so I've performed a little chop and swap and given him the head off the statue that came as a part of his base. I just think that there's a bit more to work with on this face.
I've also fully prepped up the base and overall composition (there's a first), as this will save me a bit of time and effort once the project nears completion. All I have to concentrate on now is painting.
The base is an unused one I made or my Hellion in the run up to Salute 2013. It's funny how things work out as I've had the basic idea for Jason's composition right from day one but didn't realise the key element of the base was there all the time! The tree for the Golden Fleece is made up of root fragments scavenged from the Tombs of the Kings on Cyprus and the Ram's skull comes from a GW basing kit. The fleece itself is still a Work in progress, as I need to sculpt the wool texture onto it.
Subscribe to:
Posts (Atom)