Showing posts with label water effects. Show all posts

Thursday, 27 October 2022

Project P30 - Part 16b

The End is Nigh - Part 2.


With the exception of the base (and that’s a whole new chapter) the remaining work on my Tank is a matter of finishing things off. Some parts need to be painted from scratch but most of the work involved tying-up lose ends from earlier work.

Fix the hand holding the bell into place.


This was a far more straightforward process than the mecha arm. I simply glued the bell hand in place with plastic glue. Once that had set, I filled the seam with dilute PVA and then retouched the paintwork. This felt like an enormously significant step as I was finally adding the sub-assemblies to the model. At long last it was all coming together!


Fix the chimneys back into place.


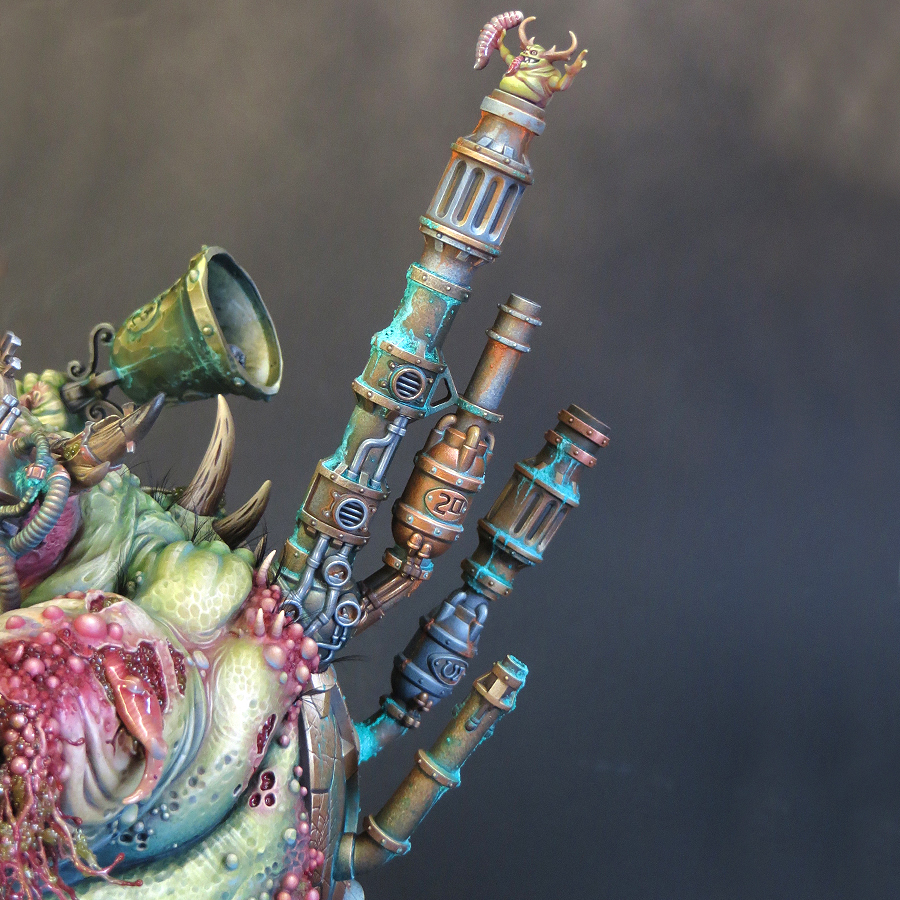
Now things really started to near completion as the re-addition of the chimneys would complete the model’s silhouette. I’d removed the chimneys earlier to make them easier to paint and I’d expected their reattachment to be a tricky process. In the end it went very smoothly. The chimneys were pinned, then glued back into position, leaving relatively minor seams to cover. For the smaller chimney, there was a matter of adding some corrosion over the join. A little corrosion can hide a multitude of sins! 


For the larger chimney, I had to re-sculpt some of the bubbly flesh texture over the join and then fill some hairline cracks with dilute PVA. I also added a few bony spines to this. Overall I’m very happy with the result. In fact, I think this area works better than it did before I removed the chimneys! Painting this area was a matter of matching up the colours to my existing scheme.

I was now finally able to add a long planned feature to the model. Some time ago I decided that I wanted coarse bristles sprouting from the Daemon’s back and shoulders. I’ve used grass tufts and paintbrush bristles to create similar effects in the past. 


My first attempt, using grass tufts, was an instant fail! The ‘hair’ looked too fluffy. Fluffy is not what we want or expect from Nurgle! For ‘plan B’ I used false eyelashes for the hairs which have a curve to them and taper to a point. They proved to be perfect. I cut them into small clusters, or individual hairs, and glued them into place with PVA. Once again this was tricky work but the final effect is exactly what I wanted!

4. Painting the Tentacles


I’ve a notebook with seven years worth of ideas written down for this project. As my plans developed and changed I kept notes to make sure nothing was forgotten. But, by the time I started painting, there were far to many, sometimes conflicting, plans for one project. Much of my decision making has been around which ideas to implement and which to reject. As the scheme developed the process of editing my plans became easier.

The tentacles are an example of the ‘less is more’ approach I’ve taken in the later stages of this project. I’d initially envisioned them as a larger version of the tentacles on Gutrot Spume, complete with stripes and dripping slime. But I felt that the stripes would bring an unnecessary new element to the scheme which would make the tentacles stand out from the rest of the model in an unsatisfactory way. 


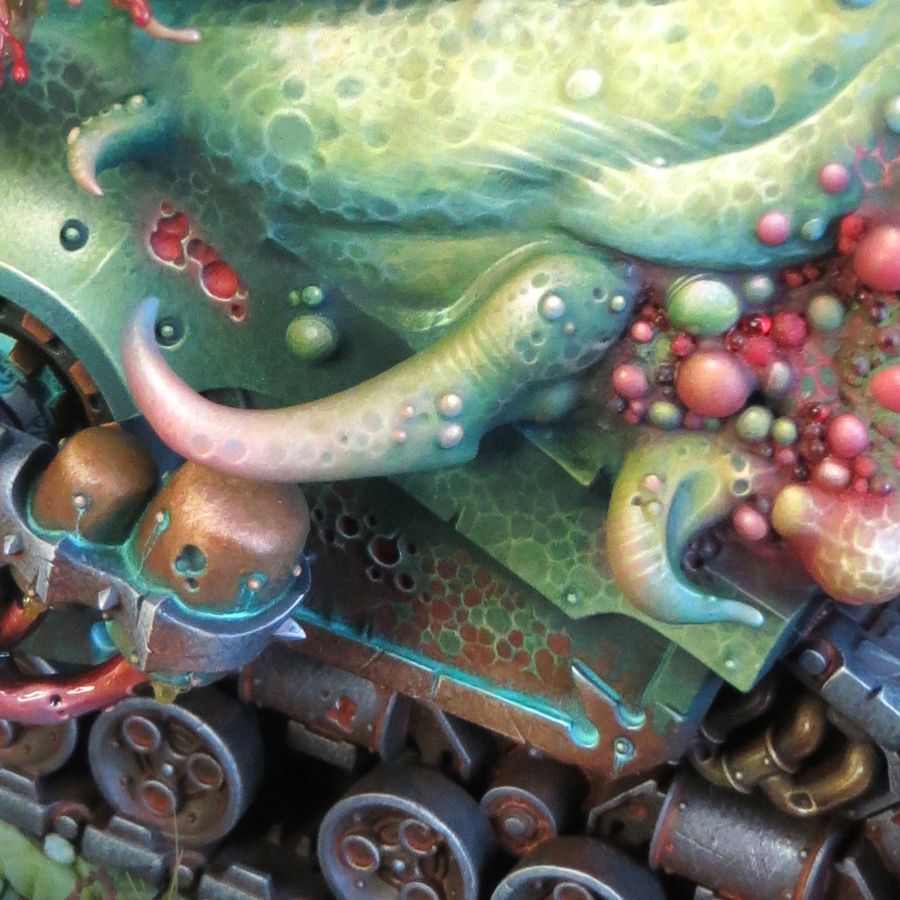
Rather than stripes, I’ve painted the same freehand texture as used on the sides and back of the model. This adds interest to the tentacles but ties them in to the overall scheme. I’ve used colour to make them pop against the rest of the model. Starting from green hues at the base they graduate through a pinkish flesh tone to blue tips. The blue is my old favorite Bering Blue, which I’ve used throughout the scheme. It’s at its most obvious on the tentacle tips.

5. Add drool.


I rejected the idea of slime dripping from the tentacles as being just too much! This also applied to most of my plans for adding extra slime and goo to the model. My tank from 1990 has a liberal application of slime made from PVE glue and then painted. I strongly felt that I already had enough slime and goo on my new model and any more would begin to dominate the painting.

But there was one area where I very much wanted to break out the microbeads and water effects. This was the mouth (the one in the Daemon’s head) where I felt the addition of drool would be beneficial. The mouth was one of the very first areas I painted and its been a long wait to be able to finish it! 


I decided to focus the effect to one side of the mouth rather than filling the jaws with stringy drool. This was done with that old favorite UHU glue. Once the glue had set (it goes rubbery rather than hard) I built up several layers of water effects and microbeads. Once dry I gave it three coats of gloss varnish.

In the final of these updates I’ll describe how I made and painted the base for my Daemon Engine.

Thursday, 29 April 2021

Project P30 - Part 11

Skulls, Nurglings, Tentacles and a spot of bother with my microbeads!

Since I started painting my Daemon Engine at the beginning of February, I’ve made very good progress because I’ve managed to paint for a few hours almost every day. In fact, at times, I’ve almost gotten ahead of myself. I went into the painting stage of this project with a plan, of course, but I had many different options. That’s because I’ve spent years thinking about this project so I have a lot of ideas for how I could paint it. Far more ideas than I can (or should) incorporate into one scheme! 


So part of the challenge I face is to sort through all the ideas I have and edit them down to those I’m going to implement. I have to make just as many choices about what I’m not going to do as to what I am going to do. This is where my notebook and a file of reference/inspirational images have come to the rescue. They help me to keep track of my changing ideas and make sure I don’t forget any of them when the time comes to make a decision. This is an ongoing process because the more I paint the more resolved my ideas become but they can also develop in directions I’d not anticipated.

Every now and then I need to pause, sit back and consider my work. Which is just what I hadn’t been doing so it should come as no surprise that I found myself working on a part of the model for which I had no firm plan. The back of the left arm featured the sculpted detail of three skulls, forming a Nurgle icon, set into a large open wound. Very gruesome and apparently straightforward, all I had to do was paint what was in front of me.


However, I had a nagging feeling that I needed to do something with this area other than just paint it as it is! The skulls are a great detail in their own right but were too distinctive a detail from the donor model (Great Unclean One) and in the new context seemed a little fiddly. Whenever I’ve had doubts or problems with this model I find the best solution is nearly always to be bold, so I decided to replace the skulls with something a bit more dynamic!

I chose to have a Nurgling popping out of the wound. I painted my Nurgling, stuck him in place and filled the surrounding wound with microbeads. As it turns out this was not a good choice because I had replaced one fiddly detail with another. In addition to that the microbeads looked very artificial. It was time to follow my own advice and be bolder! 


I scraped away the microbeads and prised the Nurgling off the model. Then I took my Dremel and ground away all the detail of the wound to make a deeper recess. This was nerve-wracking work, and it made a horrible mess, covering the area in tiny plastic flecks that were very difficult to clean off the painted surfaces. But no pain no gain!

I decided to see how the model looked with a tentacle hanging out of the wound. This was a much bolder element than the skulls or Nurglings and it also tied in to the other tentacles on the model. A quick test fitting confirmed that this was a move in the right direction but I decided to add two tentacles because that was a little more dynamic than just one. I pre-painted and varnished the tentacles before I pinned and glued them into place. Next I had to deal with the wound and microbeads. 


I’ve covered the use of microbeads on this blog before and you can find my tutorial HERE. However as time has passed I’ve gained more experience with my technique and materials.

I still recommend applying the microbeads one at a time as this gives far more control over the final look. If you fill or cover an area with a mass of microbeads in one go the finished result can be formless and bland. Taking care with their placement will enable you to ‘sculpt’ with the microbeads and create some form and structure to your effect.

In my experience water effects is the best medium to fix your microbeads in place and bind them together; but it can also be mixed with a range of differing materials to tint it. Of course quantities used can be varied to adjust the finish but the examples bellow show my favourites. 

Water effects finished with a coat of gloss varnish will give a crystal clear finish.

 
Tamiya clear colours will tint the water effects without lessening the transparency. 
 
 
A small amount of pigment powders will give a slightly cloudy and less translucent finish. 
 
 
Acrylic paint can create a more opaque effect. 
 

To varnish or not is a big question because it can radically alter the final result of any water effects. I use Vallejo Still Water which dries to a clear shiny finish but that may change over time. I’ve noticed that over the course of a few days the finish will become a little duller and eventually take on a matt/frosted look. This may be a result of my products being out of date but it has eventually happened in all cases where I’ve not varnished over my water effects! 


However all is not lost because I quite like the frosted/translucent look. It’s an interesting and useful variation on the effect and the frosting doesn’t occur if the water effects have been varnished once they are dried. Where the frosting occurred and was unwanted it was easy enough to fix. I think the frosting is caused by humidity so I take a hairdryer and apply a gentle stream of warm air to the model. The frosting will disappear and the clear gloss finish will return before your eyes - like magic! It is then possible to apply a couple of coats of gloss varnish for a permanent fix. My preferred varnish for high gloss effects is Tamiya clear X-22.

The final update to my use of microbeads and water effects came as a direct result of how they looked on my Daemon Engine. I’ve always intended to feature a quantity of slime and goo on my new model, as it was a prominent feature of the old one. I felt that the semi-opaque look and more muted colour I get from using pigment powders was the way to go because I didn’t want my slime to be too bright and ‘cartoony’. But as soon as I started adding water effects and microbeads to this model it looked very artificial and didn’t feel like a part of the whole.

The solution was to apply some subtle red glazes over the green slime once it was dry. I usually build up a stronger red in deeper areas and along the top edges of my slime. This has the effect of toning down the slime and blending it into the surrounding areas. Even when it has been glossed over the slime now feels like a part of the whole scheme.


Tuesday, 1 August 2017

Building a ‘better’ Splash


Back when I was making the base for Gutrot Spume I created my wave and splash effects using a foundation of clear plastic. These pieces of plastic had been partly melted and distorted over the heat of a candle. While the finished result was very effective it was also quite a bit of fuss and bother to achieve!


For my Abyssal Warlord I decided to try a slightly simpler method of creating dynamic splash effects for the base. This involved a similar technique to the one used before of building up layers of water effects but, in this instance, I would be using cotton wool as a foundation material.

I’ve used cotton wool previously to create candle flames and seaweed and while I was adding a wet weedy fringe to the Warlord’s cloak, I had the idea to use it for splashes. The technique is very straight forward but it is best done slowly, allowing each stage to dry before adding the next. I’d recommend making up a load of these splashes as a side project fitted in between other jobs.


Materials and Equipment. 


Cotton wool – I used cotton buds as only a very small quantity is needed.
Water effects - I used two types of water effects Transparent Water and Still Water, both by Vallejo. Transparent Water is thick and has some body to it, the Still Water is fluid.
Paintbrush size 1 or 2
Scissors
A plastic tray/ palette – I used an old blister pack

Step 1


Pick off a tiny amount of cotton wool from a cotton bud. Give the cotton wool a coating of the Transparent Water. Take the piece of, now soggy, cotton wool and attach it to the edge of your tray/palette. Gently draw your brush along the length of the cotton wool to pull it out into a longer shape. Now leave the cotton wool alone until the water effects have dried.

Step 2


Trim off any stray or straggling ‘hairs’ with a pair of scissors. Build up the splash using Still Water applied in several successive layers. I found three to four layers gave me the look I wanted. Let each layer dry before you add the next one. As you build up the effect form rounded droplets at the ends of the splashes. The droplets may need a few extra layers of water effects.

Step 3


Once you are happy with the splashes let them dry thoroughly over night. This is an important step as the water effects will shrink somewhat and go totally clear as it dries. The next day you can assess the fully dried splashes to see if they are done, or if you wish to add a little more of the Still Water.

Step 4


When you are satisfied with the splashes and they are totally dry you can cut them from the tray/ palette using scissors. The splashes can then be fixed to your model using a small blob of the Transparent Water. When this has dried you can add further layers of both types of water effects to incorporate the splashes into your base/model.

To finish the splash effects on the Warlord’s base I added a few microbeads (of course) and some slimy seaweed, using more cotton wool, but with less layers of water effects. For a final touch I’ve used a little green pigment powder to tint the last layers of water effects.