Showing posts with label Nurgle Predator. Show all posts

Thursday, 27 October 2022

Project P30 - Part 16b

The End is Nigh - Part 2.


With the exception of the base (and that’s a whole new chapter) the remaining work on my Tank is a matter of finishing things off. Some parts need to be painted from scratch but most of the work involved tying-up lose ends from earlier work.

Fix the hand holding the bell into place.


This was a far more straightforward process than the mecha arm. I simply glued the bell hand in place with plastic glue. Once that had set, I filled the seam with dilute PVA and then retouched the paintwork. This felt like an enormously significant step as I was finally adding the sub-assemblies to the model. At long last it was all coming together!


Fix the chimneys back into place.


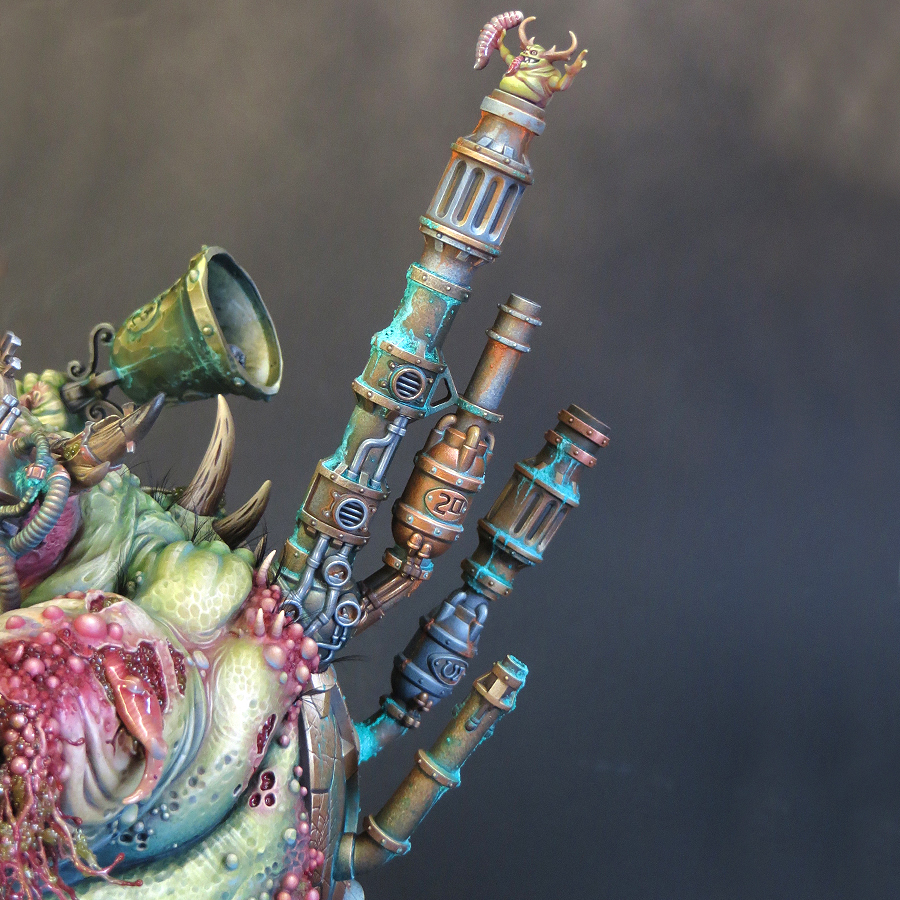
Now things really started to near completion as the re-addition of the chimneys would complete the model’s silhouette. I’d removed the chimneys earlier to make them easier to paint and I’d expected their reattachment to be a tricky process. In the end it went very smoothly. The chimneys were pinned, then glued back into position, leaving relatively minor seams to cover. For the smaller chimney, there was a matter of adding some corrosion over the join. A little corrosion can hide a multitude of sins! 


For the larger chimney, I had to re-sculpt some of the bubbly flesh texture over the join and then fill some hairline cracks with dilute PVA. I also added a few bony spines to this. Overall I’m very happy with the result. In fact, I think this area works better than it did before I removed the chimneys! Painting this area was a matter of matching up the colours to my existing scheme.

I was now finally able to add a long planned feature to the model. Some time ago I decided that I wanted coarse bristles sprouting from the Daemon’s back and shoulders. I’ve used grass tufts and paintbrush bristles to create similar effects in the past. 


My first attempt, using grass tufts, was an instant fail! The ‘hair’ looked too fluffy. Fluffy is not what we want or expect from Nurgle! For ‘plan B’ I used false eyelashes for the hairs which have a curve to them and taper to a point. They proved to be perfect. I cut them into small clusters, or individual hairs, and glued them into place with PVA. Once again this was tricky work but the final effect is exactly what I wanted!

4. Painting the Tentacles


I’ve a notebook with seven years worth of ideas written down for this project. As my plans developed and changed I kept notes to make sure nothing was forgotten. But, by the time I started painting, there were far to many, sometimes conflicting, plans for one project. Much of my decision making has been around which ideas to implement and which to reject. As the scheme developed the process of editing my plans became easier.

The tentacles are an example of the ‘less is more’ approach I’ve taken in the later stages of this project. I’d initially envisioned them as a larger version of the tentacles on Gutrot Spume, complete with stripes and dripping slime. But I felt that the stripes would bring an unnecessary new element to the scheme which would make the tentacles stand out from the rest of the model in an unsatisfactory way. 


Rather than stripes, I’ve painted the same freehand texture as used on the sides and back of the model. This adds interest to the tentacles but ties them in to the overall scheme. I’ve used colour to make them pop against the rest of the model. Starting from green hues at the base they graduate through a pinkish flesh tone to blue tips. The blue is my old favorite Bering Blue, which I’ve used throughout the scheme. It’s at its most obvious on the tentacle tips.

5. Add drool.


I rejected the idea of slime dripping from the tentacles as being just too much! This also applied to most of my plans for adding extra slime and goo to the model. My tank from 1990 has a liberal application of slime made from PVE glue and then painted. I strongly felt that I already had enough slime and goo on my new model and any more would begin to dominate the painting.

But there was one area where I very much wanted to break out the microbeads and water effects. This was the mouth (the one in the Daemon’s head) where I felt the addition of drool would be beneficial. The mouth was one of the very first areas I painted and its been a long wait to be able to finish it! 


I decided to focus the effect to one side of the mouth rather than filling the jaws with stringy drool. This was done with that old favorite UHU glue. Once the glue had set (it goes rubbery rather than hard) I built up several layers of water effects and microbeads. Once dry I gave it three coats of gloss varnish.

In the final of these updates I’ll describe how I made and painted the base for my Daemon Engine.

Wednesday, 19 October 2022

Project P30 - Part 16a

The End is Nigh!

It will come as a great surprise to anyone if I state that a lot has happened since I last posted regularly on this blog! Not least the long anticipated return of Golden Demon UK at Warhammer World on October 1 & 2. I posted some finished pics here during the weekend of the competion but it’s time to indulge in a little time travel as I bring things up to date.

For some time my gut feeling was that I’d finish the Daemon Engine this year but there’s nothing like a deadline to boost momentum! I felt that, with some effort, the October deadline might be achievable so I decided to go for it. The last few months have seen some adrenaline fueled painting and I now feel more confident about that deadline. Things have been coming together well and the end is in sight!

As I move towards the closing stages of a project I usually create a checklist of things to do. This helps me to keep focused, stay on target and avoid missing anything out in a rush to get finished. It’s been especially useful this time around as there have been many steps to complete. In my next few posts I’ll describe that list of jobs in the order I did them.

Finish the mecha arm.


This arm has been the most physically difficult area of the model to paint so far! In retrospect, I wish I had found a way to paint the arm as a sub-assembly, which would have made things a lot easier. 


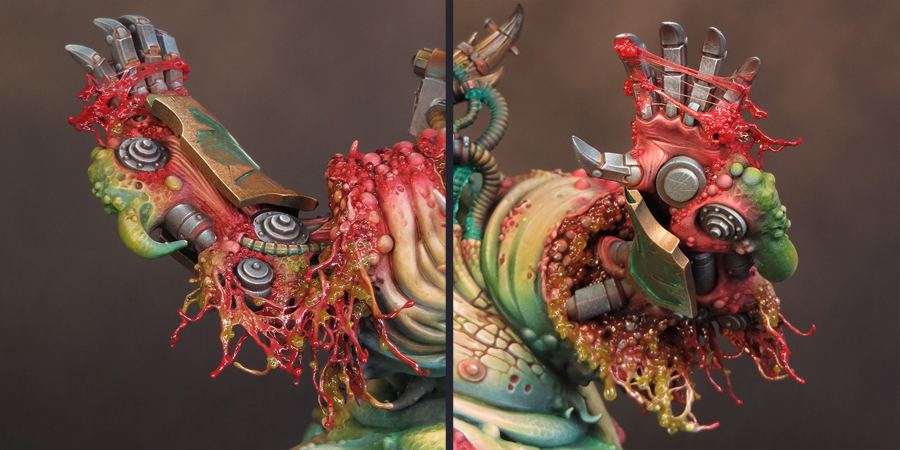
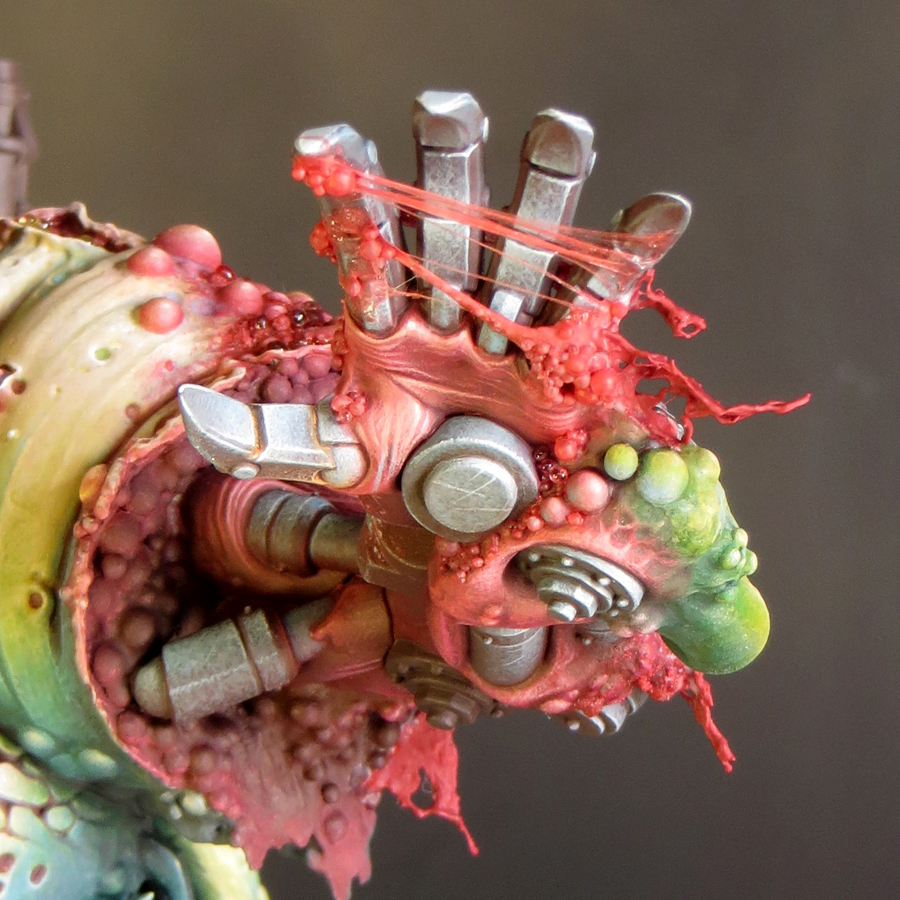
However, the more interesting problem was to address the transitions between areas of flesh and metal. The arm came from the Forge Fiend kit and as such already depicted a union of monster and machine. This was a good starting point. I especially liked the hand as it matched the size of the fleshy hand holding the bell. However, some of the fleshy parts of the arm lacked the definition and texture that I wanted. I built up these areas with a combination of greenstuff, texture paste and microbeads. This had the additional benefit of helping to integrate the arm with the overall scheme by the use of common textures. This applied most especially to the bubbly/blistered texture I’d added elsewhere.

The next task was to address the stump out of which the mechanical arm protruded. Microbeads (of course) provided much of the texture, but I wanted something more. I wanted to create a semi liquid, ragged texture, as if the flesh was in the process of flowing into a new form. My greatest inspiration for this was the writing of Michael Moorcock, and most especially ‘Stormbringer’, which has had a huge influence on how I see the forces of Chaos and their effects. To create the flowing flesh, I used a variation of the cotton wool and water effects splash effect (shown HERE). In this case, however, I used a PVA glue and paint mix instead of water effects. 


I was very pleased with the final effect but the overall look of the arm didn’t feel right to me. After some thought I decided that I needed more metal and machine parts in proportion to the fleshy parts. Taking my nerves in hand, I clipped off the large green tentacle (I was to later use it elsewhere) and added the spikey guard rail from the Plague Burst Crawler. It was a nasty job but I was much happier with the arm once it was done!


Paint the sides of the tank.


I regarded the sides of the tank as three distinct areas: the side panels, the tracks and the entropy cannon. The side panels are especially significant because it was here I wanted to create a major transition between flesh and metal.

I’d decided upon the colours for this transition as a part of my ongoing work. The fleshy parts of the side panels were to be a deep green, transitioning from the lighter green upper parts. I felt that a flashy NMM effect would be inappropriate for the metal parts. So I used a brown hue inspired by patinated bronze. This was the same treatment I’d used on the ‘boiler’ at the back of the tank. It is a colour that contrasts with the green but not in a way that draws the eye away from the focal points of the model.

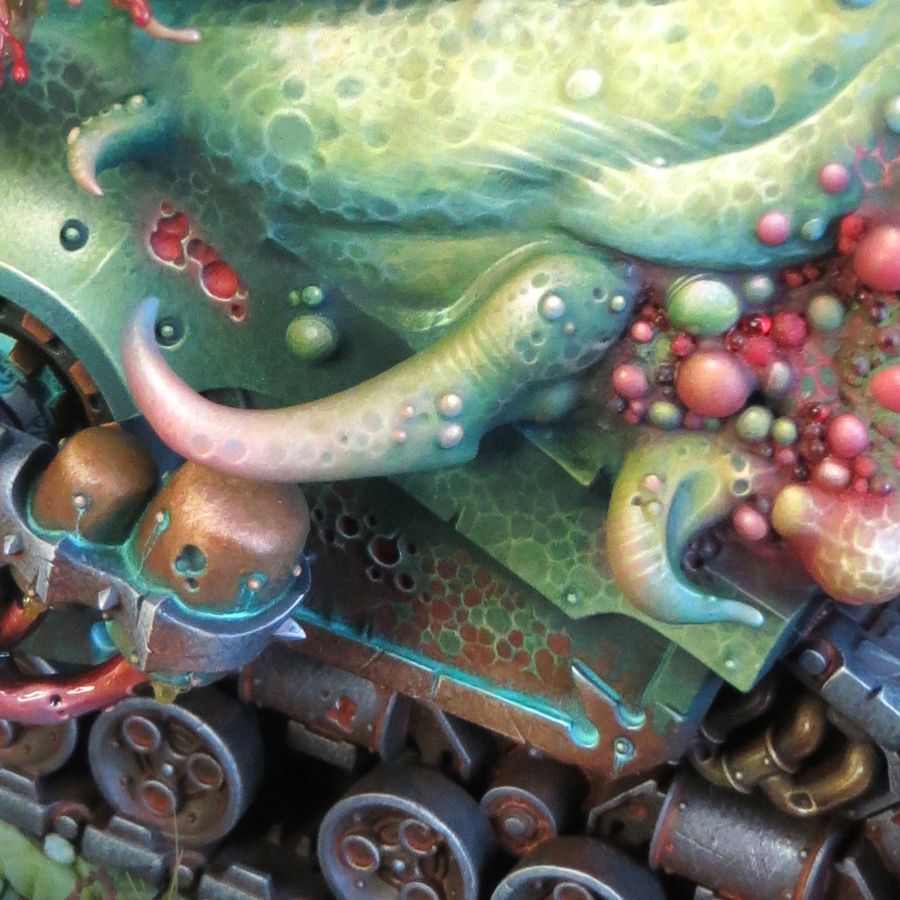
The transition is created through the use of a freehand texture. This was based upon the painted texture of the upper flesh areas, so it felt like a part of the overall scheme. I’d not been looking forward to painting this transition but, by the time I came to do it, things had become fairly straightforward. All my choices had been made as an on-going part of the project’s evolution, so I was able to focus on executing them rather than worrying about what to do! All in all this was one of the faster parts of the paint scheme to complete. 


Now I could paint the tracks. Once again my choices were informed by my earlier decisions. I kept the scheme for this area fairly simple. I painted the tracks and all the associated wheels, gears and general gubbins in the same dull grey NMM I’d used elsewhere. This would contrast with the adjacent parts of the model but fit in with the overall scheme. I had some plans for adding lots of mud and dirt but decided against this. As things have progressed, I’ve been editing my plans as it is easy to go OTT with this project. There is already a lot going on with the overall scheme. 


Rather than adding heavy layers of dirt, I painted some fairly subtle rust effects and blended them into the brown shadows to give a grimy feel. My global shade colour is Black Leather from Scale Colour which helped with this a great deal. I am particularly fond of shading cool or neutral greys with brown hues. As always, the photographs I took for lighting reference were extremely useful when it came to placing my highlights and shadows!

The final job for this overall area was to paint the two entropy cannons. These were painted as sub-assemblies and provided a nice little sub-project. 


The sides of the tank were the last significant areas of the tank to be painted.

The remaining work consists mostly of finishing things off and bringing together previously painted sub-assemblies.

Thursday, 29 September 2022

Project P30 - Part 15.

It's done!!!

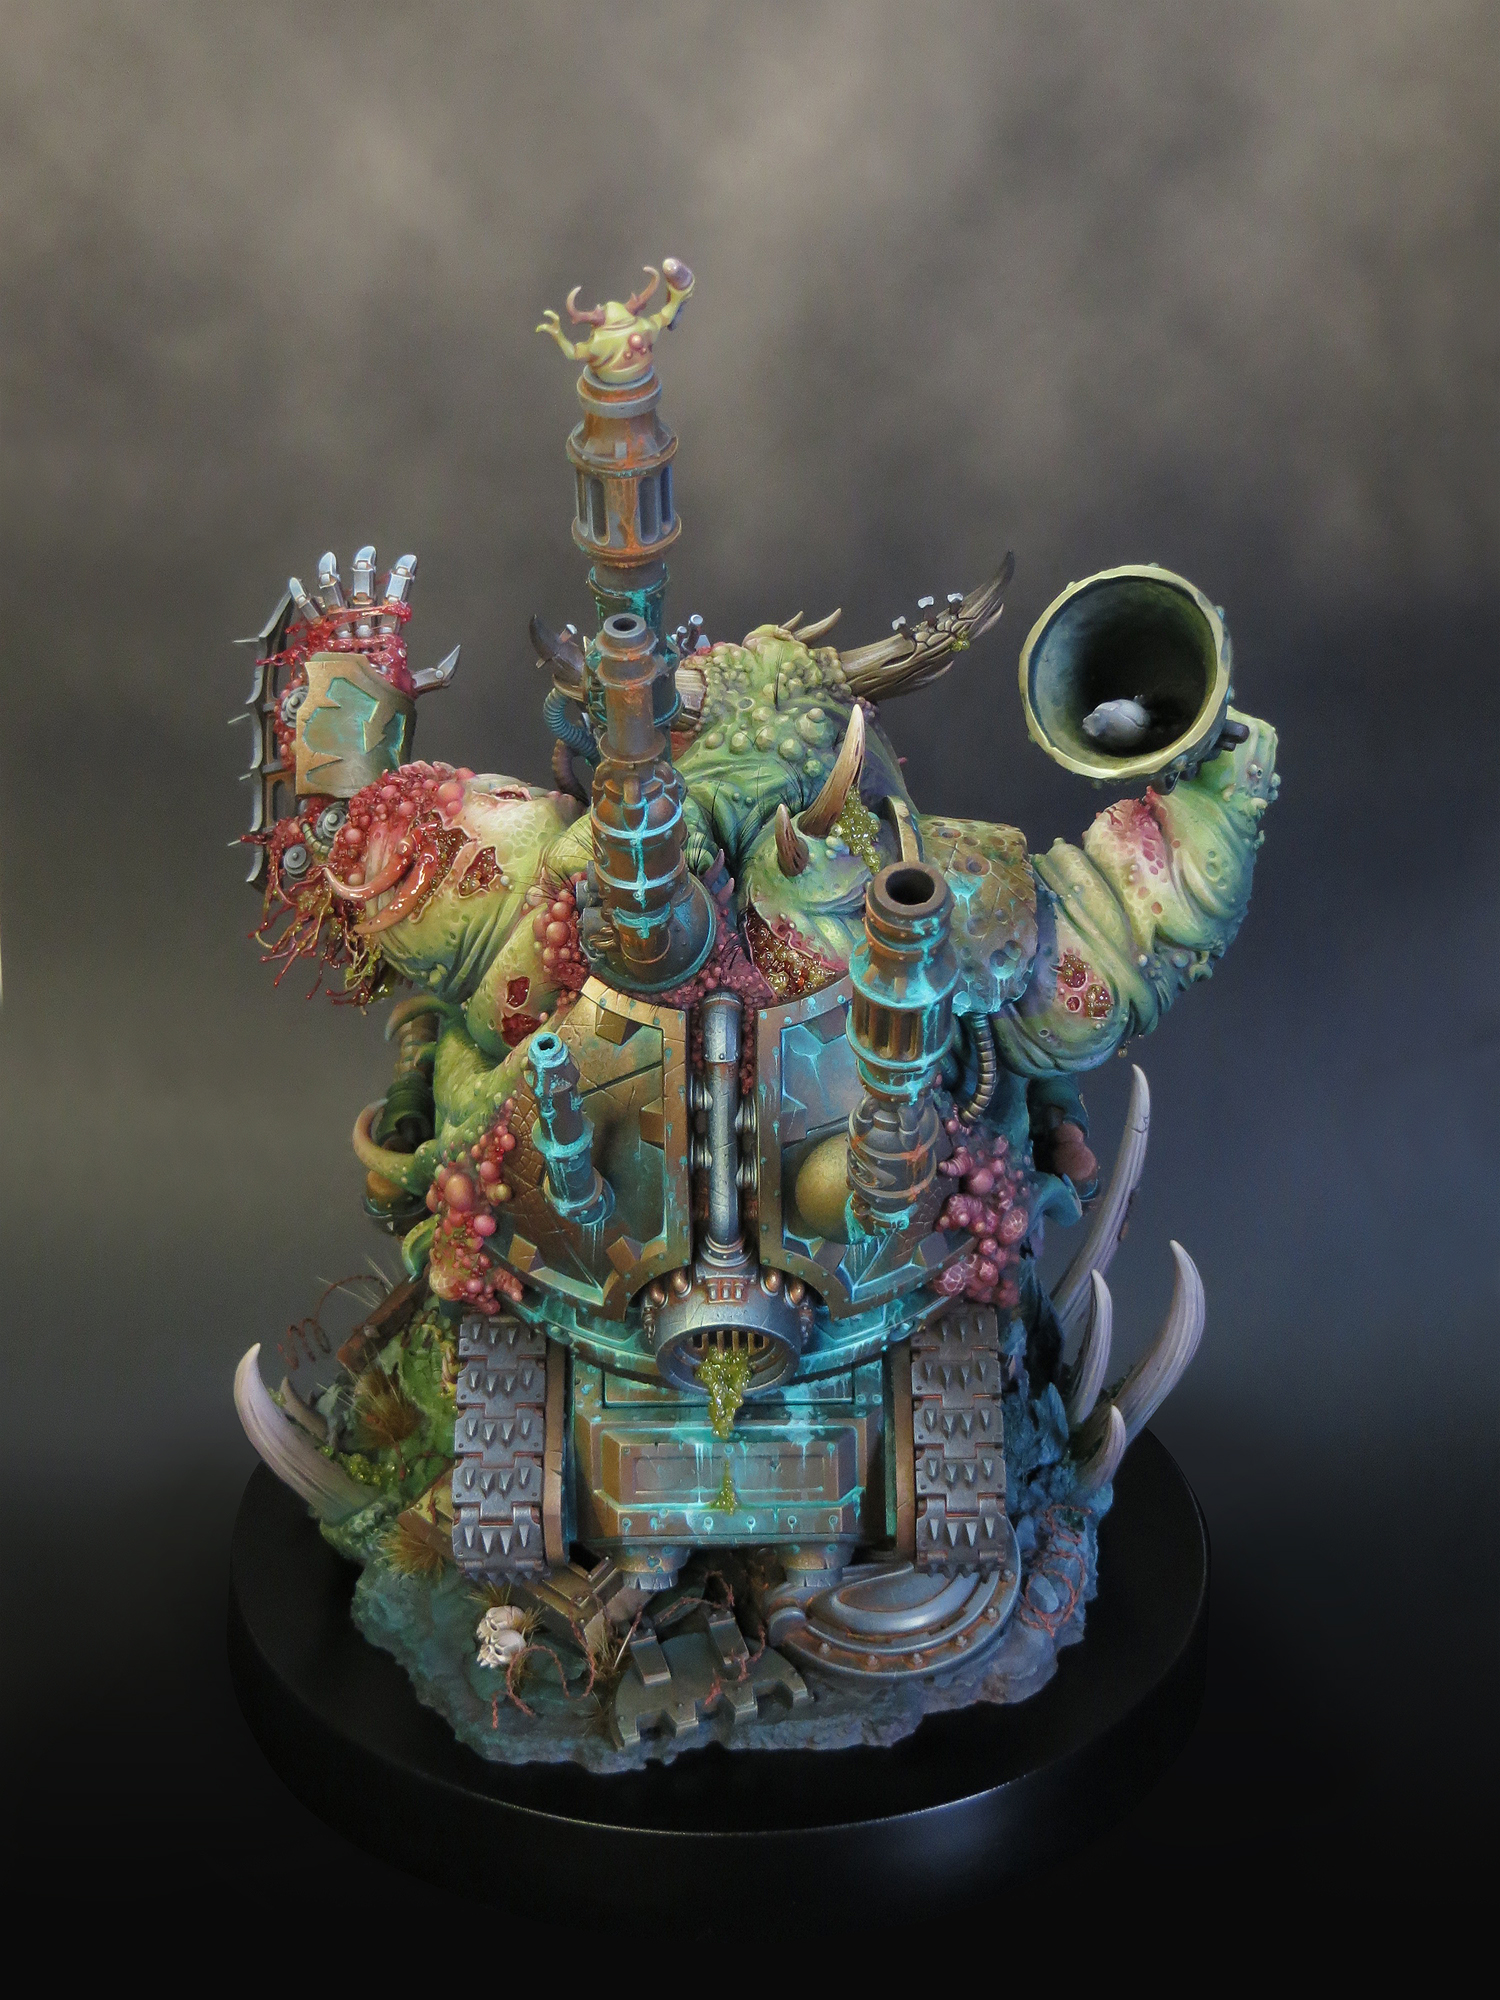
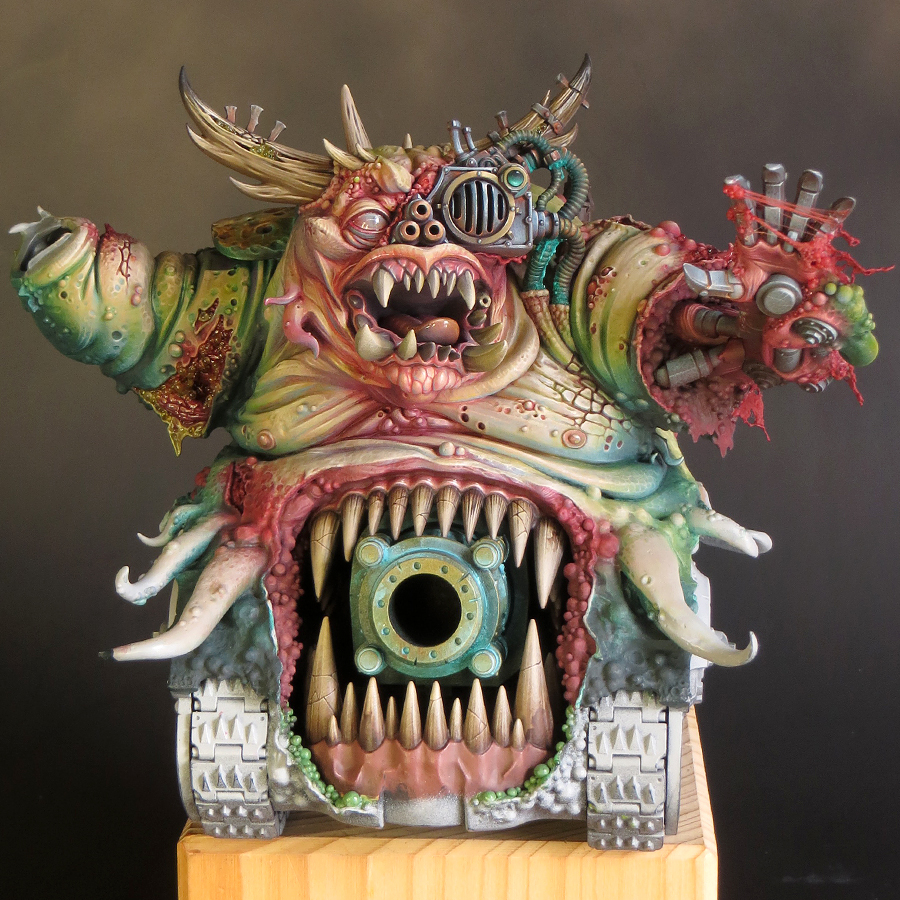
It’s been an intense few months of preparation and painting but I’ve finished my Daemon Engine in time for Golden Demon UK 2022, which is now upon us! I’m very proud of how this project has turned out because I’ve done the very best I can. It has been a brilliant experience but it’s now out of my hands and into the GD cabinet for judging. Fingers crossed!

So it’s time to reveal the finished Tank in its entirety. 

My planned pre-GD blog updates fell by the wayside. Once I’m back home and the GD dust has settled, I will upload a series of posts detailing the stages of this project to its completion.

Tuesday, 29 March 2022

Project P30 - Part 14.

So just when I though I’d be getting back into the swing of things, with a regular painting schedule, life had other ideas! We’d been planning some long-overdue house renovations (by long I mean 20 years!) and had scheduled them in for 2022. However the chance came to get the work done earlier and we took it. As a result our home was in complete upheaval, from October until mid-January, and there was no way on earth I could do any painting. Stressful as the disruption was it’s been great to finally get our bathroom and kitchen sorted and things are now getting back to normal, whatever that is.

The enforced hiatus has given me the opportunity to take stock and realise that I’ve undergone a big shift in attitude towards this project. Up until now I’ve been very focussed on getting the paint scheme for my Daemon Engine up and running. It’s been a sign of my uncertainty that I’ve concentrated on establishing the colours, textures, overall contrast and direction for the scheme but haven’t really looked beyond that.

Over the last month that has changed and I quite suddenly realised that I’ve now painted the bulk (no pun intended) of the flesh on this model. I have no firm idea of how long it will actually take to complete, but it feels like I’ve reached a sort of halfway point in the painting! I’m well aware that much of what remains to be done features fiddly mechanical details but I’ve most definitely moved forward into a new phase of the project.

When I started work on this project, back in February 2019, it was with the final model very much in mind. But as I’ve progressed, and especially since I’ve started painting, my thinking became more wrapped up with the process rather than the end goal. I think this was necessary because I needed to make a lot of decisions about what I was actually going to do with my scheme, but it did overwhelm my thinking.

With some major decisions made (I’m sure there are many more to come!) and considerable progress under my belt, I can now see my way ahead. So much so that I’ve started to work on a base for this model. The end of the project may be some way off but I think it’s a good time to start planning for it. The overall composition of this model and its base will make or break this project so there is no room for a last minute solution! I have plenty of time for planning and preparing a base and I fully intend to use it.

My thoughts on basing the model have greatly evolved over time. I’d thought of something quite large and elaborate, inspired by the type of basing you often see for historical tank kits. Thankfully I saw sense as that would have taken the project into diorama territory. What I now intend is to base the tank as though it were, and in many ways it is, a character model.

I’m not going to say too much about my basing plans until later in the project. But I must say a huge ‘thank you’ to Byron Orde who, through the course of a general discussion about basing, helped me to clarify my ideas. However, Byron went above and beyond that with some significant practical help towards getting this model onto the right base. I don’t like to blow my own trumpet but, with the help I’ve had from Byron, and if I can pull off all my plans, it’s going to be epic!

But all of that is in the future and for the moment I need to crack on with painting. I will go into more detail in my next posting but for the time being I will bring things up-to-date with a summary.

Back in October I painted the large horns on the Daemon’s head. This was straightforward but very fiddly. I then moved onto the mechanical left hand and arm. I’d made a good start on these when everything ground to a halt. 

At the end of February I was able to pick up my brushes again but decided not to go straight back to the hand. I decided to paint a sub-assembly to help me get back into the swing of things. For this I chose to paint the large chimney which I first had to detach from the model! This was not a fun job but well worth the bother as the chimney was much easier to paint as a separate element. 


With the chimney painted, I’ve now returned to painting the mechanical hand and arm.


Saturday, 3 July 2021

Project P30 - Part 12

It’s time for a long overdue update! An interruption in my posting usually means that, for one reason or another, I’ve not been painting but that’s not the case this time! I’ve been happily painting away to a regular schedule and making steady progress. Quite simply when faced with a choice between painting and writing about painting I’ve opted for the former. 


I’ve already written about the physical challenges presented by this model and they haven’t lessened. However I’ve now become used to handling and painting a model of this size and I’m coping quite well with this aspect of the project. I think the greatest challenges remain the psychological ones! The scale and level of expectation for this project, both from others, and myself are through the roof.

However, in spite, or perhaps because, of these challenges I'm very happy with how my Tank is going at the moment! I've had so many ideas and options to consider that the project’s overall direction has been a bit open-ended. As I said in my last post, I've had to editing my ideas as I go. That’s involved making as many choices about what I’m not going to do as to what I am going to do! Because of this my vision for the paint scheme has become much clearer over the last month or so.

My experience of this project is unlike anything I’ve had since I returned to painting. I regularly feel that I’ve bitten off more than I can chew and this strongly reminds me of the years when I was first learning my craft! Although I have a wealth of experience to call on, I can’t take it for granted that I will succeed. This is because this work is truly challenging me and I’m having to work my very hardest to resolve every aspect of this project. All of this can only be a good thing and so far I’m loving (almost) every minute of it. I’m getting more satisfaction from my hobby than I’ve had for some time!

In my last post I’d just finished painting the arms. The next area I turned to was the top of the model where the neck, back and shoulders meet. This proved to be a far more complex job than I’d anticipated! This part of the model is a major junction between other areas and involves transitions between different forms, textures, tones and hues.


I’d initially considered painting the back, neck and shoulders with a dark green to create a counter shading effect similar to that on my plague bearers. I’ve retained an element of this but less pronounced than in my initial plans. My Tank is painted as though the light is hitting it from the top left. Broadly speaking there is a light (left) and a shade (right) side to the model. The upper back features the most obvious transition between them. In addition to the tonal transitions the hues on the shade side are cooler than those on the light side. 


Figuring out these transitions took a lot of going back and forth to adjust and balance all the factors but it was well worth the effort. With this area painted the separate areas I’d worked on previously are now connected and the paint scheme feels more unified and consistent. 


In the course of resolving this part of the model, I had to go back and adjust some of my earlier work. I’ve worked more of a purple hue into many of the shadows and strengthened the yellow/green hues in the mid-tone areas of the arms. Both of these changes were made by building up a series of controlled glazes over the appropriate areas. I fully expect to make further adjustments to my earlier work as the project progresses. I don’t consider any part of the model to be finished until the entire thing is finished.

I was then at the point where I needed to start addressing the boundaries between flesh and metal on my model. The upper area I had just painted is in contact with the large boiler/plate in the back of the model. The sides of the torso also connect with this area. When sculpting I’d decided to make a feature of this boundary and created an area of swollen bubbling flesh.


I’ve chosen to paint all areas of bubbling flesh on the model in warm red and flesh hues. The bubbling flesh often occurs where flesh and metal meet and I want it to have a raw and angry look as if it is trying to boil up and overwhelm the metal. 


Having resolved the overall flesh tones to my satisfaction it became very clear to me that I needed to begin painting the boiler/plate. To be honest I was ready for a change, as I’d been painting blubbery green flesh for weeks!

Coming soon…


As you can see from my pics I’ve gone well beyond the stages I’ve described in this post. I will next look at how I’ve painted NMM on the boiler/plate and how that has affected my overall colour palette. I will also describe my approach to painting corrosion on this model.

Thursday, 29 April 2021

Project P30 - Part 11

Skulls, Nurglings, Tentacles and a spot of bother with my microbeads!

Since I started painting my Daemon Engine at the beginning of February, I’ve made very good progress because I’ve managed to paint for a few hours almost every day. In fact, at times, I’ve almost gotten ahead of myself. I went into the painting stage of this project with a plan, of course, but I had many different options. That’s because I’ve spent years thinking about this project so I have a lot of ideas for how I could paint it. Far more ideas than I can (or should) incorporate into one scheme! 


So part of the challenge I face is to sort through all the ideas I have and edit them down to those I’m going to implement. I have to make just as many choices about what I’m not going to do as to what I am going to do. This is where my notebook and a file of reference/inspirational images have come to the rescue. They help me to keep track of my changing ideas and make sure I don’t forget any of them when the time comes to make a decision. This is an ongoing process because the more I paint the more resolved my ideas become but they can also develop in directions I’d not anticipated.

Every now and then I need to pause, sit back and consider my work. Which is just what I hadn’t been doing so it should come as no surprise that I found myself working on a part of the model for which I had no firm plan. The back of the left arm featured the sculpted detail of three skulls, forming a Nurgle icon, set into a large open wound. Very gruesome and apparently straightforward, all I had to do was paint what was in front of me.


However, I had a nagging feeling that I needed to do something with this area other than just paint it as it is! The skulls are a great detail in their own right but were too distinctive a detail from the donor model (Great Unclean One) and in the new context seemed a little fiddly. Whenever I’ve had doubts or problems with this model I find the best solution is nearly always to be bold, so I decided to replace the skulls with something a bit more dynamic!

I chose to have a Nurgling popping out of the wound. I painted my Nurgling, stuck him in place and filled the surrounding wound with microbeads. As it turns out this was not a good choice because I had replaced one fiddly detail with another. In addition to that the microbeads looked very artificial. It was time to follow my own advice and be bolder! 


I scraped away the microbeads and prised the Nurgling off the model. Then I took my Dremel and ground away all the detail of the wound to make a deeper recess. This was nerve-wracking work, and it made a horrible mess, covering the area in tiny plastic flecks that were very difficult to clean off the painted surfaces. But no pain no gain!

I decided to see how the model looked with a tentacle hanging out of the wound. This was a much bolder element than the skulls or Nurglings and it also tied in to the other tentacles on the model. A quick test fitting confirmed that this was a move in the right direction but I decided to add two tentacles because that was a little more dynamic than just one. I pre-painted and varnished the tentacles before I pinned and glued them into place. Next I had to deal with the wound and microbeads. 


I’ve covered the use of microbeads on this blog before and you can find my tutorial HERE. However as time has passed I’ve gained more experience with my technique and materials.

I still recommend applying the microbeads one at a time as this gives far more control over the final look. If you fill or cover an area with a mass of microbeads in one go the finished result can be formless and bland. Taking care with their placement will enable you to ‘sculpt’ with the microbeads and create some form and structure to your effect.

In my experience water effects is the best medium to fix your microbeads in place and bind them together; but it can also be mixed with a range of differing materials to tint it. Of course quantities used can be varied to adjust the finish but the examples bellow show my favourites. 

Water effects finished with a coat of gloss varnish will give a crystal clear finish.

 
Tamiya clear colours will tint the water effects without lessening the transparency. 
 
 
A small amount of pigment powders will give a slightly cloudy and less translucent finish. 
 
 
Acrylic paint can create a more opaque effect. 
 

To varnish or not is a big question because it can radically alter the final result of any water effects. I use Vallejo Still Water which dries to a clear shiny finish but that may change over time. I’ve noticed that over the course of a few days the finish will become a little duller and eventually take on a matt/frosted look. This may be a result of my products being out of date but it has eventually happened in all cases where I’ve not varnished over my water effects! 


However all is not lost because I quite like the frosted/translucent look. It’s an interesting and useful variation on the effect and the frosting doesn’t occur if the water effects have been varnished once they are dried. Where the frosting occurred and was unwanted it was easy enough to fix. I think the frosting is caused by humidity so I take a hairdryer and apply a gentle stream of warm air to the model. The frosting will disappear and the clear gloss finish will return before your eyes - like magic! It is then possible to apply a couple of coats of gloss varnish for a permanent fix. My preferred varnish for high gloss effects is Tamiya clear X-22.

The final update to my use of microbeads and water effects came as a direct result of how they looked on my Daemon Engine. I’ve always intended to feature a quantity of slime and goo on my new model, as it was a prominent feature of the old one. I felt that the semi-opaque look and more muted colour I get from using pigment powders was the way to go because I didn’t want my slime to be too bright and ‘cartoony’. But as soon as I started adding water effects and microbeads to this model it looked very artificial and didn’t feel like a part of the whole.

The solution was to apply some subtle red glazes over the green slime once it was dry. I usually build up a stronger red in deeper areas and along the top edges of my slime. This has the effect of toning down the slime and blending it into the surrounding areas. Even when it has been glossed over the slime now feels like a part of the whole scheme.