The End is Nigh - Part 2.
With the exception of the base (and that’s a whole new chapter) the remaining work on my Tank is a matter of finishing things off. Some parts need to be painted from scratch but most of the work involved tying-up lose ends from earlier work.
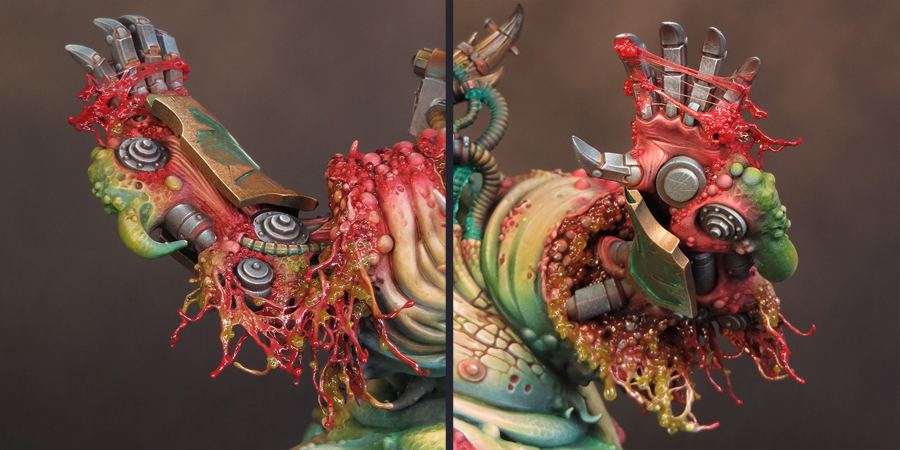
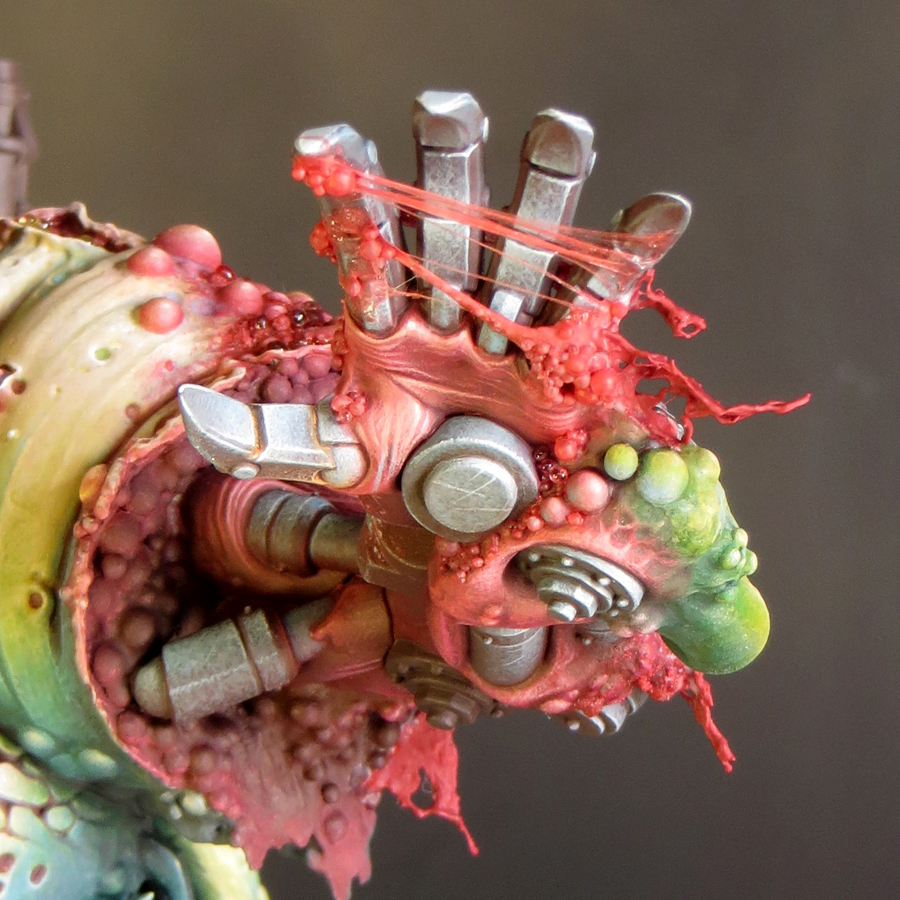
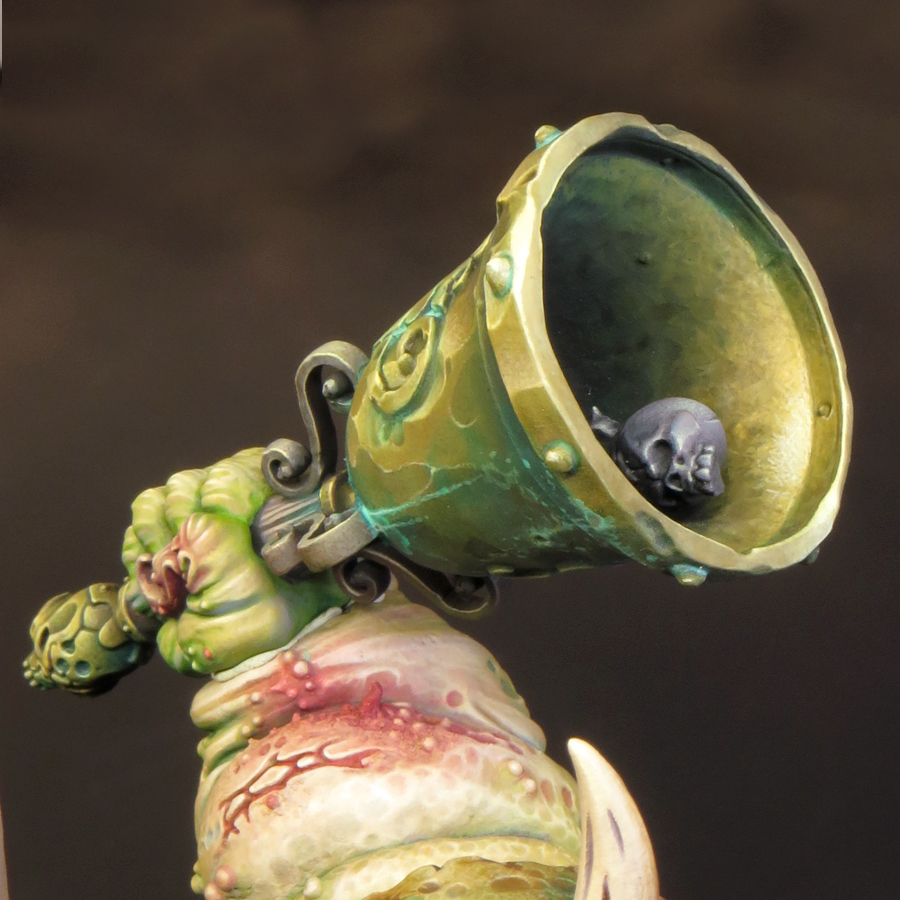
Fix the hand holding the bell into place.
This was a far more straightforward process than the mecha arm. I simply glued the bell hand in place with plastic glue. Once that had set, I filled the seam with dilute PVA and then retouched the paintwork. This felt like an enormously significant step as I was finally adding the sub-assemblies to the model. At long last it was all coming together!


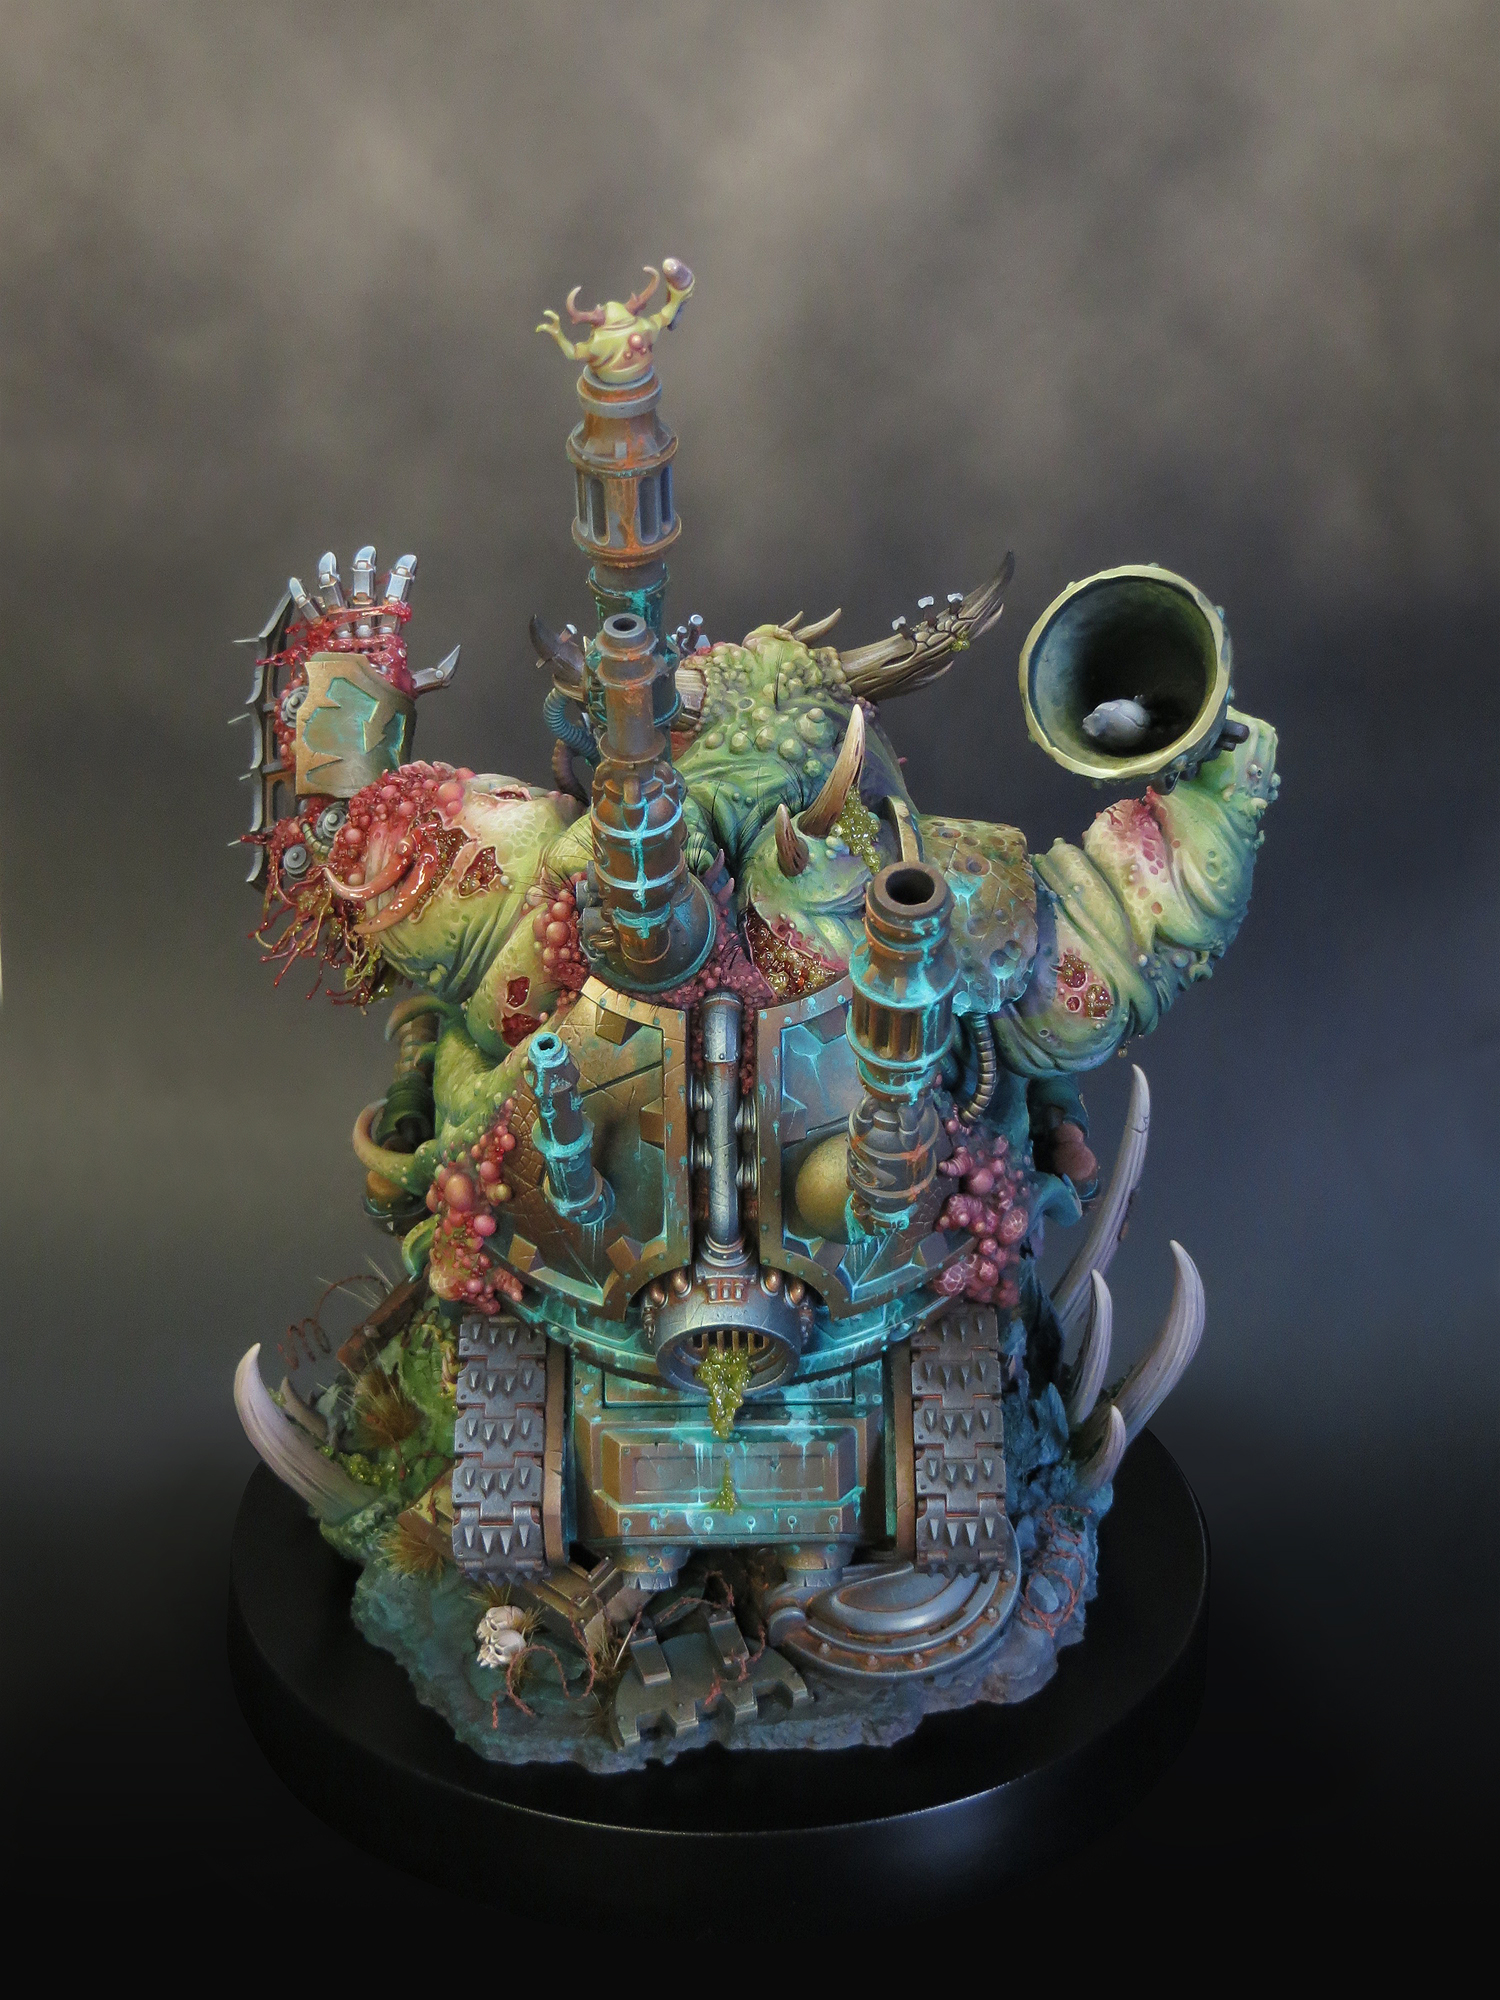
Fix the chimneys back into place.
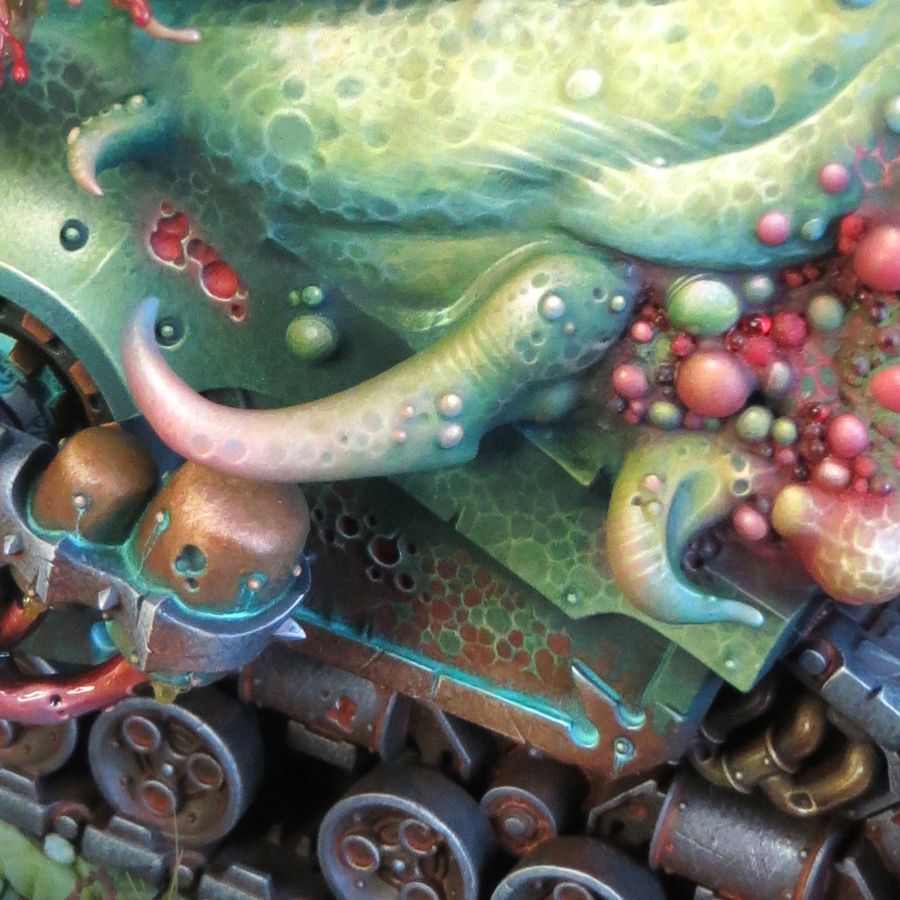
Now things really started to near completion as the re-addition of the chimneys would complete the model’s silhouette. I’d removed the chimneys earlier to make them easier to paint and I’d expected their reattachment to be a tricky process. In the end it went very smoothly. The chimneys were pinned, then glued back into position, leaving relatively minor seams to cover. For the smaller chimney, there was a matter of adding some corrosion over the join. A little corrosion can hide a multitude of sins!

For the larger chimney, I had to re-sculpt some of the bubbly flesh texture over the join and then fill some hairline cracks with dilute PVA. I also added a few bony spines to this. Overall I’m very happy with the result. In fact, I think this area works better than it did before I removed the chimneys! Painting this area was a matter of matching up the colours to my existing scheme.
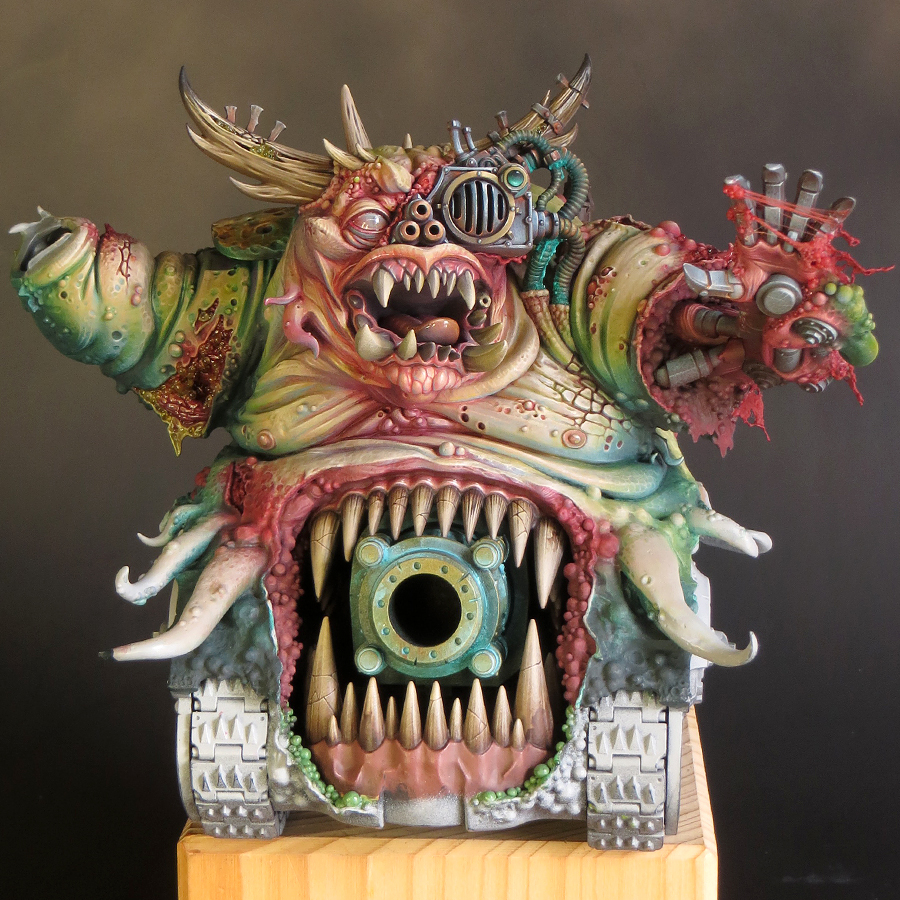
I was now finally able to add a long planned feature to the model. Some time ago I decided that I wanted coarse bristles sprouting from the Daemon’s back and shoulders. I’ve used grass tufts and paintbrush bristles to create similar effects in the past.


My first attempt, using grass tufts, was an instant fail! The ‘hair’ looked too fluffy. Fluffy is not what we want or expect from Nurgle! For ‘plan B’ I used false eyelashes for the hairs which have a curve to them and taper to a point. They proved to be perfect. I cut them into small clusters, or individual hairs, and glued them into place with PVA. Once again this was tricky work but the final effect is exactly what I wanted!
4. Painting the Tentacles
I’ve a notebook with seven years worth of ideas written down for this project. As my plans developed and changed I kept notes to make sure nothing was forgotten. But, by the time I started painting, there were far to many, sometimes conflicting, plans for one project. Much of my decision making has been around which ideas to implement and which to reject. As the scheme developed the process of editing my plans became easier.
The tentacles are an example of the ‘less is more’ approach I’ve taken in the later stages of this project. I’d initially envisioned them as a larger version of the tentacles on Gutrot Spume, complete with stripes and dripping slime. But I felt that the stripes would bring an unnecessary new element to the scheme which would make the tentacles stand out from the rest of the model in an unsatisfactory way.


Rather than stripes, I’ve painted the same freehand texture as used on the sides and back of the model. This adds interest to the tentacles but ties them in to the overall scheme. I’ve used colour to make them pop against the rest of the model. Starting from green hues at the base they graduate through a pinkish flesh tone to blue tips. The blue is my old favorite Bering Blue, which I’ve used throughout the scheme. It’s at its most obvious on the tentacle tips.
5. Add drool.
I rejected the idea of slime dripping from the tentacles as being just too much! This also applied to most of my plans for adding extra slime and goo to the model. My tank from 1990 has a liberal application of slime made from PVE glue and then painted. I strongly felt that I already had enough slime and goo on my new model and any more would begin to dominate the painting.
But there was one area where I very much wanted to break out the microbeads and water effects. This was the mouth (the one in the Daemon’s head) where I felt the addition of drool would be beneficial. The mouth was one of the very first areas I painted and its been a long wait to be able to finish it!


I decided to focus the effect to one side of the mouth rather than filling the jaws with stringy drool. This was done with that old favorite UHU glue. Once the glue had set (it goes rubbery rather than hard) I built up several layers of water effects and microbeads. Once dry I gave it three coats of gloss varnish.
In the final of these updates I’ll describe how I made and painted the base for my Daemon Engine.